36
11.
Place the Main Power OFF/ON and Freezing
Cylinder OFF/ON switches in the OFF position.
12.
Install the belt and tighten the tension bolt.
13.
Use a Burroughs Belt Tension Gauge to set the
tension for the drive belt. Set the belt tension to 35-
40 lbs.
14.
Using a straightedge, align the drive motor pulley
with the gearbox pulley. Tighten the two allen head
screws.
B. DRIVE MOTOR REMOVAL
1.
Disconnect machine from electrical supply before
removing any panels for servicing.
2.
Remove the back panel and the left side panel.
3.
Remove the electrical cover plate from the back of
the motor.
4.
Identify (mark) wires and remove them from the
motor.
5.
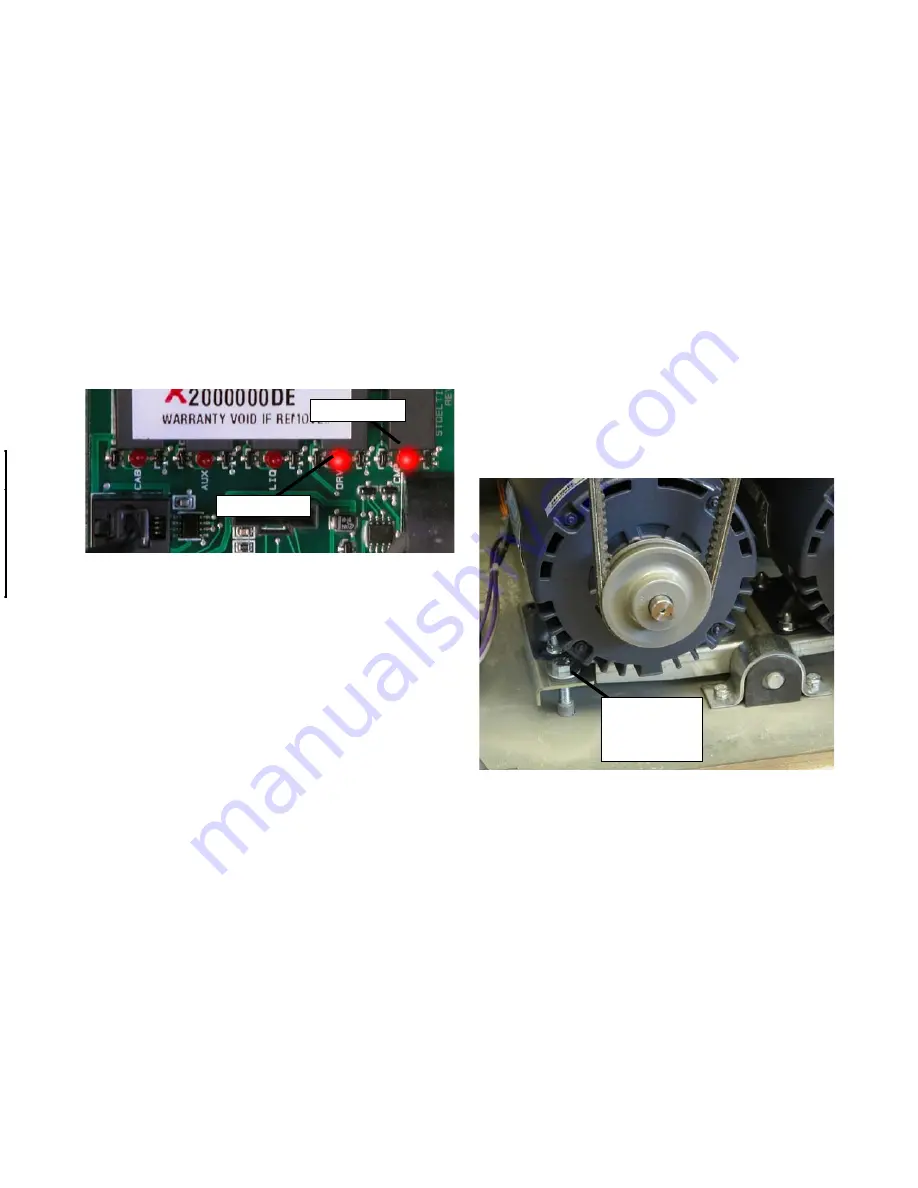
Loosen the belt tension adjustment bolt and remove
the belt. (Refer to Figure 6-5)
7.
Remove the motor mounting bolts.
8.
Loosen the two allen head screws from the pulley.
9.
Remove the pulley and key from the motor shaft.
C. DRIVE MOTOR INSTALLATION
1.
Place the drive motor in position and install the four
mounting bolts.
2.
Place the pulley and key on the motor shaft.
NOTE
Do not tighten the pulley screws until after the belt
tension has been properly adjusted.
3.
Install the belt and tighten the tension adjustment
bolt.
A. CONTACTOR TESTS
The following tests will show if a contactor is working
properly.
1.
Open right side panel and visually check the
IntelliTec control board.
2.
Check for a signal going to contactor. When the
spigot is opened or the Push To Freeze button is
pressed, the DRV LED on the control board will
light up. After three seconds, the CMP LED will
light up (Refer to Figure 6-4). If the LEDs do not light
up, refer to Section 7 Troubleshooting.
NOTE
In addition to the LEDs lighting, there will be an au-
dible click from the contactors and the motor and
compressor will start.
3.
Check to ensure contactor is receiving signal.
Read voltage across the coils of the contactor
during a freezing cycle. Voltage should be about
115V. If there is no voltage reading, refer to Section
7 Troubleshooting.
6.3
DRIVE MOTOR
The drive motors are designed specifically for the E131 and
F131 machines. The drive motors are used to rotate the
auger assemblies. An internal, normally closed, centrifugal
switch starts the drive motor. The motors have an internal
thermal overload.
A. DRIVE MOTOR TEST
1.
Make sure the Main Freezer Power and the Freezing
Cylinder OFF/ON switches are in the OFF position.
2.
Remove the back panel and a side panel.
3.
Loosen the belt tension adjustment nut and remove
the belt.
9.
Start the drive motor.
10.
Put a clamp ammeter on the motor wire at T1 of the
motor contactor. The ammeter should read 2.1
amps ±0.5.
NOTE
The motor amps are based on 230VAC supply volt-
age.
Figure 6-4 IntelliTec LEDs
DRV LED
CMP LED
Figure 6-5 Removing Drive Motor
Tension
Adjustment
Bolt
Summary of Contents for Stoelting E131-OT2
Page 1: ...Model E131 OT2 F131 OT2 SERVICE MANUAL Manual No 513648 Rev 0 https appliancetechmanuals com ...
Page 2: ...https appliancetechmanuals com ...
Page 14: ...8 https appliancetechmanuals com ...
Page 16: ...10 https appliancetechmanuals com ...
Page 26: ...20 Figure 4 2 IntelliTec Control Menu Settings https appliancetechmanuals com ...
Page 52: ...46 8 2 AUGER SHAFT AND FACEPLATE PARTS https appliancetechmanuals com ...
Page 60: ...54 8 9 REFRIGERATION DIAGRAM WIRING DIAGRAM 01 2 3 3 3 3 https appliancetechmanuals com ...


