39
Connection of the Sat Finder
Ensure that the satellite receiver or distributor is switched off to avoid short
circuit when connecting the sat finder.
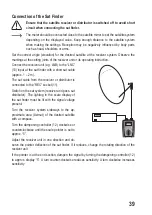
The meter should be connected close to the satellite mirror to set the satellite system
depending on the displayed value. Keep enough distance to the satellite system
when making the settings. Reception may be negatively influenced by body parts
such as head, shoulders or arms.
Set the correct angle (elevation) for the desired satellite at the receiver system. Observe the
markings at the setting joints of the receiver unit or its operating instruction.
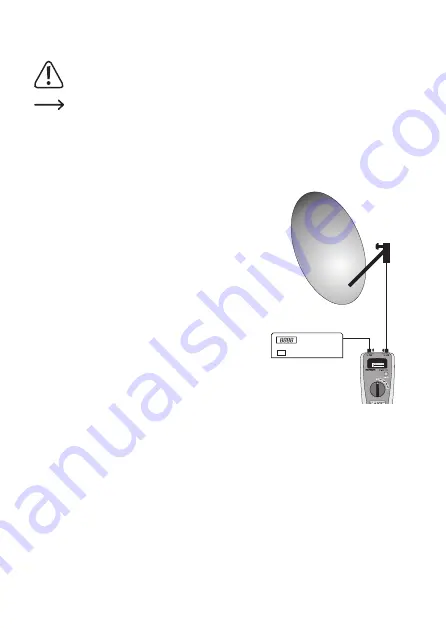
Connect the receiver unit (e.g. LNB) to the “LNC”
(10) input at the sat finder with a short sat cable
(approx. 1 – 2 m).
The sat cable from the receiver or distributor is
connected to the “REC” socket (11).
Switch on the sat system (receiver and poss. sat
distributor). The lighting in the scale display of
the sat finder must be lit with the signal voltage
present.
Turn the receiver system sideways to the ap-
proximate area (Azimut) of the desired satellite
with a compass.
Turn the dampening controller (12) clockwise or
counterclockwise until the scale pointer is set to
approx. “5”.
Adjust the receiver unit in one direction and ob-
serve the pointer deflection of the sat finder. If it reduces, change the rotating direction of the
receiver unit.
If the pointer is at the end section, dampen the signal by turning the dampening controller (12)
to approx. display “5”. A turn counter-clockwise reduces sensitivity. A turn clockwise increases
sensitivity.


