26
7. Installation and Connection
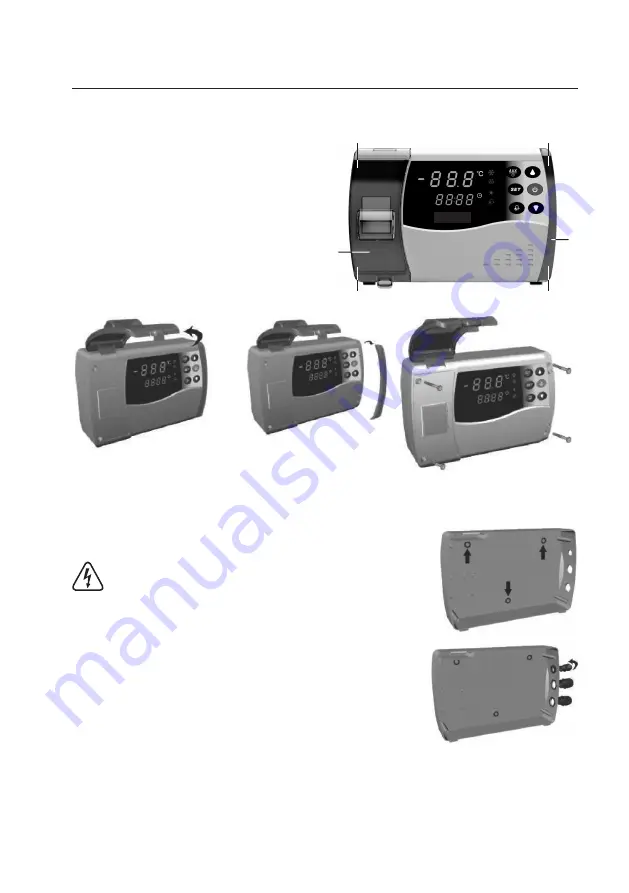
a) Open Housing
• Pull the narrow lateral cover (B) out forward towards
you. It is merely plugged in.
• Carefully fold the cover (A) upwards.
• Turn out the four screws (C) with a suitable cross-
recess screwdriver.
• The front with the operating unit can only be folded
open from the housing bottom. Remove the cover (A)
between the two housing halves.
The two housing halves remain connected by two rub-
ber strips.
b) Assembly
• The bottom of the housing can be installed on a vertical wall with three suitable
screws and poss. dowels. First install the connection lines, if necessary.
The only permissible mounting position is on a vertical wall; it must be
possible to open the cover (A) upwards.
• Puncture the housing with a pointed object in the corresponding locations; see
circular marks and arrows in the figure on the right. Only make the hole large
enough to push the screw used by you through.
• Before pushing the screws through the three openings and tightening them,
you need to push one of the enclosed small rubber seals onto each of the
screws.
Ensure that no wires/lines in the wall are damaged when drilling or tightening
screws.
• Last, attach the enclosed cable feedthroughs (2x large, 1x small) in the cor
-
responding openings of the housing.
C
C
C
C
A
B

