13. Visual fault locator
Important
• Always replace the protective covers when finished working. This will protect against
accidental discharge from the laser, scratches, dust, and moisture from entering.
• Only use standard adapters.
• Make sure the components you connect are clean and free of dust.
• Use care when attaching and removing connections to prevent scratches.
• Make sure you observe the precautions indicated in the section “Safety instructions
→ Laser”. This also applies to laser light projections from the fiber optic cable being
tested.
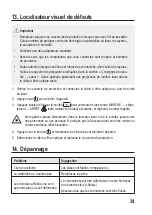
1. Remove the protective cover and connect the fiber optic cable to the laser output port.
2. Press to turn the power ON.
3. Press the
button repeatedly to cycle the laser ON → blinking → OFF.
will be
constant if the laser is on, and blinks if the laser is blinking.
Never look directly into the laser beam and never point it at people or animals. Do not
point the laser beam at mirrors or other reflective surfaces.
4. Press and hold to turn the power off.
5. Disconnect the fiber optic cable and replace the protective cover.
14. Troubleshooting
Problem
Suggestion
Display is dim
Batteries are low, replace the batteries
Meter cannot be turned on
Replace the batteries
Displayed data is not normal or
garbled
The connector may be faulty or dirty. Clean and
reconnect the cable(s)
Make sure the connections are attached properly.
26
Summary of Contents for 2299816
Page 55: ......


