OPERATING INSTRUCTIONS
VERSION 09/12
DOM-100 OIL CONSUMPTION INDICATOR
ITEM NO.: 10 33 33
INTENDED USE
This product is designed for installation in heating control systems, to indicate the oil consumption of the
burner. Oil consumption is calculated by measuring the operating time (in h) and the preset oil flow rate (in
kg/h or l/h). The product is suitable for virtually all small and medium-sized heating systems.
This product complies with the statutory national and European requirements. All company names and
product names are trademarks of their respective owners. All rights reserved.
For safety and approval purposes (CE), you must not rebuild and/or modify this product. If you use the
product for purposes other than those described above, the product may be damaged. In addition, improper
use can cause hazards such as short circuiting, fire, electric shock etc. Read the instructions carefully and
keep them. Make this product available to third parties only together with its operating instructions.
DELIVERY CONTENT
•
Oil consumption indicator
•
Operating instructions
SAFETY INSTRUCTIONS
Read the operating instructions carefully and especially observe the safety information.
If you do not follow the safety instructions and information on proper handling in this
manual, we assume no liability for any resulting personal injury or damage to property.
Such cases will invalidate the warranty/guarantee.
a) Persons / Product
• Installation and servicing should be performed only by qualified personnel, abiding by local
regulations.
•
All terminals should not be user-accessible after installation.
•
The device is not a toy. Keep it out of the reach of children and pets.
•
Do not leave packaging material lying around carelessly. These may become dangerous
playing material for children.
•
Protect the product from extreme temperatures, direct sunlight, strong jolts, high humidity,
moisture, flammable gases, vapours and solvents.
•
Do not place the product under any mechanical stress.
•
If it is no longer possible to operate the product safely, take it out of operation and protect it from
any accidental use. Safe operation can no longer be guaranteed if the product:
- is visibly damaged,
- is no longer working properly,
- has been stored for extended periods in poor ambient conditions or
- has been subjected to any serious transport-related stresses.
•
Please handle the product carefully. Jolts, impacts or a fall even from a low height can damage
the product.
•
Also observe the safety and operating instructions of any other devices which are connected
to the product.
b) (Rechargeable) batteries
•
Correct polarity must be observed while inserting the (rechargeable) batteries.
•
(Rechargeable) batteries should be removed from the device if it is not used for a long period
of time to avoid damage through leaking. Leaking or damaged (rechargeable) batteries might
cause acid burns when in contact with skin, therefore use suitable protective gloves to handle
corrupted (rechargeable) batteries.
•
(Rechargeable) batteries must be kept out of reach of children. Do not leave (rechargeable)
batteries lying around, as there is risk, that children or pets swallow them.
• (Rechargeable) batteries must not be dismantled, short-circuited or thrown into fire. Never
recharge non-rechargeable batteries. There is a risk of explosion.
c) Miscellaneous
•
Consult an expert when in doubt about operation, safety or connection of the device.
• Maintenance, modifications and repairs are to be performed exclusively by an expert or at a
qualified shop.
If you are not sure about the correct connection or use, or if questions arise which are not covered by
these operating instructions, please do not hesitate to contact our technical support or another qualified
specialist.
Voltcraft®, Lindenweg 15, D-92242 Hirschau, Tel. +49 180/586 582 7.
REPLACING THE BATTERY
1. Remove the knurled nuts from the oil consumption indicator.
2. Loosen the four screws on the back of the oil consumption indicator.
3. Remove the back cover of the oil consumption indicator. The cover is connected to the front panel with a
cable. Carefully remove the plug.
4. The battery compartment is located on the back of the front panel. Press the retaining bracket down and
remove the button cell battery. Insert a CR2450 button cell battery into the battery compartment. The
positive terminal must point outwards.
5. Reconnect the cover’s plug to the socket on the back of the front panel. Ensure the polarity is correct.
R = Red, B = Black.
6. Check whether the display has turned itself on automatically.
ASSEMBLY
Installation must only be carried out by a qualified specialist.
Disconnect the heating system from the mains prior to installing the oil consumption indicator.
There are usually blind covers on the control panel of the heater that cover cutouts for add-on devices. The
oil consumption indicator can be installed here.
Many heating systems already provide for the option of connecting an hour meter. If that is the case, connect
those leads to the terminal strip on the back of the oil consumption indicator.
If not, cables must be laid to the burner pump. The oil consumption indicator is connected in parallel to the
pump. The polarity of the leads on the terminal strip is of no relevance here.
DISPLAY
The meter has three modes: Normal mode, FL mode (Flow Mode) and oil level mode.
To switch to FL mode, press and hold the MODE button for 3 seconds.
To switch to oil level mode, press and hold the OIL button for 3 seconds.
Direct switching from FL to oil level mode is not possible. It is always necessary to return to normal
mode before activating another mode. To return to normal mode, press and hold the MODE button
for 3 seconds.
Normal mode
a
b
c
d
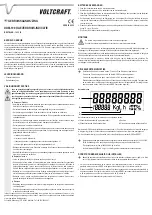
In normal mode the display will show the following values:
a) Oil consumption / time elapsed (count-up)
c) Unit
b) Oil level / remaining time (count-down)
d) Oil level in percent (count-down)
You can switch between units (c) by using the MODE button. You can call up oil consumption and oil level in
kilogramme (kg) or litre (l). The display can also indicate hours (h) elapsed and remaining.
To set the up counter (a) to zero, press the MODE and RESET button simultaneously.
The (up / down) counters start counting when voltage of 100 - 240 V/AC, 50/60 Hz is supplied. Voltage
is supplied when the burner pump is in operation.
The up counter (a) can count up to 999999.99 h, kg or l.
When the meter reading has reached 999999.99 h, kg or l, the display will flash continuously.
SETTING THE OIL FLOW RATE
Set the oil flow rate of the burner in kilogramme per hour (kg/h) or in litre per hour (l/h). Normally you
should find this value on the burner’s rating plate.
1.
To store the oil flow rate in the oil consumption indicator, press the MODE button repeatedly in normal
mode until the desired unit (l or kg) shows up on the display.
2.
Press and hold the MODE button for 3 seconds to switch to FL mode and set the oil flow rate in the desired
unit (l/h or kg/h) there. When you press and hold the MODE button for 3 seconds while the unit is set to h
in normal mode, the unit in FL mode will become l/h.
3. The display view will switch to FL mode:


