RESET
If the reset button is pressed for a maximum of 5 seconds the device will reboot. The yellow
status LED lights up when pressed for exactly 5 seconds. Subsequently, the LED goes out
and the system is restarted.
If the reset button is pressed for longer than 5 seconds the device resets to factory default
settings and restarts automatically. You should do this before, for example, passing the device
on to another person. The yellow status LED lamp turns on again for 5 seconds, but then be
-
gins with 1 Hz flashing. Once the status LED starts flashing, the reset button can be released.
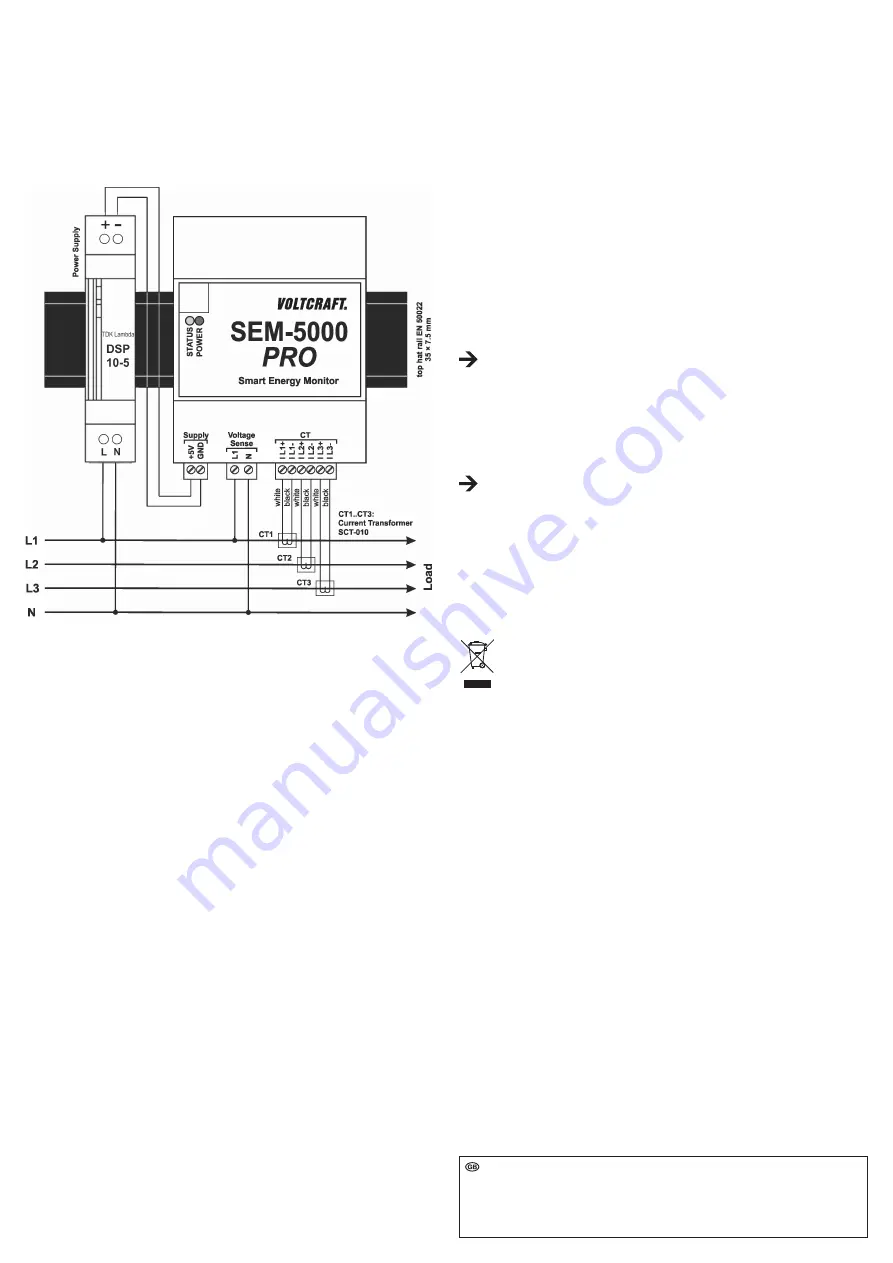
CONNECTION PLAN
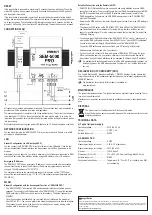
All connections are made with screwable terminals. The connection lines must be selected in
accordance with the applicable local rules and regulations.
The system is designed for operation in the house distribution box. The current converters are
to be attached at L1/L2/L3 on the output side from the main electric meter. In so doing, it is
imperative that you make sure that the converter is closed and the locking bracket has clicked
into place cleanly.
When starting the device the green power LED flashes with 1.5 Hz and then glows constantly.
NETWORK CONFIGURATION
You can also either plug the “SEM 5000 PRO” into your router with a LAN cable or to a USB
port plug of a wireless adapter.
LAN
Network Configuration via LAN (setting DHCP):
You can connect the “SEM 5000 PRO” directly to the router via a LAN cable. Once the con
-
nection is established, the web interface can be accessed via the URLs given below in the
browser.
Alternatively, you can search in your router’s software in the list of devices connected to “SEM
xxxxxx” and call up the Web interface with the assigned IP address: http: // <IP address>.
Emergency IP Address:
The “SEM-5000 PRO” has an emergency IP address. It can be reached after a misconfigu
-
ration, without having to reset. The emergency IP address is programmed and cannot be
changed. The LAN address is: 172.24.127.12
The computer must be on the same address range for this access; set the TCP/IPv4 ad
-
dress of the computer manually, e.g., 172.24.127.1 (the subnet mask is automatically set to
255.255.0.0).
WLAN
Network Configuration with the Accesspoint Function of “SEM-5000 PRO”:
• The “SEM-5000 PRO” with inserted USB wireless adapter is factory configured as an ac
-
cesspoint. To connect to the WLAN network of the “SEM-5000 PRO”, look at the available
WLAN networks for “SEM xxxxxx” and connect to this network. The default password is
87654321.
• Once the connection is established, you can reach the user interface in the browser at
http://192.168.127.1. You can now perform the network settings easily via the web interface.
The procedure can be found in the User’s Guide, which you can view by clicking on the
question mark in the upper right of the page.
Establish Connection with the Router via WPS:
• With WPS (Wi-Fi Protected Setup) you can quickly and easily establish a secure WLAN
connection to the router. The preconditions are that your WLAN base station supports WPS,
that WPS is enabled there, and that the SSID (wireless network name) is visible to the
WLAN base station. Furthermore, the USB WLAN adapter used in the “SEM-5000 PRO”
must be WPS enabled.
• Now press the WPS button on the router. Depending on the type of router an LED will begin
to flash there.
• Then press the WPS button on the “SEM-5000 PRO”. Both LEDs of the “SEM-5000 PRO”
now flash alternatively for a maximum of 2 minutes. During this time, both devices will
search for a suitable signal. Once the connection is made (but no later than 2 minutes) the
LEDs stop flashing.
• You can now reach the Web interface of the “SEM-5000 PRO” on “sem” or “sem-xxxxxx”, a
point and the DNS suffix name, such as “Sem-42D5FC.box” or “sem-42D5FC.localdomain”.
“xxxxxx” are here the last 6 digits of the MAC address of the “SEM-5000 PRO”.
You get the DNS suffix name when you enter on your PC “ipconfig” at the prompt.
Alternatives are http://sem and http: // sem-xxxxxx.
• If you not be able to connect with the web interface of “SEM-5000 PRO” using the given
URLs, you can also search in your router’s software in the list of connected devices for
“sem-xxxxxx” and call the web interface with the assigned IP address: http://<IP address>.
It is advisable with reception problems to install the USB wireless adapter (optional, not
included) by means of a USB extension cable (length max. 1.8 m) outside the distribu
-
tion box.
DECLARATION OF CONFORMITY (DOC)
We, Conrad Electronic SE, Klaus-Conrad-Straße 1, D-92240 Hirschau, hereby declare that
this product conforms to the fundamental requirements and other relevant regulations of the
1999/5/EC directive.
The declaration of conformity for this product is available at:
www.conrad.com
MAINTENANCE
The product is maintenance-free. The product contains no parts that require servicing. There-
fore, do not open/dismantle it.
Maintenance or repair may only be performed by qualified personnel or a specialised repair
shop.
DISPOSAL
The product must not be disposed of with the household waste.
When the device has become unusable, dispose of it in accordance with the current
statutory regulations.
TECHNICAL DATA
a) Top hat rail power supply
Operating voltage .................................
230 V/AC, 50 Hz
Output ...................................................
5 V/DC, 1.5 A
Suitable top hat rail
...............................
DIN 35
b) SEM-5000 PRO
Operating voltage .................................
5 V/DC
Measurement range for current
...........
0.02 A - 75 A (per phase)
Measurement range for voltage
............
230 V/AC ±10%
Ethernet ................................................
10/100 Base-T
Dimensions (W x H x D)
.......................
71.3 x 62.5 x 90.5 mm (with fixing slide 93.5 mm)
Suitable top hat rail
...............................
DIN 35
Environmental conditions .....................
Temperature -10 °C to +55 °C, air humidity max. 85%,
not condensing
Legal Notice
This is a publication by Conrad Electronic SE, Klaus-Conrad-Str. 1, D-92240 Hirschau (www.conrad.com).
All rights including translation reserved. Reproduction by any method, e.g. photocopy, microfilming, or the capture in electronic data processing
systems require the prior written approval by the editor. Reprinting, also in part, is prohibited. This publication represent the technical status at
the time of printing.
© Copyright 2016 by Conrad Electronic SE.


