3.Functions and Operations
16
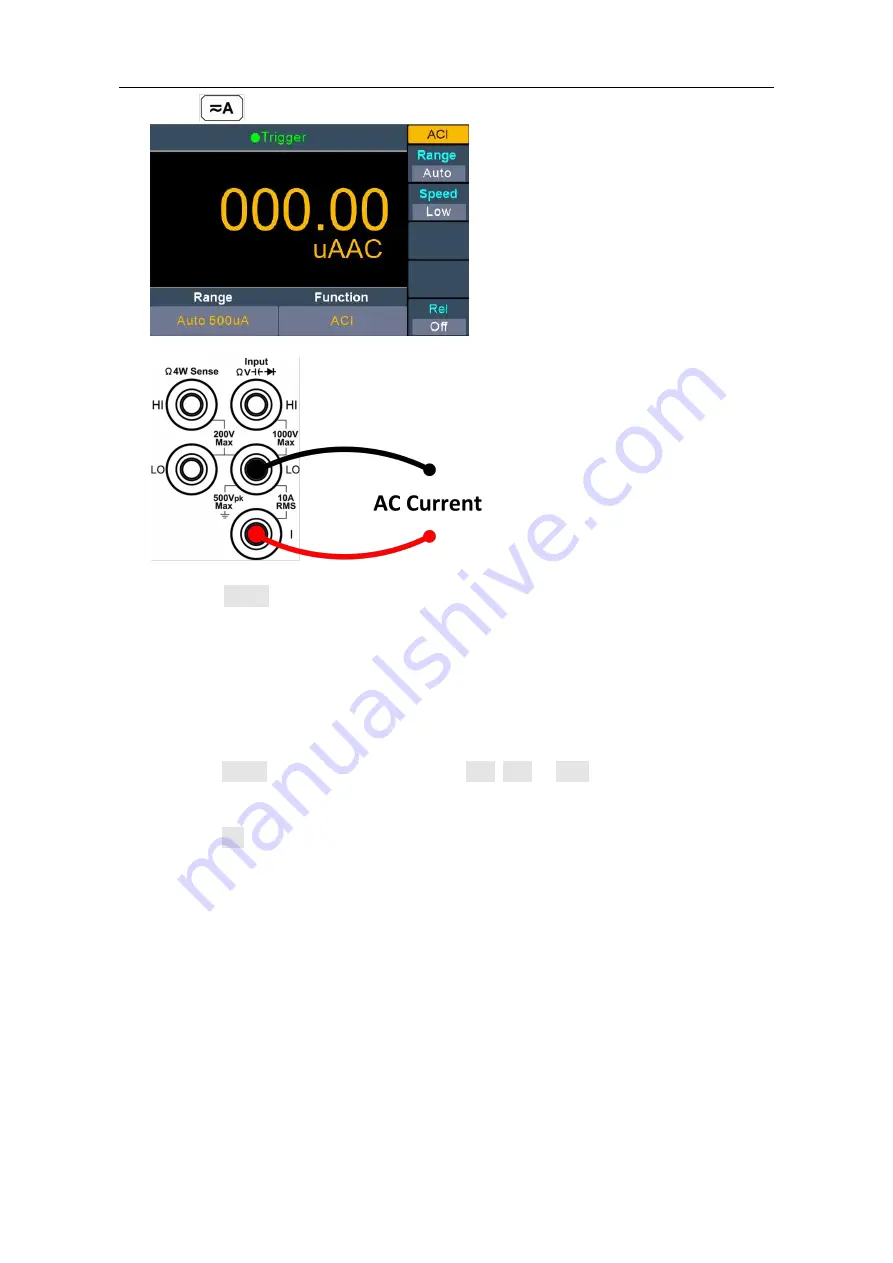
Press
on the front panel, press it again to enter ACI measurement mode.
2. Connect the test lead.
3. Set the range.
Press the Range softkey to set the range. Auto range automatically selects the range
for the measurement based on the input.
Note:
The multimeter uses two kinds of fuses for current protection: the 10 A current
input fuse on the front panel and the built-in 12 A current input fuse.
10% over range for all ranges except 10 A range.
If the reading exceeds 10.5 A in 10 A range, "overload" will be displayed.
4. Set the measurement speed.
Press the Speed softkey to switch between Low, Mid or High. See page 13,
Measurement Speed
.
5. Set the relative value.
Press the Rel softkey to turn on or off the relative operation. For relative operation,
the multimeter subtracts the pre-specified value of REL operation from the actual
measurement result and displays the result. See page 25,
Relative Value
.
Measuring Resistance
This section describes how to configure 2-wire and 4-wire resistance measurements.
The multimeter provides 2-wire and 4-wire resistance measurements. When the
measured resistance is lower than 100 kΩ, the 4-wire resistance measurement is
recommended to reduce the measurement error caused by test lead resistance and
contact resistance between the probe and the testing point, because these two
resistances can not be ignored any more, compared to the measured resistance.
Operating Steps:
1. Enable the Ω2W/Ω4W measurement.


