51
Crankshaft assembly
10
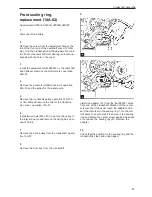
Check the mounting screws for wear and deforma-
tion and replace them if required. Lightly lubricate
the threads with engine oil. Install the screws and
washers and tighten the screws in stages and even-
ly to 112 Nm.
11
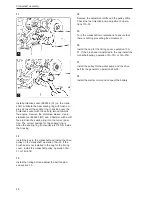
Check that the crankshaft can be freely turned. If
the thrust washers have been removed and rein-
stalled, check crankshaft axial clearance, operation
14A-03.
12
Install the oil screen and extractor pipe if required,
operation 18A-04.
13
Install the oil pan, operation 18A-03 and fill it to the
correct level with approved engine oil.
Crankshaft, replacement
(14A-08)
1
Drain the engine oil and the engine coolant system.
2
Remove the oil pan, operation 18A-03. Remove the
oil screen and extractor pipe 18A-04.
3
Remove the crankshaft pulley, operation 14A-01.
Remove the water pump pulley.
4
Remove the cap of the timing cover, operation 15A-
01.
5
Remove the flywheel and flywheel cover, section
21.
6
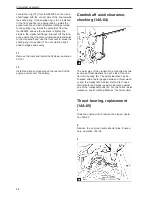
Turn the crankshaft until the pistons are at the
same height in the cylinder bores.
7
Temporarily mark the timing belt and the appropri-
ate teeth on the crankshaft pulley, camshaft pulley
and the injection pump pulley. This is to ensure
that the belt can be reinstalled in the correct posi-
tion.
8
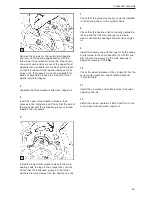
Remove the timing belt, pulleys and timing cover,
section 15.
9
Remove the oil pump, operation 18A-06.
10
Measure the crankshaft axial clearance to deter-
mine if new thrust washers are required.
Main bearings, inspection
(14A-07)
Check the bearings for wear and damage. If a bear-
ing is worn or damaged, replace both the bearing
shells and check the condition of the other bearings.
Summary of Contents for MD22
Page 1: ...Engine repair MD22 TMD22 TAMD22 Workshop Manual 2 0 A ...
Page 2: ......
Page 129: ...127 Notes ...
Page 130: ...128 Notes ...
Page 132: ...7738684 5 English 04 1999 ...

