A
A
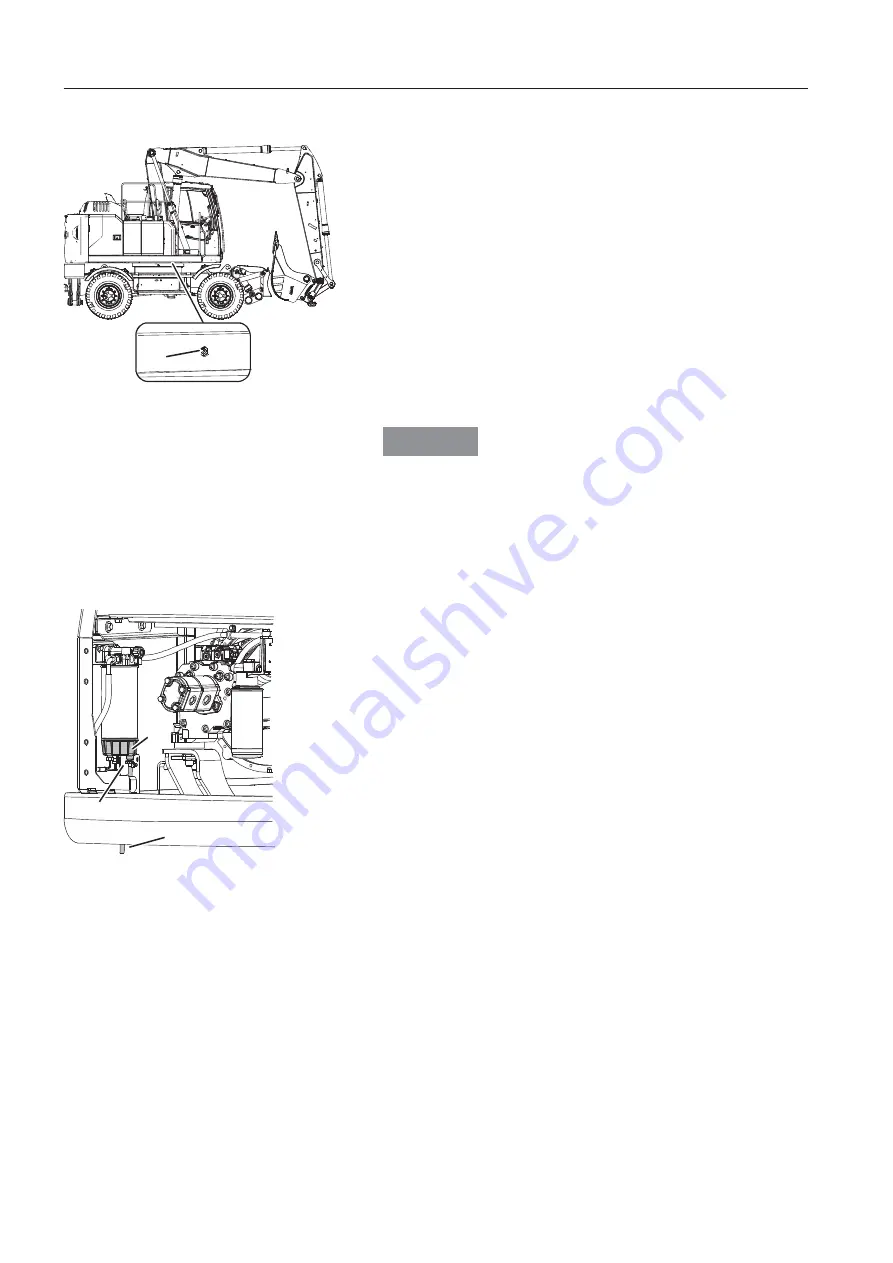
dBlue®/DEF tank, draining
NOTE!
Read the safety when servicing instructions before starting any
work.
1 Park the machine on a level ground and move the
superstructure as shown in the figure.
2 Lower the bucket to the ground.
3 Turn the ignition switch to stop position.
4 Move the control lockout lever down to lock the system
securely. See page
110.
5 Remove drain plug (A) using a L wrench from the tank.
6 Drain AdBlue®/DEF into a container.
NO
O
T
T
I
I
C
C
E
E
T
T
a
a
ke car
r
e of fi
i
lte
e
rs, oi
i
l
l
s
s
an
n
d
d
liq
q
uids in
n
an
n
envir
r
on
n
ment
t
a
a
l
l
ly
y
safe
e
wa
a
y
y
.
7 Install the drain plug to the tank.
Wa
a
t
t
e
e
r
r
sep
p
a
a
r
r
a
a
t
t
o
o
r
r
,
,
dr
r
a
a
i
i
ni
i
ng
g
Dr
r
ain th
h
e
e
wa
a
t
t
e
e
r
r
sepa
a
rat
t
o
o
r
r
if th
h
e contr
r
ol
l
la
a
m
m
p lig
g
hts
s
up
p
on
n
th
h
e
e
IC
C
(In
n
str
r
umen
n
t
t
Cl
l
u
u
ste
e
r
r
) or
r
when req
q
u
u
ir
r
ed
d
.
NO
O
T
T
E
E
!
Read the safety when servicing instructions before starting any
work.
1 Place the machine on level ground and turn the ignition switch
to OFF position and apply the parking brake.
2 Check for water and the sediment in the water separator bowl
(A).
3 Place a suitable sized container under drain hose (B).
4 Open the drain valve (C) and drain the water and sediment if
needed.
5 Close the drain valve (C).
6 Bleed the fuel system, see page
304.
V1150664
A
A Drain plug
V1107817
B
C
A
Water separator
A Water separator bowl
B Drain hose
C Drain valve
3
3
0
0
4
4
Ma
a
i
i
n
n
t
t
e
e
n
n
a
a
n
n
c
c
e
Ma
a
i
i
n
n
t
t
e
e
n
n
a
a
n
n
c
c
e ser
r
v
v
ic
c
e,
,
wh
h
e
e
n
n
re
e
q
q
u
u
i
i
r
r
e
e
d
d
Summary of Contents for 322001
Page 7: ...5 5 ...
Page 146: ...Right mirrors 1 14 44 4 Op pe er ra at ti in ng g in ns str ru uc cti io on ns s ...
Page 172: ...1 170 Operating instructions Exhaust aftertreatment system ...
Page 357: ...S Specifications Dimensions 355 ...
Page 410: ......
Page 413: ......
Page 414: ...4 412 Alphabetical index Ref No 20052711 C Volvo Eskilstuna English ...


