21
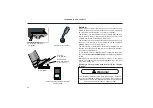
Setting warning signal
Open the tachograph.
The level for the speed warning signal is set by turning the
set screw (C), which is located just above where the speed
can be read (D), to the right or left.
Setting the clock
1. Open the tachograph and set the exact time using the
toothed setting wheel (E). The second hand in the mid-
dle of the clock shows that the clock is working.
2. Check that the actual time corresponds with the time that
can be read on the tachograph disc’s time scale at the
red marking. On setting the clock, the difference for ex-
ample between 04.00 and 16.00 must be taken into ac-
count. (Applies to one-day tachographs). It is possible
that the clock must be put forward 12 hours.
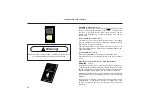
Changing the tachograph disc
One-day tachograph
1. Fill in the tachograph disc’s inner section: driver, bus’s
registration no. and current meter reading.
2. Open the tachograph.
3. Lay the completed tachograph disc face up in the holder
and push it down. The second driver’s tachograph disc
should be placed under the hinged dividing plate and
the current driver’s tachograph disc on top. Make sure
the egg-shaped hole is not damaged. Close the tacho-
graph – the tachograph disc is now held automatically
in place.
4. After finishing work, yet no later than 24 hours after, the
tachograph disc should be removed and the current
Instruments and controls
date, meter reading at end of journey and distance trav-
elled should be filled in.
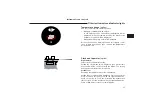
Seven-day tachograph
1. Fill in tachograph disc’s inner section (see instructions
for the one-day tachograph). Only the first tachograph
disc in the bunch needs to be provided with handwritten
information.
2. Open the tachograph.
3. Loosen the clamping ring by turning to the left and re-
move. Insert the bunch of tachograph discs so that the
current time ends up in the middle of the red marking,
which is placed under the detach knife. Centre the
bunch over the tachograph disc holder.
4. Turn the bunch of tachograph discs so that the exact
time on the top disc is in the middle of the red marking.
NOTE!
– The inserted bunch of tachograph discs should
only be turned in the direction of the arrow.
5. Once the correct time is set, the bunch of tachograph
discs can be pressed into the holder.
6. Fit the clamping ring on the holder with the locking pins
down and lock with a short turn to the right (bayonet fit-
ting).
7. Close the tachograph.
8. After no later than seven days, the registered bunch of
tachograph discs must be removed from the tacho-
graph. Complement the information on the first tacho-
graph disc according to the instructions for the one-day
tachograph.
Summary of Contents for B10M
Page 1: ...Driver s Manual...
Page 6: ...4 Pay attention to warning and indicator lights Their purpose is to warn of danger...
Page 131: ...129 TechnicalData Type plates 130 Specifications Data 132...
Page 142: ...140 Notes...
Page 143: ...141 Notes...
Page 144: ...142 Notes...
Page 145: ...143 Notes...
Page 146: ...144 Notes...
Page 147: ...3 Notes...


