70
1
2
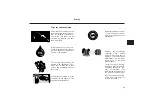
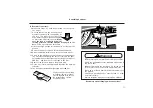
The symbol can be
seen on the side of the
body and indicates
where the jack points
are located.
Jacking pad
locations behind the
front axle.
If anything happens
Preparations for a puncture
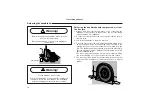
1. Make sure the bus is standing on a level, horizontal sur-
face that is firm. Put on the hazard warning lights and
place warning triangles!
2. Take out the spare tyre and jacks, socket wrench, adapt-
er, etc., from the toolbox.
3. Block up in front and behind the wheels remaining on
the ground (part no. 1611874, option).
4. Remove any rim covers and undo the wheel nuts about
2 turns.
5. Make sure the handbrake is applied.
NB! Not applica-
ble for punctures in rear wheels.
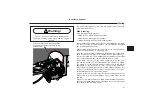
A Front wheel puncture:
6. Place one of the jacks
in the inner (1) of the two jacking
points behind the front wheel marked with a symbol on
the body.
Make sure the jack is vertically under the
jacking point.
Then, lift as far as possible with this jack.
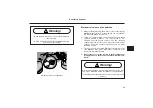
7. Then, place the other jack under the outer jacking point
(2) and turn the screw to increase the lifting height.
Make
sure the jack is vertically under the jacking point.
Lift
the bus so that tyre goes free. Do not disturb the first jack!
8. Remove the wheel nuts and lift off the wheel.
Changing wheels
9. Clean the mating surfaces and lift on the spare wheel.
10. Screw on the wheel nuts. Then, lower the bus so that the
wheel can not be rotated and tighten the nuts according
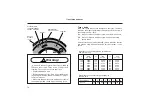
to the tightening diagram (see page 72) to a torque of
300 Nm. Tighten in a second stage to 625 Nm.
11. Remove the jacks in reverse order.
12. Fit the rim cover. Retrieve the warning triangles.
13. The wheel nuts
must
be retightened after 200 km.
Summary of Contents for B10M
Page 1: ...Driver s Manual...
Page 6: ...4 Pay attention to warning and indicator lights Their purpose is to warn of danger...
Page 131: ...129 TechnicalData Type plates 130 Specifications Data 132...
Page 142: ...140 Notes...
Page 143: ...141 Notes...
Page 144: ...142 Notes...
Page 145: ...143 Notes...
Page 146: ...144 Notes...
Page 147: ...3 Notes...


