background image

.com

VonShef

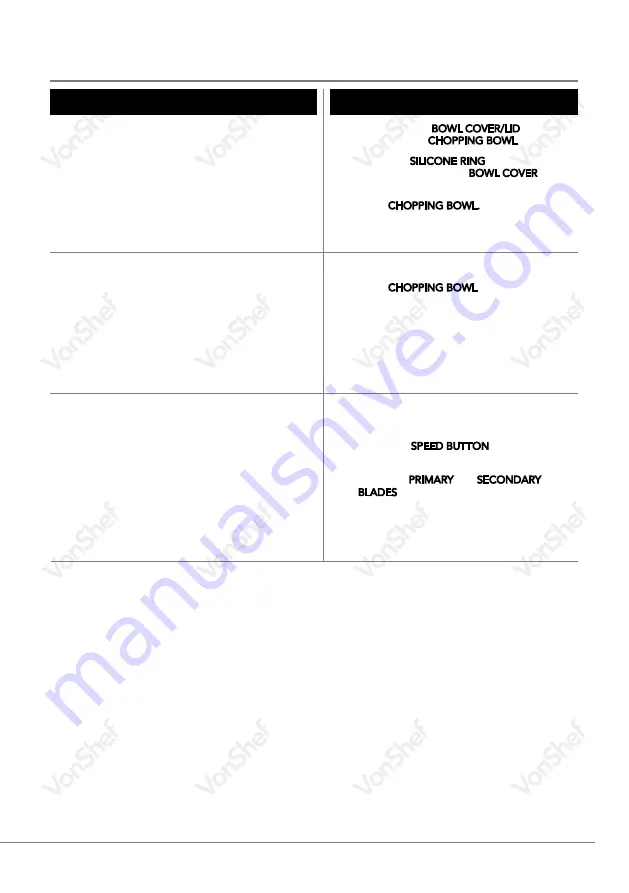
TROUBLESHOOTING

PROBLEM

SOLUTION

• 

Ensure that the BOWL COVER/LID are firmly 

secured to the CHOPPING BOWL.

• 

Ensure the SILICONE RING is securely fitted 

to the underside of the BOWL COVER.

• 

Too many ingredients have been added 

to the CHOPPING BOWL. Switch off the 

Mini Chopper, unplug and remove excess 

ingredients before continuing.

• 

Too many ingredients have been added 
to the CHOPPING BOWL. Switch off and 
unplug the Blender and remove excess 
ingredients before continuing.

• 

Trim ingredients down to finer pieces 

• 

Ensure the Blade assembly is assembled 
correctly.

INGREDIENTS ARE LEAKING OUT 

OF THE LID.

CHOPPING SLOWS DOWN 

DURING OPERATION.

CHOPPER FAILS TO OPERATE

• 

Ensure it is plugged into a suitable mains 
socket and plugged in correctly

• 

Ensure the SPEED BUTTON is fully pressed 
down.

• 

Check the PRIMARY and SECONDARY 
BLADES are assembled correctly, See 
page 4.

• 

Contact DOMU Brands Customer Services.

If you are having difficulty using your product and require support, please 

contact 

hello@DOMU.co.uk

Summary of Contents for 2000068

Page 1: ... com VonShef VonShef com 400W MINI CHOPPER 2000068 Instruction Manual 01 0618 ...

Page 2: ... Instructions 1 Safety Instructions Safety Symbols 2 Before First Use Blade Assembly 4 Removing Blade Sheath Assembly Operation 5 Assembly Operation Cleaning Maintenance 6 Troubleshooting 7 Specification 3 Warranty 8 ...

Page 3: ... or cover the appliance SAFETY INSTRUCTIONS WARNING PLEASE READ THESE INSTRUCTIONS CAREFULLY AND KEEP FOR FUTURE REFERENCE INTENDED USE Only operate the VonShef Mini Chopper for its intended purpose and within the parameters specified in this manual This appliance is for domestic use only Do not use outdoors or on wet surfaces This appliance is not intended for use by persons with reduced physical...

Page 4: ...hopping Bowl to blend When using for the first time your Mini Chopper may give off a new smell or vapour This will dissipate after a few uses Never attempt to remove food or liquid from the Bowl while the Blade is still moving Always allow it to stop completely Do not lift or move the Mini Chopper whilst in use Do not operate continuously for periods longer than those marked on the product or indi...

Page 5: ...E 400 W RATED POWER 50 60 Hz RATED FREQUENCY 1 SPEED 1 BUTTON 2 SPEED 2 BUTTON 3 MOTOR UNIT 4 BOWL COVER LID 5 SILICONE RING not pictured 6 CHOPPING BOWL 7 BLADE SUPPORT PIN 8 BOWL NON SLIP COASTER 9 PRIMARY BLADE with sheath 10 SECONDARY BLADE with sheath 1 3 4 5 6 7 8 10 9 2 ...

Page 6: ... PRIMARY BLADE and SECONDARY BLADE slide the SECONDARY BLADE over the PRIMARY BLADE BLADE ASSEMBLY WARNING Do not remove the BLADE SHEATH until fully assembled 9 10 The secondary blade column should sit flush the column of the primary blade Once both blades sit flush with each other rotating the secondary blade clockwise will lock both blades together IMPORTANT To confirm the blades are in correct...

Page 7: ...y in place TIP We advise chopping up the ingredients slightly beforehand to minimise overall chopping time Hold the SECONDARY BLADE firmly by the column with one hand keeping fingers a safe distance away from the BLADE Grip the edge of the BLADE SHEATH and gently slide the BLADE SHEATH away from the BLADES WARNING Never handle the BLADE SHEATH from the centre This may cause personal injury Always ...

Page 8: ...ER LID BLADE SUPPORT PIN AND SILICONE RING under warm running water Scrub gently with a sponge and mild detergent NOTE The SILICONE RING can be removed from the lid for cleaning but must be replaced before use Disassemble the Blade assembly and clean using a scrubbing brush to avoid contact with IMPORTANT Once completely dry always use the BLADE SHEATH to cover the BLADES when not use storage To c...

Page 9: ...tch off and unplug the Blender and remove excess ingredients before continuing Trim ingredients down to finer pieces Ensure the Blade assembly is assembled correctly INGREDIENTS ARE LEAKING OUT OF THE LID CHOPPING SLOWS DOWN DURING OPERATION CHOPPER FAILS TO OPERATE Ensure it is plugged into a suitable mains socket and plugged in correctly Ensure the SPEED BUTTON is fully pressed down Check the PR...

Page 10: ...hase receipt or statement as proof of the purchase date The warranty only applies if the product is used solely in the manner indicated in this manual and all instructions have been followed accurately Any abuse of the product or the manner in which it is used will invalidate the warranty Returned goods will not be accepted unless re packaged in its original packaging and accompanied by a relevant...

Reviews: