background image


UNPACKING INSTRUCTION 


CAUTION!

 Immediately upon receiving the product, carefully unpack the carton, check the contents to ensure that all parts are 

present, and have been received in good condition. Notify the shipper immediately and retain packing material for inspection if 
any parts appear damage from shipping or the package itself shows signs of mishandling. Save the package and all packing 
materials. In the event that the product must be returned to the factory, it is important that the product be returned in the original 
factory box and packing. 
 
If the device has been exposed to drastic temperature fluctuation (e.g. after transportation), do not switch it on immediately. The 
arising condensation water might damage your device. Leave the device switched off until it has reached room temperature. 
 

SETTING UP 


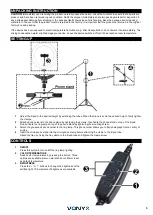
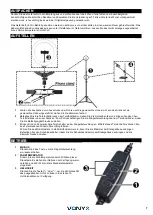
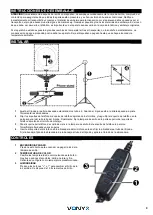
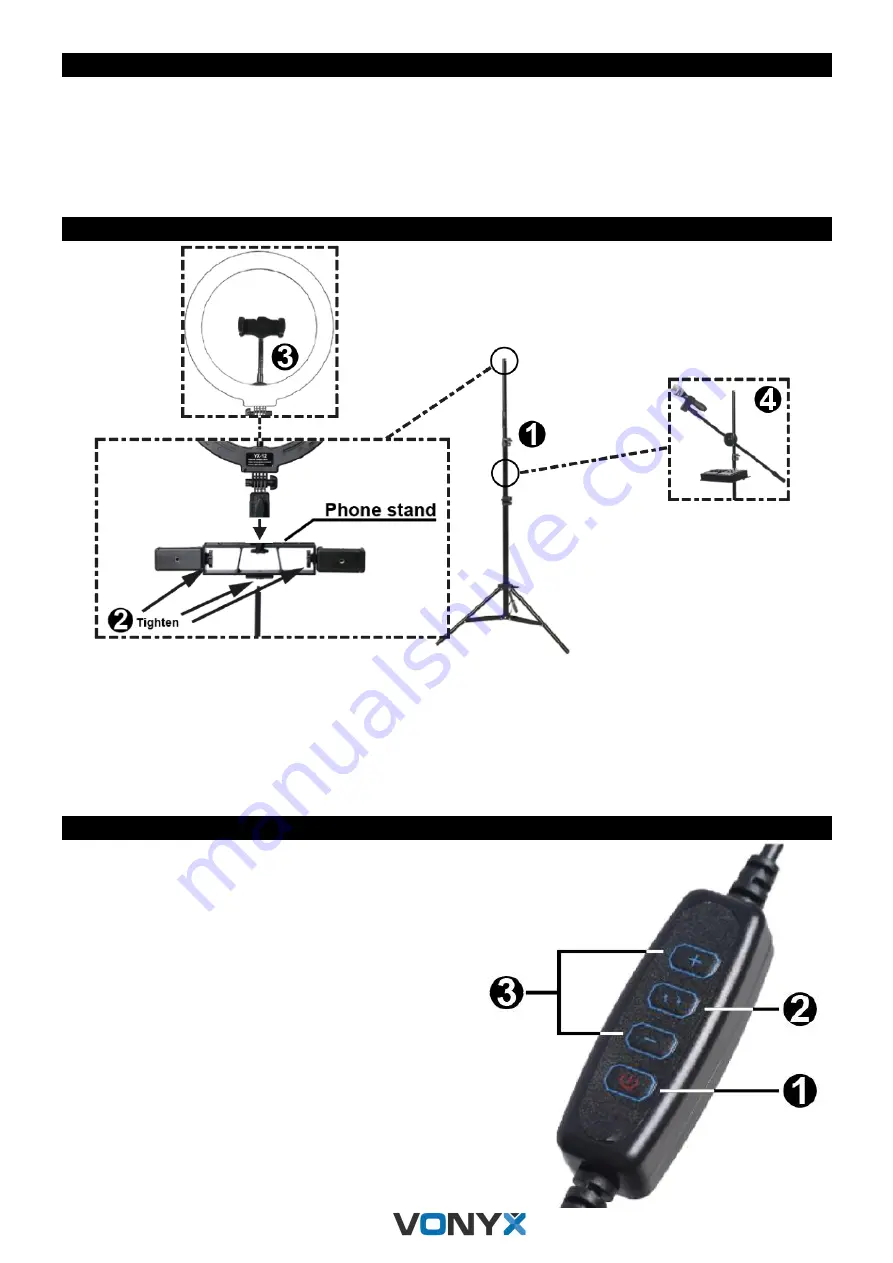
1. 

Adjust the tripod to the desired height by extending the tubes. When the tripod is set to the desired height, firmly tighten 

the clamps. 

2. 

Attach phone holders to the phone stand by tightening the screws, then fixate the phone stand on top of the tripod. 

Finally, fixate the ring lamp on top of the phone stand by tightening the mounting screw. 

3. 

Attach the gooseneck phone holder to the ring lamp. This phone holder allows you to film/photograph from a variety of 

angles. 

4. 

Insert the microphone stand into the microphone clamp before attaching the clamp to the tripod tube. 

Attach the tray, by fixing the tray clamp to the tripod tube and tighten the clamp screw. 


CONTROLS 


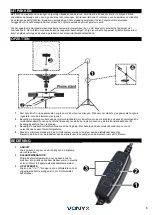
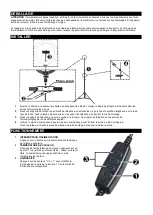
1.  ON/OFF


Press this button to turn on/off the ring lamp lighting. 

2.  COLOR TEMPERATURE 

Switch color temperatures by pressing this button. Three 
options are available: warm, natural and cool. Warm is set 
as default temperature.  

3.  BRIGHTNESS 

Press the 

“+” or “-“ buttons to change the brightness of the 

emitted light. 10 increments of brightness are available. 


Summary of Contents for 188.223

Page 1: ...RL25 Ringlamp Floorstand Ref nr 188 223 INSTRUCTION MANUAL GEBRUIKSAANWIJZING GEBRAUCHSANLEITUNG MANUAL DE INSTRUCCIONES MANUEL D INSTRUCTIONS V1 0...

Page 2: ...d rooms or outdoors To prevent accidents in companies you must follow the applicable guide lines and follow the instructions Do not repeatedly switch the product on and off This shortens the life time...

Page 3: ...1 Adjust the tripod to the desired height by extending the tubes When the tripod is set to the desired height firmly tighten the clamps 2 Attach phone holders to the phone stand by tightening the scr...

Page 4: ...ndens ontstaan laat het apparaat eerst op kamertemperatuur komen alvorens het weer in werking te stellen Apparaat nooit in vochtige ruimten en buiten gebruiken Om ongevallen in bedrijven te voorkomen...

Page 5: ...f op de gewenste hoogte is ingesteld zet u de klemmen stevig vast 2 Bevestig de telefoonhouders aan de telefoonstandaard door de schroeven aan te draaien en bevestig vervolgens de telefoonstandaard bo...

Page 6: ...t nicht in feuchten R umen oder im Freien benutzen Um Unf llen in der ffentlichkeit vorzubeugen m ssen die geltenden Richtlinien beachtet und die Anweisungen Warnungen befolgt werden Niemals das Ger t...

Page 7: ...er ziehen Sie die Schrauben fest und bringen Sie dann den Telefonst nder oben am Stativ an Zum Schluss befestigen Sie die Klingelbeleuchtung oben am Telefonst nder wobei Sie die Befestigungsschraube a...

Page 8: ...uede producirse condensaci n Deje el aparato a temperatura ambiente antes de encenderlo Nunca utilice el aparato en ambientes h medos o en el exterior Para prevenir accidentes en las empresas debe seg...

Page 9: ...do los tubos 2 Cuando el tr pode est a la altura deseada apriete firmemente las abrazaderas 2 Fijar los soportes de tel fono al soporte de tel fono apretando los tornillos y luego fijar el soporte de...

Page 10: ...reprise vous devez respecter les conseils et instructions N allumez pas et n teignez pas l appareil de mani re r p t e Cela r duit sa dur e de vie Conservez l appareil hors de la port e des enfants Ne...

Page 11: ...errant les vis puis fixez le statif de t l phone sur le tube tripode Enfin fixez la lampe de sonnerie sur le support du t l phone en serrant la vis de montage 3 Fixez le support de t l phone en col de...

Page 12: ...lightly change from one unit to the other Specifications can be changed without prior notice The products referred to in this manual conform to the European Community Directives to which they are subj...

Reviews: