Voom Technologies, Inc. © 2004-2018 Proprietary
6 Button Interface
The button control panel and the LCD are the user interface. The button panel
consists of the following three buttons:
Button
Function
Description
Yellow
Menu
This button is designed to step through each of the
menu items. It always steps in a forward direction.
Green
Enter
This button is designed to either select a menu item or
acknowledge status information.
Red
Cancel
This button is designed to either abort the entering of
a new command or the execution of the previous
command.
The LCD is used to display each of the menu items, the progress of the current
command, and to acknowledge the command status information.
Whenever commands are entered from the button control panel, all status
information must be acknowledged by the operator. A special arrow character
[←] displayed in the lower right hand corner of the LCD indicates that the unit is
waiting for acknowledgment of the data currently displayed in the LCD. Press
the
<enter>
button each time the arrow character is displayed in order to
continue executing the current command.
Note: The user may terminate an executing command by pressing the
<cancel> button.
Note: The button command menu is unavailable when there is not a
Source Drive attached.
The button command menu is organized into levels. The prompting hierarchy
used to organize the set of supported commands follows:
Level
Prompt
Description
1
Zero Shadow
Zero (clear) the Shadow drive.
2
Wipe Shadow
A more secure clearing of the Shadow drive.
3
Park Drives
Prepare the drives for powering off.
Spin Drives
Spin the drives back up.
4
Lock Shadow
Place the Shadow unit in simple write block mode.
5
Toggle Ctrl Blk
Toggle the control block mode.
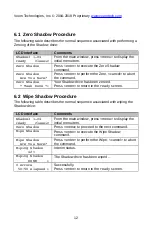
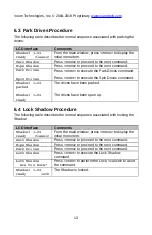
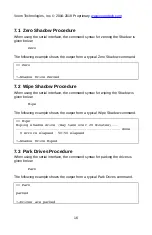
Step-by-step examples of the operations that the user can perform through the
button interface are described in the following sections of this chapter:
11


