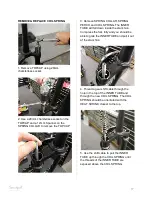
There are 3 main sections to installing the Smashpot
1. Removing the stock air spring assembly from your fork
2. Configuring the Smashpot to your travel and spring rate
3. Installing the Smashpot assembly into your fork
Note: Do not proceed unless you have the following tools and supplies on hand:
TOOLS REQUIRED:
Torque wrench
Torque wrench to spanner adaptor
12mm Spanner
13mm Spanner (29er PIKE only)
14mm Cone Wrench
22mm Cone Wrench
12mm Socket
28mm Chamferless Socket
2mm + 1.5mm Allen Keys
Oil syringe or graduated cylinder
Sharp knife or scissors
SUPPLIES REQUIRED
Slick Honey Grease or alternative
110ml of 20wt fork oil
PART 1: REMOVE STOCK AIR SPRING
See manufacturers service instructions for disassembling the stock air spring and removing it
completely from your fork. The Vorsprung Smashpot kit will replace the entire stock air spring
assembly including foot stud and top cap and this must be removed first.
Refer to the relevant factory service instructions up until you have removed the air spring from
the stanchion. Unless your fork requires additional servicing, the damper and seals will not need
to be touched to install the Smashpot.
FOX:
https://www.ridefox.com/fox17/help.php?m=bike&listall=service
ROCKSHOX:
https://www.sram.com/service/rockshox/7,434
Refer to the Factory service instructions for torque specifications, lubrication specifications and
general disassembly/reassembly.
2
Summary of Contents for Smashpot
Page 1: ...Installation Instructions REV C 1...
Page 3: ...KIT CONTENTS Figure 1 Kit Contents 3...
Page 5: ...5...
Page 11: ...11...


