ENGLISH
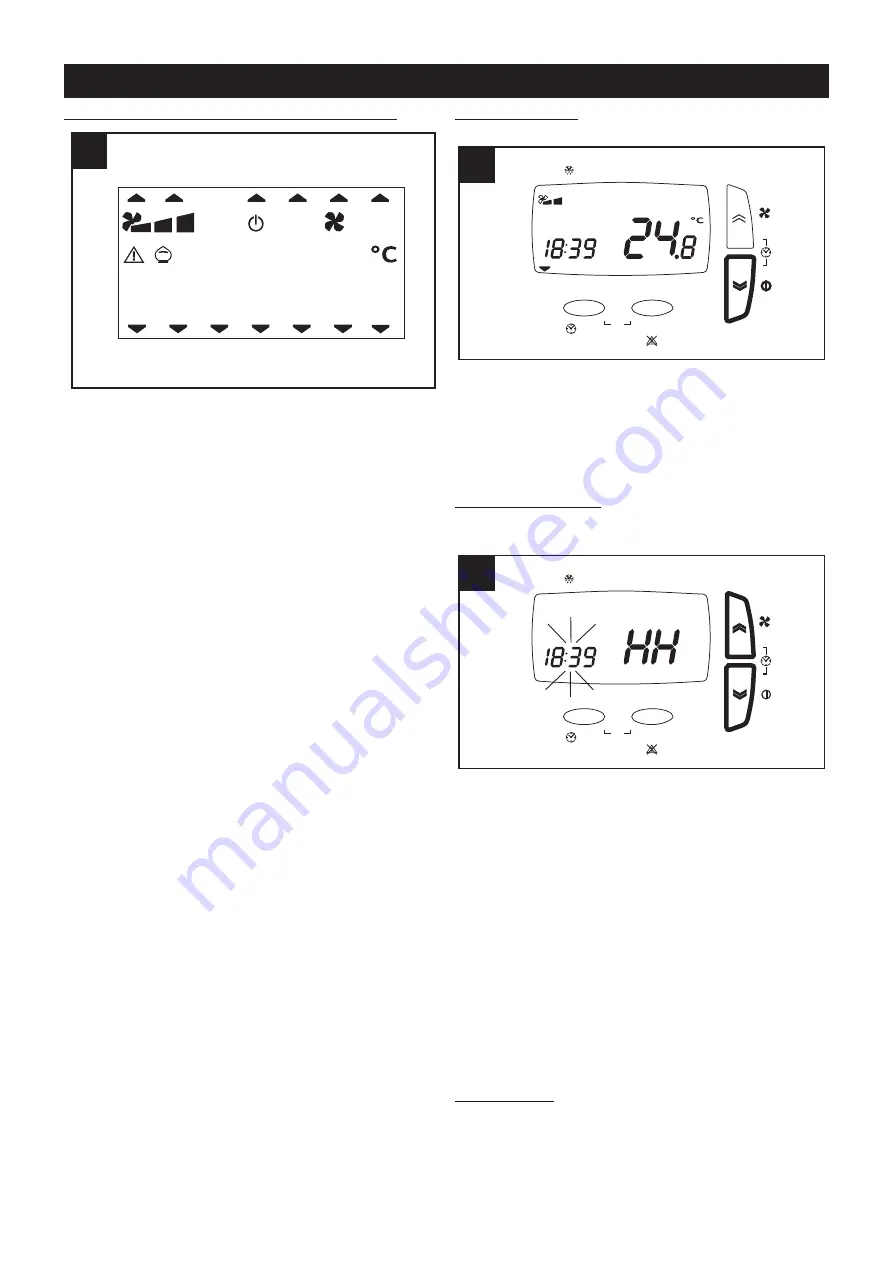
Summary of icons displayed on the panel (Fig.16)
1-7 day of the week: 1=Monday, 2=Tuesday, etc.
8 filter alarm: this icon lights up to warn that the filters
should be replaced within two months; if the filters are
not renewed by the end of this period, the filter error
message Filt appears (see "View alarm menu").
9 no-frost function: the icon lights up permanently when
the no-frost procedure is active; the icon will flash to
indicate a “no-frost timeout”: in this instance the no-
frost procedure has proved insufficient and the
appliance goes into protected mode for one hour, with
the motors stopped, following which the system will
restart the machine.
10 time profile P1: (see “User menu”).
11 time profile P2: (see “User Menu”).
12 HA
13 --
14 current fan speed: with the appliance in operation,
the icons light up steadily to indicate which of the 3
speeds is currently selected.
15 system standby status: the icon lights up
permanently when the appliance is in standby
(powered up, but with the motors at a standstill); the
icon will flash to indicate that the appliance has
reverted to standby after being programmed (see
“User menu”); if the icon lights up and is
accompanied by the message “OFF” on the right of
the display, this means that the appliance has been
switched off remotely (when connected to a home
automation system).
16 the icon flashes to indicate that an alarm condition
has been triggered; this indicates that an alarm with
no manual reset has been tripped (see “View alarms
menu”) .
17 bypass function: : the icon indicates: (see also
"Activation of bypass function" paragraph) off:
bypass deactivated permanently alight: bypass
opened
manually
blinking:
bypass
opened
automatically via software (in this case the bypass
cannot be closed manually).
18 Time / °C outdoor temperature
19 °C indoor temperature
Switching on/off
(fig.17)
The appliance is switched on and off by pressing and
holding the DOWN button on the panel.
Setting the time/day
(fig.18)
Before proceeding with the steps indicated below, press
the ESC button to exit and return to the initial menu.
The current time and day can be set as follows:
- press the UP and DOWN buttons together briefly;
- press the UP or DOWN button repeatedly to select the
"hours” setting (HH);
- press the SET button briefly to retain the “hours” setting
and move on to the “minutes” setting (MM);
- press the UP or DOWN button repeatedly to select the
"minutes”;
- press the SET button briefly to retain the “minutes”
setting and move on to the “day” setting (dAy);
- press the UP or DOWN button repeatedly to select the
"day” setting;
- press the SET button briefly to retain the “day” setting
and quit.
Speed setting
(fig.19).
Before proceeding with the steps indicated below, press
the ESC button to exit and return to the initial menu.
16
1
16
8 9 10 11 12 13
14
15
16 17 19
1 2 3 4 5 6 7
18
esc
set
By-Pass
/ °C
1
2
3
4
5
6
7
FILT
P1
P2
Prg
17
1
17
HA
esc
set
By-Pass
/ °C
1
2
3
4
5
6
7
FILT
P1
P2
Prg
18
1
18
HA
22


