background image

TI

G

ER

260

91

TI

G

ER

260

90

After having been inserted, the Active

Odour Filter has an effective life of one

year, depending on how it is used.

The Hygiene Microfilter and the Active

Odour Filter can be disposed of with your

normal household waste.

Dovina

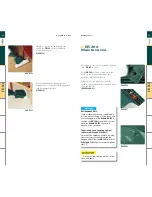
Press the Dovina Fragrance Chip into the

Dovina holder on the hygiene Microfilter.

(FIGURE 27)

Using attachments
for raised areas

Unplug appliance prior to connecting or

changing brushes.

Connecting accessories

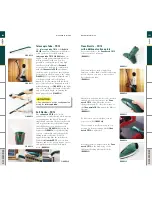
Press the desired accessory part onto the

handle of the suction hose until it can be

heard to click into place. Both devices are

now ready for operation.

(FIGURE 28)

Switching on and off

After your

Tiger 260

has been connected to

the mains, the green ready-for-operation

light on the appliance will be activated.

(FIGURE 29)

The

Tiger 260

is switched on and off by

means of the sliding switch on the

electronic suction hose. The sliding switch

makes sure that you can easily and safely

select one of the four power performance

settings. Select the desired power

performance setting between

A

and

.

For the raised areas we suggest the power

setting

.

(FIGURE 30)

The Tiger

260

can only be used with the

electrical suction hose for the

Tiger 260,

NOT with the hose of an older model.

FIGURE 26

FIGURE 27

FIGURE 28

FIGURE 29

FIGURE 30

Maintenance

Maintenance

Hygiene Microfilter

The red indicator on the appliance draws

your attention to the fact that the Hygiene

Microfilter has to be changed.

(FIGURE 21)

In order to change the Hygiene Microfilter,

open the appliance hood and press the flap

that is located at the side of the Hygiene

Microfilter. When inserting the new

Hygiene Microfilter, make sure the flap is

showing towards the cable drum. Then

close the hood. The appliance is now ready

for operation, the red indicator light goes

out.

(FIGURE 22)

After having been inserted, the Hygiene

Microfilter has an effective life of one year,

depending on how it is used.

(FIGURE 23)

Active Odour Filter

In order to change the active odour filter,

take the filter bag out of the appliance first.

(FIGURE 24)

Depress the upper flap of the holding grid.

Afterwards clap the grid to the front and

remove the filter pad. Insert the new filter

into the grid with the writing facing

outwards.

(FIGURE 25)

Clap the grid back into its original position

and hook in the upper flap. Re-insert the

filter bag into the appliance. When you

have closed the hood, the appliance is ready

for operation.

(FIGURE 26)

FIGURE 21

FIGURE 22

FIGURE 23

FIGURE 25

FIGURE 24

Summary of Contents for Kobold System VK 140

Page 1: ...ia Ludovico di Breme 33 20156 Milano Numero verde 800 014457 Codice Fiscale 04029500966 Vorwerk Folletto presente su Internet all indirizzo www folletto it CODE 22857 GIUGNO08 COPIES 100 000 PRINTED O...

Page 2: ...the mains cord Never use the Kobold Freshener Kit FK 360 in connection with any kind of liquid cleaning agents cleaning foam or cleaning agents containing damp substances Fire hazard Never vacuum up...

Page 3: ...t of the body Always unplug the appliance when it is stored or left unattended Stay away from rotating brushes of the electronic brush Never use the vacuum cleaner near children or pets Suffocation ha...

Page 4: ...r other household waste Instead you have to hand it over to a designated free of charge collection point for the recycling of waste electrical or electronic equipment For more information on how to re...

Page 5: ...Sales Offices and Service Centres and an excellent customer care service Vorwerk pays the greatest attention to after sales support Because the relationship with the Customer doesn t end with the dem...

Page 6: ...Only a century ago cleaning a house meant enormous effort What now is just part of our daily routine was once a task that demanded an unthinkable amount of energy The main reason for this situation wa...

Page 7: ...a To achieve this result we used special materials that attract dust and dirt thanks to their particular electrostatic charge The Kobold VK 140 system has achieved the T V seal as a guarantee for alle...

Page 8: ...concentrations of certain types of these substances called allergens can cause allergies even in people who have never suffered them before By allergy we mean an overreaction of the body to other wis...

Page 9: ...and easiness in maintenance As well as saving time and effort the Kobold VK 140 guarantees health and hygiene the special HEPA filtering system guarantees its effectiveness in preventing allergies th...

Page 10: ...er to use Easier to transport FIGURE 3 VK 140 19 VK 140 18 Kobold VK 140 with HD 40 Technical specifications Technical specifications Housing High grade recyclable plastic Motor Maintenance free switc...

Page 11: ...make sure that it is rolled in the same direction as shown in the picture FIGURE 10 Doing otherwise you might damage the cable Pay attention to possible damages to the appliance or the connecting cab...

Page 12: ...ook downwards Insert the plug into the wall socket FIGURE 15 To prevent damage to furniture always fold the lower hook inwards when you work with the Kobold VK 140 FIGURE 16 Switching on and off This...

Page 13: ...th the HD 40 FIGURE 19 FIGURE 20 To assemble insert the Kobold VK 140 into the joint nozzle of the HD 40 nozzle until it clicks into place FIGURE 19 The HD 40 is perfect for cleaning right up to the s...

Page 14: ...ly full When the Kobold VK 140 is unusually loud as well or the suction power performance is reduced check if the filter bag should be changed For protecting the motor from soiling the Kobold VK 140 h...

Page 15: ...ted inserted or is not the filter suitable for the appliance If the filter cassette does not close easily do not force it and check if you have correctly inserted the Premium Filterbag FP 40 During a...

Page 16: ...ks clean the filter compartment and the motor protection filter thoroughly If the motor protection filter is very soiled replace it Then change the filter bag In order to re establish the allergy redu...

Page 17: ...RE 39 If the bristle plate is worn out you can replace it to remove the old one press the hook downwards and detach it attach now the new bristle plate beginning from the front paying attention the 3...

Page 18: ...s a technically advanced product developed around the concept of modularity It took years of research to obtain an appliance that worthy of the great Vorwerk tradition integrates all these features h...

Page 19: ...as shown in the picture FIGURE 6 Pay attention to possible damages to the appliance or the connecting cable when winding it up Check that the mains cord can slide freely through the handle when teles...

Page 20: ...Insert the plug into the wall outlet FIGURE 11 In order to avoid damage on furniture always fold the lower hook inwards when you work with the Kobold VK 140 FIGURE 12 Switching on and off This is done...

Page 21: ...the vacuuming process for a moment for example to place or lift an object to the side without switching off the appliance The Kobold VK 140 then remains at the selected performance setting The Kobold...

Page 22: ...he Kobold VK 140 FIGURE 24 Then press the top of the filter bag plastic plate into the metal clasp until you hear a click FIGURES 25 AND 26 FIGURE 23 FIGURE 24 FIGURE 25 FIGURE 26 Maintenance Maintena...

Page 23: ...special system that prevents the filter cassette from closing if the filterbag is not present is not corrected inserted or is not the filter suitable for the appliance If the filter cassette does not...

Page 24: ...f the appliance Not doing it will under no circumstances damage the appliance Never clean the motor filter with water or other liquid cleaning agent To avoid damage to the motor blower unit use the ap...

Page 25: ...the quantity of allergens Its performance on carpeted floors is extraordinary cleans accurately and with the action of Kobosan active does an effective dry cleaning to bring back the original splendo...

Page 26: ...be pushed forward with ease FIGURE 5 FIGURE 4 DETAIL A DETAIL B EB 360 Technical specifications EB 360 51 EB 360 50 Technical specifications Appliance usable exclusively when connected to Kobold appl...

Page 27: ...ean carpets and rugs the EB 360 should be fitted with the bristle brushes FIGURE 6 To change the brushes refer to chapter Assembly Use on carpets and mattresses If you need to remove the brushes remov...

Page 28: ...om the mains socket and remove the trapped object from the EB 360 Switch the Kobold VK 140 on again at minimum power level 1 FIGURE 17 FIGURE 18 FIGURE 20 EB 360 55 EB 360 54 FIGURE 14 Use on mattress...

Page 29: ...140 vacuuming remains off If it does not switch off the appliance remove the plug and check that the Freshener Kit FK 360 units are correctly inserted and remain inside the appliance Lavenia for mattr...

Page 30: ...FIGURE 13 at PAGE 52 and spread the Kobosan active over the floor following the instructions given on the packet Switch on the Kobold VK 140 With the Freshener Kit installed the Kobold VK 140 vacuumi...

Page 31: ...rectly to the stain rubbing it in from the outside of the stain inwards Continue this action until no visible traces are left on a clean cloth after rubbing it on the stain If left for a long time cer...

Page 32: ...reads become tangled around the brushes remove the brushes and then clean away the threads FIGURES 40 41 Anti damadge block If you accidentally suck up something big or if the mattress lining is a lit...

Page 33: ...brushes from their respective drawers paying attention to replace them correctly red bristles in drawer with red arrow After shaking off any excess water leave the Freshener Kit FK 360 to dry with the...

Page 34: ...s in the floor profiles and rough surfaces on the other pad brushes recommended for vitrified ceramic floors and for removing stubborn dirt the Polishing module for waxed and parquet floors polishing...

Page 35: ...the cowling FIGURE 5 The Hard floor and Polishing Modules are both dual function Hard floor Module combines cleaning bru shes and power pads see PAGE xx Polishing Module combines polishing bru shes a...

Page 36: ...for appr 70 m2 on PVC and linoleum floors FIGURE 12 FIGURE 11 Remove the brush unit by means of the yellow ring FIGURE 6 Insert the required brushes making certain that the selected brushes are facin...

Page 37: ...seats FIGURE 13 If the polishing pads Polishing module are heavily soiled for example by wax residues the module must be replaced If necessary the brush unit housing plate can also be replaced Open t...

Page 38: ...of the product are on the label on the rear side of the appliance The manufacturer reserves the right to make any changes suggested by developing technology at any time and without prior notice Coupl...

Page 39: ...l or sky surfaces It must not be used to clean quilts mattresses or similar Occasionally check the brushes set for wear Use only Genuine Spare Parts Polsterboy PB 420 Assembly Use This appliance is de...

Page 40: ...disconnect the appliance from the mains supply by removing the plug To clean or replace the brush set press the end of the suction nozzle in FIGURE 5 Release the nozzle as shown in FIGURE 6 Extract t...

Page 41: ...ver the electric cord as it could damage the cord Never use an appliance with a damaged cord or plug or if the appliance is damaged or malfunc tioning in any way The security of the appliance could be...

Page 42: ...max suction performance 250 Watts Filter bag volumes 4 5 l in accordance with DIN IEC 60 312 Dust emission Ca 0 0001 mg m3 in accordance with DIN IEC 60 312 Noise emission 74 dBA basic appliance VT 2...

Page 43: ...y Use Working with the Tiger 260 Connecting the suction hose Press the electrical suction hose onto the suction socket of the Tiger 260 until the connecting piece can be heard to click into place When...

Page 44: ...e that you can easily and safely select one of the four power performance settings Select the desired power performance setting between A and 3 FIGURE 12 The Electronic Brush will automatically be swi...

Page 45: ...e hood closed Always use Vorwerk original filter bags to ensure optimum performance from your appliance Tiger 260 Maintenance FIGURE 18 FIGURE 19 FIGURE 20 Parking The Electronic Brush Kobold EB 351 a...

Page 46: ...e used with the electrical suction hose for the Tiger 260 NOT with the hose of an older model FIGURE 26 FIGURE 27 FIGURE 28 FIGURE 29 FIGURE 30 Maintenance Maintenance Hygiene Microfilter The red indi...

Page 47: ...nd between furniture items to name just a few Its two joints allow a variety of adjustments making your work particularly comfortable For dust removal from radiators Venetian blind blades and similar...

Page 48: ...0 94 Tiger 260 Spare parts consumables EB 360 BORSA ACCESSORI 4977 DUMMY TEXT 4976 DUMMY TEXT 4978 DUMMY TEXT 4979 DUMMY TEXT 4980 DUMMY TEXT 4975 DUMMY TEXT 4972 DUMMY TEXT Spare parts consumables Sp...

Page 49: ...bought at the same time the Polsterboy PB 420 and the Kobold VK 140 have the non electrified flexible suction hose For use with the accessories both flexible suction hoses are the same The picture sho...

Page 50: ...dirt directly at the drill hole For this switch on your Kobold VK 140 and position the drilling dust attachment to the planned drilling hole where the suction attaches itself firmly to the wall FIGUR...

Page 51: ...ozzle with four lock in positions with ease It is also possible to comfortably reach very high raised areas with all kinds of Vorwerk accessories For example in combination with the flexo nozzle FD 14...

Page 52: ...ly dry Accessories Maintenance FIGURE 31 FIGURE 32 With the bristle covered plate the nozzle can be used for cleaning walls door frames and skirting boards FIGURE 26 It is especially suited for stairs...

Page 53: ...tion power check that there is no blockage in the suction channels of the Kobold VK 140 or any accessories fitted to it remove any blockage and switch on the Kobold VK 140 again check that the Premium...

Page 54: ...t praesent luptatum zzril delenit augue duis dolore te feugait nulla facilisi Nam liber tempor cum soluta nobis eleifend option congue nihil imperdiet doming id quod mazim placerat facer possim assum...

Page 55: ...decima et quinta decima Eodem modo typi qui nunc nobis videntur parum clari fiant T e x t t o b e s p e c i f i e d b y C o u n t r y In full respect of the laws safeguarding consumers D Lgs n 24 200...

Reviews: