A
C
C
ES
S
O
R
IES
99
A
C
C
ES
S
O
R
IES
98
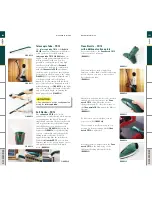
Vario Nozzle – VD14
The
vario-nozzle VD 14
is the specialist for
various specific uses. The flat and long tip
allows the user to reach narrow and small
spaces.
(FIGURE 10)
The nozzle thoroughly vacuums dust from
seams and gaps, in upholstery and
mattresses and between furniture items, to
name just a few.
(FIGURE 11)
Its joint close to the handle allows a variety
of adjustments, making your work
particularly comfortable.
The extractable, flexible extension allows
the user to reach and clean narrow places
that are difficult to access.
Just pull out the tip until the flexible
extension click into place. To push it back
together, push the button in the middle of
the nozzle.
(FIGURE 12)
The attachable
bristle brush
allows
cleaning of areas such as, behind radiators
and air conditioners.
(FIGURE 13)
An extraordinary accessory is the
drill-dust
attachment,
the definitive solution for
drilling holes without soiling the wall.
(FIGURE 14)
The
drill-dust attachment
permits freehand
operation with the drilling machine and
vacuums away the resulting dirt directly at
the drill hole. For this, switch on your
Kobold VK 140
and position the drilling dust
attachment to the planned drilling hole
where the suction attaches itself firmly to
the wall.
(FIGURE 15)
Once finished, remember to take hold of
the nozzle before switching the
Kobold VK
140 off to stop it falling off the wall.
We recomend to store the
Vario nozzle
once you have closed it.
FIGURE 10
FIGURE 11
FIGURE 13
FIGURE 15
FIGURE 14
FIGURE 12
Hook the
shoulder strap
into the
corresponding strap eyelet.
(FIGURE 6)
This is to the right on the upper housing.
(FIGURE 7)
To connect the accessories to the suction
hose simply insert them until it can be
heard to click into place.
(FIGURE 8)
To remove the accessories from the suction
hose simply press the button on the Hose.
(FIGURE 9)
Switching on and off
With the main switch on your
Kobold
VK 140
, you can rotate the switch to select
the desired setting from
up to
.
Switch off the appliance and remove
the plug before changing any of the
accessories.
Do not insert pointed objects into the
electrical contacts! Do not rig the contact
systems.
The Electrified suction hose has
electrical contacts. Do not vacuum up any
liquids. Do not clean it with water.
Assembly & Use
Assembly & Use
FIGURE 6
FIGURE 7
FIGURE 8
FIGURE 9


