background image

26

Cleaning and maintenance

Thermomix®

8.3

REGULAR MAINTENANCE

Regular maintenance will extend the life of your Thermomix® TM6.

1. Inspect your Thermomix® TM6 and its accessories (incl. mixing bowl, cord

and mixing bowl sealing ring) for possible damage.

2. Do not use your Thermomix® TM6 with damaged accessories.

3. To prevent any damage to the Thermomix® TM6, regularly check that the air

intakes at the back and on the bottom of the Thermomix® TM6 are not
obstructed.

4. Unplug the Thermomix® TM6 when not in use.

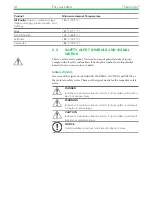
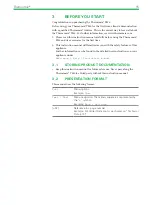
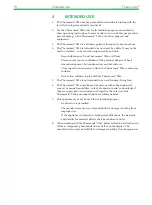
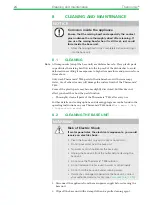
5. To improve ventilation when the Thermomix® TM6 is not in use, leave the

measuring cup off the mixing bowl lid on the Thermomix® TM6.

8.3.1

REPLACING THE MIXING KNIFE

The mixing knife will wear out over time if the Thermomix® TM6 is regularly
used for chopping hard food. The table below shows recommended intervals for
replacing the mixing knife.

Use of 
mixing knife

Example of use

Replacement of 
mixing knife after

Heavy

I crush ice, mill flour, etc. daily

Every 6 months

Moderate

I crush ice, mill flour, etc. weekly

Every 2 years

Low

I hardly ever crush ice or mill flour.

Every 4 years

To order a new mixing knife, contact Thermomix® TM6 advisor or Vorwerk
customer service.

Summary of Contents for Thermomix TM6

Page 1: ...USER MANUAL THERMOMIX TM6 V 2 0 US 25351 04 19...

Page 2: ...et to O and the locking mechanism has released it 13 WARNING Spilled food can cause serious burns Keep Thermomix TM6 and cord away from children Never drape cord over edge of counter never use outlet...

Page 3: ...led and used in accordance with the instructions may cause harmful interference to radio communications However there is no guarantee that interference will not occur in a particular installation If t...

Page 4: ...d illustrations lies with Vorwerk International Strecker Co Switzerland All rights reserved This publication may not in part or in whole be reproduced saved transmitted or distributed in any form or b...

Page 5: ...L STARTUP 17 5 1 Parts List 17 5 2 Choosing the setup location 18 5 2 1 Grounding 20 5 3 Switching on for the first time 20 5 4 Cleaning for the first time 21 5 4 1 Disassembling the mixing bowl 21 6...

Page 6: ...ttached 2 Mixing bowl base 10 Varoma dish 3 Contact pins 11 Varoma tray 4 Mixing bowl 12 Varoma lid 5 Mixing knife and sealing ring 13 Spatula 6 Mixing bowl lid 14 Butterfly whisk stirring attachment...

Page 7: ...e unit or power cord is damaged you could receive an electric shock Do not use the Thermomix TM6 if the power cord is damaged Before every usage inspect the base unit power cord and accessories for po...

Page 8: ...e outside e g by a towel Never cover the hole in the mixing bowl lid with anything but the original Thermomix accessories i e measuring cup simmering basket splash guard and Varoma dish Do not fill th...

Page 9: ...Never pour hot grease into the mixing bowl Never heat oil without other ingredients If there is a delay in adding the ingredients the hot oil will splatter excessively Ensure all accessories are dry p...

Page 10: ...Thermomix Do not modify the Thermomix TM6 or any of the accessories Never use the Thermomix TM6 with damaged accessories Injury Risk Other utensils apart from the supplied stirring spatula could get c...

Page 11: ...low cooking sous vide fermenting Should an accessory get damaged stop using it and contact Customer Care for a replacement part Burn Risk When preparing hot food the mixing bowl and the accessories th...

Page 12: ...main frequency of 50 to 60 Hz as indicated on the plug label Damage Risk The Thermomix TM6 can sustain damage if there is not enough water in the mixing bowl Make sure that there is sufficient water i...

Page 13: ...ace Do not add any ingredients that could damage or block the butterfly whisk 2 2 SAFE MINIMUM INTERNAL TEMPERATURE CHART Safe steps in food handling cooking and storage are essential in preventing fo...

Page 14: ...ollowing the symbol to avoid potential hazards that can cause injury or death SIGNAL WORDS Be aware of the signal words DANGER WARNING CAUTION and NOTICE as they relate to safety notes These are the s...

Page 15: ...l will familiarize you with the safety features of this appliance Further information can be found in the detailed user instructions on your appliance under Main menu Help Instruction manual 3 1 STORI...

Page 16: ...sion is necessary when the Thermomix TM6 is used near children Never allow children to play with the Thermomix TM6 5 The Thermomix TM6 is not intended to be used for deep frying food 6 The Thermomix T...

Page 17: ...tly attached 2 Mixing bowl base 10 Varoma dish 3 Contact pins 11 Varoma tray 4 Mixing bowl 12 Varoma lid 5 Mixing knife and sealing ring 13 Spatula 6 Mixing bowl lid 14 Butterfly whisk stirring attach...

Page 18: ...M6 away from hot surfaces Ensure that the power cord does not touch hot surfaces or external heat sources WARNING Risk of Electric Shock An incorrectly installed power connection may cause an electric...

Page 19: ...ving units wall units or similar while in use Doing so may result in property damage Ensure that there is sufficient clearance above and around the Thermomix TM6 taking into account the additional hei...

Page 20: ...he grounding tab 4 which extends from the adaptor 3 must be connected to a permanent ground such as a properly grounded outlet box using a metal screw 5 3 SWITCHING ON FOR THE FIRST TIME On delivery t...

Page 21: ...cleaning the appliance for the first time proceed as follows 1 Disassemble the mixing bowl see chapter on Disassembling the mixing bowl 21 2 Then wash all parts and accessories by hand or in the dishw...

Page 22: ...f 2 You can then release the selector 3 After switching off the Thermomix TM6 unplug it when it is not in use Note To save energy the Thermomix TM6 switches off automatically after 15 minutes when not...

Page 23: ...23 7 SETTINGS The Settings menu can be found under Main menu Settings Full details on all the settings can be found in the instruction manual on the appliance under Main menu Help Instruction Manual...

Page 24: ...red but this does not affect your health or how the parts function Thoroughly clean all parts of the Thermomix TM6 after every use Further details on cleaning options and cleaning programs can be foun...

Page 25: ...Thermomix 25 3 Use water sparingly to prevent moisture from penetrating the base unit...

Page 26: ...when not in use 5 To improve ventilation when the Thermomix TM6 is not in use leave the measuring cup off the mixing bowl lid on the Thermomix TM6 8 3 1 REPLACING THE MIXING KNIFE The mixing knife wi...

Page 27: ...d has seeped into the area below the mixing bowl Unplug the appliance immediately Use a towel to dry excess liquid from underneath the mixing bowl To prevent liquid from penetrating delicate component...

Page 28: ...cord Make sure that the base unit is upright Make sure that the work surface is clean level and not slippery Do not touch the appliance during the entire weighing process The Thermomix TM6 stops work...

Page 29: ...est Vorwerk Service Center MEXICO Vorwerk Mexico Vito Alessio Robles 38 Col Florida Del lvaro Obreg n 01030 CDMX Mexico Customer Care Mexico Telephone 01800 200 1121 E Mail contacto thermomix com mx V...

Page 30: ...be repaired by Vorwerk Thermomix customer service or an authorised Vorwerk repair service Use only parts provided with Thermomix TM6 or original spare parts from Vorwerk Thermomix Never use Thermomix...

Page 31: ...DISPOSAL This symbol means that electrical and electronic appliances may not be disposed of in the normal household waste Please check your local guidelines for instructions on how to dispose of elec...

Page 32: ...ximum energy consumption 1300 W Pull out power cord 36 inch 0 9 m long Standby power usage 0 W Information on connectivity 2 4 GHz IEEE Standard 802 11b g n 5 GHz IEEE Standard 802 11n a ac Bluetooth...

Page 33: ...vice is designed to meet the requirements for exposure to radio waves established by the Federal Communications Commission USA The Speci c Absorption Rate SAR limit adopted by the US is 1 6 W kg avera...

Page 34: ...34 Thermomix...

Page 35: ...Thermomix 35...

Page 36: ...36 Thermomix...

Page 37: ...Thermomix 37...

Page 38: ...38 Thermomix...

Page 39: ...Thermomix 39...

Page 40: ...US 25351 04 19 V 2 0...

Reviews: