XR3D-6 Maintenance & Troubleshooting
EM-XR3D-6-001-EN.D
6-3
©2011 VOTI Inc.
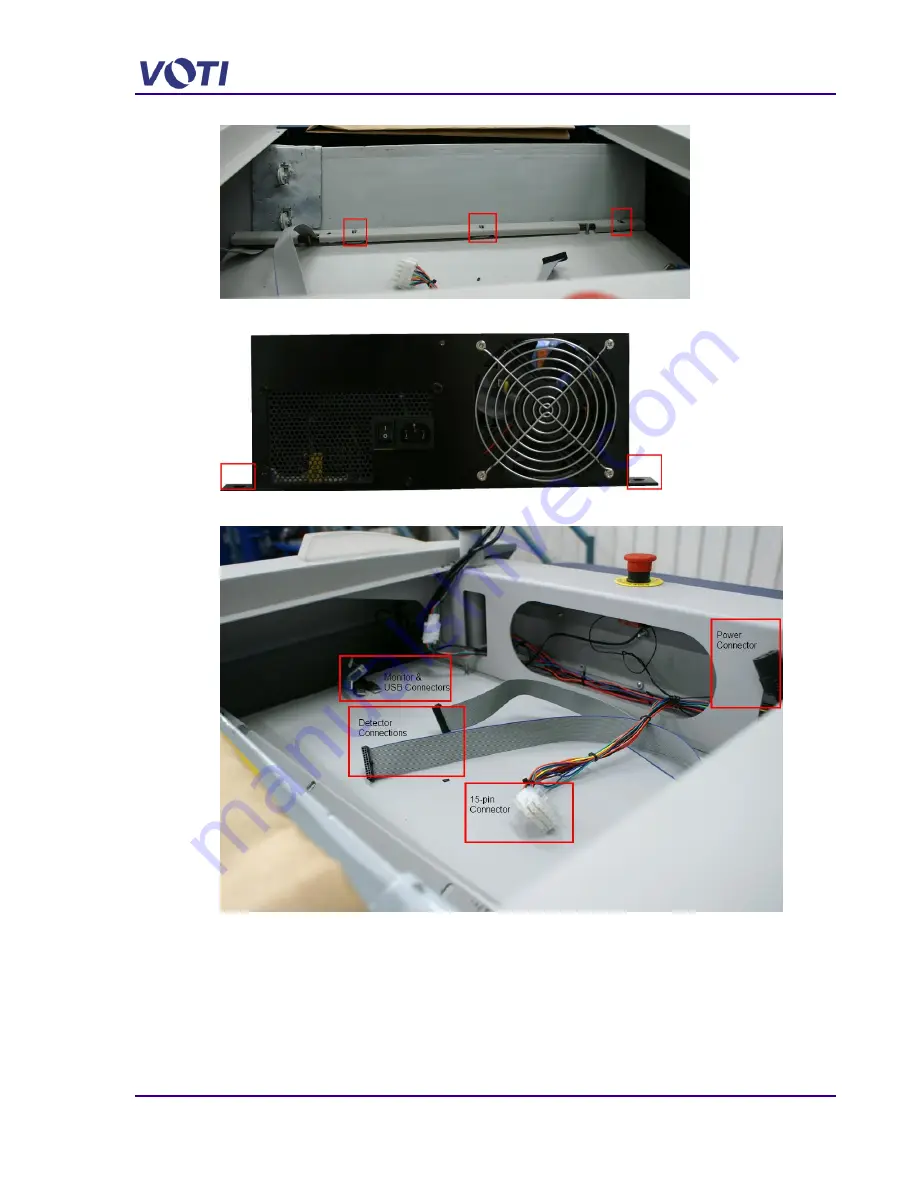
7. Using the wrench, loosen and remove 2 bolts on either side of the computer.
8. Unplug the 15-pin connector and the connectors to the monitor and the UPS.
9. Unscrew 2 screws securing the computer top access panel and unclip the detector ribbon
cables.
Note the orientation of the ribbon connectors.
Summary of Contents for XR3D-6
Page 2: ...XR3D 6 Maintenance Troubleshooting ii EM XR3D 6 001 EN D 2011 VOTI Inc...
Page 6: ......
Page 20: ...XR3D 6 Maintenance Troubleshooting 2 8 EM XR3D 6 001 EN D 2011 VOTI Inc...
Page 32: ...XR3D 6 Maintenance Troubleshooting 3 12 EM XR3D 6 001 EN D 2011 VOTI Inc...
Page 48: ...XR3D 6 Maintenance Troubleshooting 3 28 EM XR3D 6 001 EN D 2011 VOTI Inc...
Page 52: ...XR3D 6 Maintenance Troubleshooting 4 4 EM XR3D 6 001 EN D 2011 VOTI Inc...


