En-
18
Detailed Functions
9. EFFECTS controls
9. EFFECTS controls
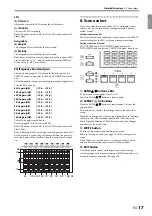
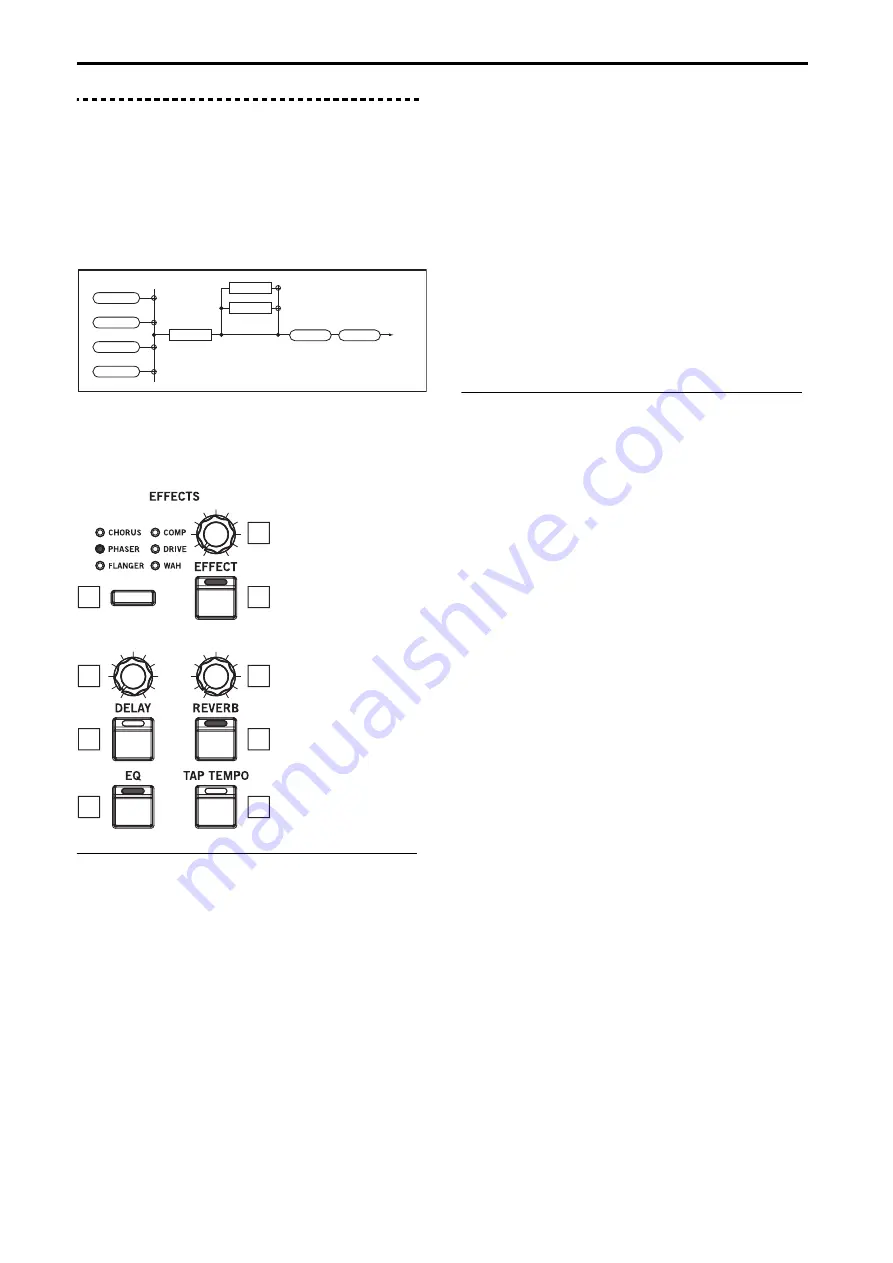
This configures the three series of effects and EQ.
For the variations of each sound part, normally you use
EFFECT in creating the sound, DELAY and REVERB for
overall spatial processing, and the nine-band EQ to adjust the
overall tonal character. Use VALVE DRIVE to give the sound a
heavier or driving feeling.
These effects apply to the variations of all parts.
Note:
Switching between variations on each part will have no
effect on the settings.
Note:
The settings for EFFECT, DELAY and REVERB are
included in each scene. The settings change along with each
scene. Note that VALVE DRIVE and EQ will not change.
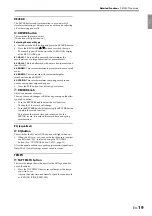
EFFECT
1:
EFFECT button
Switches the effects on/off.
(The button will light when effects are on.)
2:
EFFECT type button, LEDs
Select the effect type. The effect LED that you select will light
up.
CHORUS
: Varies the delay time on the input signal to create a
thicker or warmer sound.
PHASER
: Alters the phase of the sound to create a swelling
effect. This is effective for electric pianos and other sounds.
FLANGER
: Creates a thick swelling sound and a sense of
motion in pitch. This is effective for sounds that contain many
overtones.
COMP
: A compressor effect that compresses the dynamic
range of the input signal. Use compression to create a
smoother sound with punch. This is effective for pianos and
other sounds.
DRIVE
: Creates a heavier, distorted sound.
WAH:
Creates more shiny and muffled tones, by changing the
frequency band to emphasize. You can control the effect using
a pedal connected to the CONTROL jack.
Note:
When you switch to a different effect, the factory default
settings for that effect will be applied.
3:
EFFECT knob
Adjusts the effect that you select using the EFFECT type
button.
The way the sound changes will differ, depending on the effect
type and variation.
Turn the EFFECT knob to adjust the first function.
The depth of the LFO modulation will change.
Turn the EFFECT knob while pressing the EFFECT button
to adjust the second function.
The speed of the LFO will change.
DELAY
The DELAY effect delays the sound, so that it plays after a
certain interval (like an echo).
4:
DELAY button
Switches the delay on/off. (The button will light when on.)
Selecting the delay type
Hold down the EXIT button and press the DELAY button.
Press the KEY/LAYER
,
buttons to switch the type.
The delay type will be shown in the VARIATION display
of the KEY/LAYER part.
01. DELAY:
This is a simple stereo delay.
02. CROSS:
This is a stereo delay that bounces back and forth
from left to right.
03. TAPE:
This effect models the analog tape echo found on
popular devices. The effect recreates the changes in tone from
sound distortion and vibration produced by the rotation of
magnetic tape and the motor. This offers a warm echo sound.
04. MOD DLY:
This effect adds a pitch shift-type effect similar
to a chorus effect to a delay, creating a swelling, wobbly delay
sound.
Press the EXIT button to exit from type selection.
5:
DELAY knob
Adjust the amount of delay.
The way the sound changes will differ, depending on the effect
type and variation.
Turn the DELAY knob to adjust the first function.
The depth of the delay will change.
Turn the DELAY knob while pressing the DELAY button to
adjust the second function.
The amount of feedback will change.
* Note that you can adjust the delay time with the TAP TEMPO
button.
ORGAN
Part
E.PIANO
PIANO
KEY/LAYER
VALVE DRIVE
EFFECT
9 Band EQ
DELAY
REVERB
OUTPUT
L, R
8
4
5
2
9
6
7
1
3
Summary of Contents for CONTINENTAL-61
Page 27: ...2017 VOX AMPLIFICATION LTD 3 E...

