128-9452
Page 5
NOTE
: To insure accurate 24 Hour Start up, it is advisable to reset the start time periodically as
time may drift slightly each day.
Timing Count Down
The unit offers an additional count down timer for situations where an alert tone may be
needed to remind you of something important. For instance you may have a meeting
4 hours from now and you want a reminder in 3 Hrs and 45 Mins. This additional count
down timer allows you to set the count down up 19 Hours and 59 Minutes from the
current time and when the timer reaches zero, the transmitter will emit a tone or vibrate
dependent on your preferred setting. See chart for setting the count down time for this
feature.
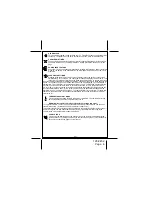
Valet
When the System is in the valet mode, the icon shown will show in the display when the
status check buttons are activated.
Parking Meter Counter
The transmitter has a built in clock that can count down from 10, 20, 30, 60, 90, or 120 minutes.
This feature is useful when parking the vehicle in a metered parking lot. If the time on the park-
ing meter is 30 minutes, you can set the count down timer to 20 minutes. The transmitter will
emit a beep tone when the timer expires to remind you to get back to your vehicle. Please refer
to the chart found later in this guide.
Alarm Clock Mode
The transmitter has a built in alarm clock that can be set to beep at a certain time each
day. The alarm clock mode must be set, and the feature turned on. To use this feature
please refer to the chart found later in this guide.
NOTE:
Your system is shipped with two transmitters, 1 two way, and the one way transmitter.
The one and two way transmitters are programmed from the factory with separate lock & unlock
buttons, the trunk/key icon button operates remote start and remote trunk release where appli-
cable. The option button and any button combination may be programmed to operate various
options. Consult your installation center for button programming and options that may have
been added to your vehicle. Although this is the default programming from the factory, this can
be changed for you to any configuration you prefer. Please refer to the transmitter program
information provided in this guide.
NOTE: A maximum of 2 two way remotes may be programmed to your unit, and a total of 4
transmitters only.
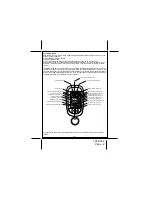
BATTERY INDICATOR
Your transmitter has a battery indicator that is shown in the upper right corner of the
screen. This icon indicates a fully charged battery shown with 3 bars. As the decreas-
es the bars will disappear. 1 bar indicates the battery needs to be charged.
Other icons that will be displayed at times when certain functions and features are active in the vehicle or on
the remote.
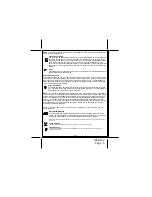
RANGE INDICATOR
The range indicator will have bars to the side of the icon if the unit is out of range.
VIBRATE MODE ON
T
his icon will be displayed if you select vibrate instead of tones. To toggle vibrate on and off, press “F” +
Unlock simultaneously.
Z
Z
Page 5

