background image

5

2019 Voxx Electronics Corporation. All rights reserved.

  Using Your Remote Starter

 Remote Starting Your Vehicle

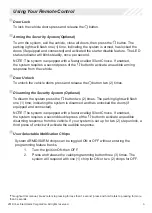
  To activate the remote start function, press and hold the 

 button for three (3) 

seconds.

  The system will flash the parking lights one (1) time and check the vehicle to ensure it 

is safe to start.  If all safety parameters are correct, the vehicle will start.  The vehicle’s 

parking lights will turn on (or flash depending on system settings) as a visual indication 

that the vehicle has started and is running.  


If your vehicle stalls or does not start, the system will pause five (5) seconds, then try 

two (2) more times to start the vehicle (a total of three (3) attempts).  The system will 

pause for five (5) seconds between each start attempt.

 Remote Start Shutdown

  Press and hold the   button for three (3) seconds again to turn the vehicle off.

 Entering the Vehicle while it is Running via Remote Vehicle Start (Optional)


1.    Unlock the vehicle’s doors.


2.   Enter the vehicle.  DO NOT PRESS THE BRAKE PEDAL!


3.   Insert the key into the ignition switch and turn to the ON or RUN    

   position.


4.    Press the brake pedal.  The remote vehicle starter will disengage and  


the vehicle will operate normally.

 Preheating or Precooling the Vehicle’s interior


  Before exiting the vehicle, set the temperature controls to the desired setting and 

operation.  After the system starts the vehicle, the heater or air conditioner will 

activate and heat or cool the vehicle’s interior to your setting.

 Remote Start Safety Features


For safety and security reasons, the system will shutdown or prevent the remote 

vehicle starter from activating if any of the following occur:


1.  The vehicle’s hood is open.


2.  The brake pedal is pressed prior to turning the ignition key to the ON  

   position.


3.  The engine is over-revved (tach checking only).


4.  Valet Mode is active. Refer to the Valet Mode section of this manual on  


page 5.


5.   Remote Start Ready Mode is not set. Manual transmission vehicle’s only.

Summary of Contents for PURSUIT PR1BTWZ

Page 1: ...NOTE The operation of the Security and Convenience System as described in this manual is applicable to most vehicles However due to the configuration of some vehicles some functions AND OR SAFETY PRE...

Page 2: ...ty System 4 Using Your Remote Vehicle Starter 5 Remote Starting Your Vehicle 5 Remote Start Shutdown 5 Entering Your Vehicle while it is Running via Remote Start 5 Preheating or Precooling the Vehicle...

Page 3: ...rity System Optional To disarm the system press the button two 2 times The parking lights will flash one 1 time indicating the system is disarmed and has unlocked the doors if equipped and connected N...

Page 4: ...will turn on solid when valet mode is active 4 Release the Valet Override button User Selectable LED This feature will control whether the LED is ON or OFF when the system is Armed Locked and can be t...

Page 5: ...Running via Remote Vehicle Start Optional 1 Unlock the vehicle s doors 2 Enter the vehicle DO NOT PRESS THE BRAKE PEDAL 3 Insert the key into the ignition switch and turn to the ON or RUN position 4 P...

Page 6: ...ehicle s doors The system will wait three 3 seconds then the vehicle will shutdown and sound two 2 short chirps then one 1 long chirp to confirm Ready Mode is set To Enter Exit the Vehicle while Manua...

Page 7: ...activated 3 Remove the keys from the ignition and exit the vehicle Press the button one 1 time to lock the vehicle s doors if desired The system will enter Quick Stop Mode and will remain running unt...

Page 8: ...Trigger Door Siren Horn Chirp Indications Chirps Function 1 Arm 2 Disarm 3 Door Ajar Upon Arming 4 Disarm Triggered Parking Light Flash Indications Flashes Function 1 Arm 2 Disarm 3 Disarm Triggered...

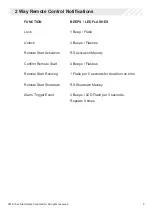
Page 9: ...ED FLASHES Lock 1 Beep Flash Unlock 2 Beeps Flashes Remote Start Activation RS Activation Melody Confirm Remote Start 4 Beeps Flashes Remote Start Running 1 Flash per 5 seconds for duration run time R...

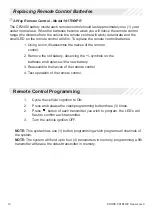
Page 10: ...mote control 2 Remove the old battery observing the symbols on the batteries and replace with a new battery 3 Reassemble the halves of the remote control 4 Test operation of the remote control Remote...

Page 11: ...ich in the opinion of the Company has suffered or been damaged through alteration improper installation mishandling misuse abuse neglect accident or by removal or defacement of the factory serial numb...

Page 12: ...Operation is subject to the following two conditions 1 This device may not cause harmful interference and 2 This device must accept any interference received including any interference that may cause...

Reviews: