background image

G6 & G10 USER MANUAL

VPC

3/16/21


 For more information visit vpc.com

RETURN TO INDEX

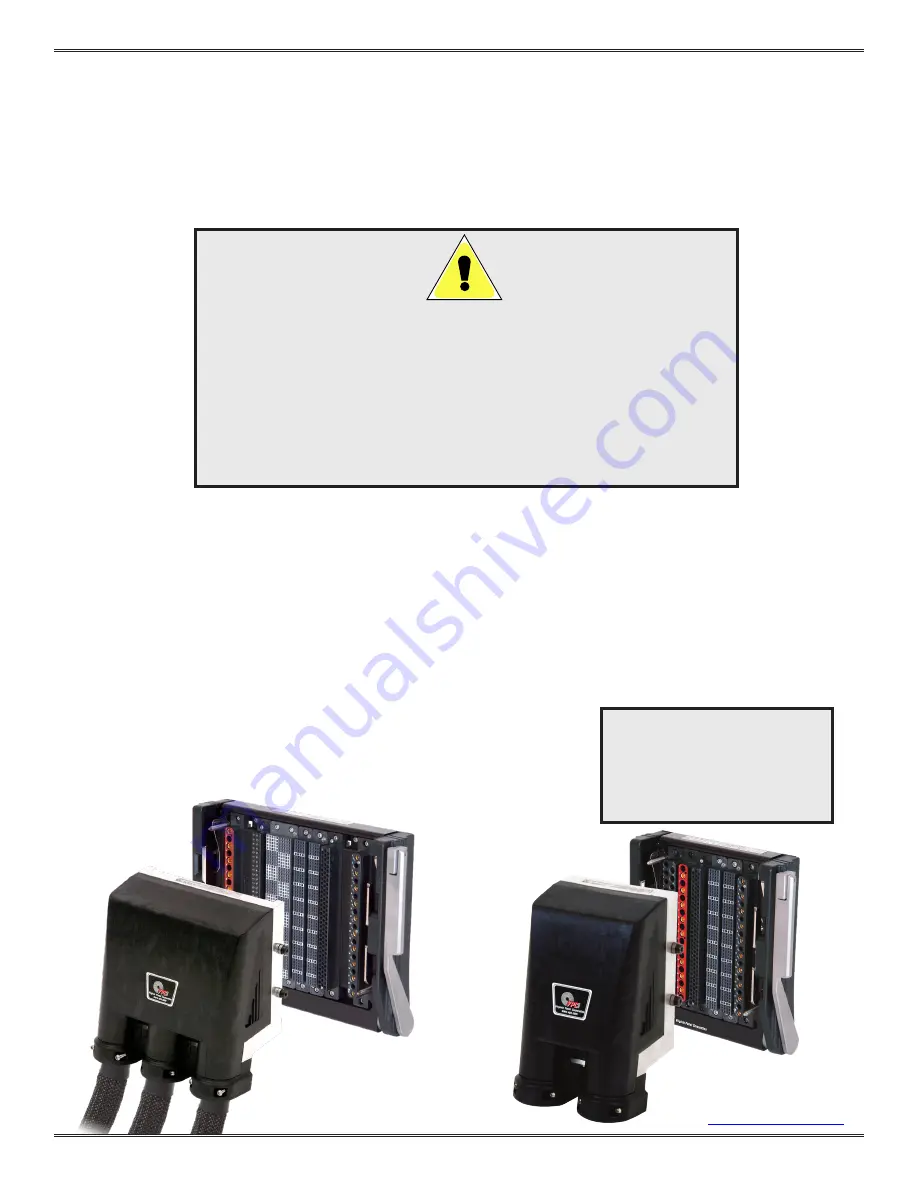
ENGAGEMENT OF ITA WITH RECEIVER 

Listed below are the required steps for proper engagement of the ITA to the receiver.

Prior to engaging an ITA with the receiver for the first time, it is good practice to check that all modules (ITA and receiver) have
been installed properly.  This involves inspection of module ends - ensuring even height relative to one-another.  While checking this,
the user should also verify the positioning of the modules. Pin 1 should always be at the top of both ITA and receiver modules.  It is
crucial for all modules to be installed properly. Improper installation will cause damage to modules, and possibly to the ITA and/or
receiver.  All ITA modules must match receiver modules.  Upon engagement, ITA modules will mate with their respective receiver
modules.

Following inspection, the ITA is ready for engagement with the receiver.  The receiver should be checked one last time for any
foreign objects that may hinder engagement. With the ITA in the upright position and the receiver handle open, align guide pins
with bushings on the ITA and mate.

The handle may now be moved to the upright/ closed position to engage contacts.

CAUTION

• When engaging the ITA with the receiver, caution must be taken to ensure

that the ITA is parallel with the receiver upon engagement and that the ITA

rollers are engaged at the same time.

• To prevent potential injury, care should be taken to avoid wrapping fingers

around the engagement handle.

• All power supplies for the system should be properly disconnected prior to

handling. When engaging, be sure that all foreign objects are removed from

the system.

2

G6 ITA •

 PART # 410 104 273, 410 104 331

G6 RCV •

 PART # 310 104 318

G10 ITA •

 PART # 410 104 272, 410 104 375

G10 RCV • PART # 310 104 317

In the event of difficulties with 

engagement, such as improper 

alignment of modules or the ITA, a 

trained VPC technician should be 

notified immediately to avoid any 

damage to the system. 

Summary of Contents for 410 104 272

Page 1: ...WINGS 6 G6 RECEIVER MOUNTING SPECIFICATIONS 7 G10 RECEIVER MOUNTING SPECIFICATIONS 8 G10 RECEIVER PANEL CUT OUT DRAWING 9 PRECAUTIONARY NOTES TROUBLESHOOTING G6 G10 USER MANUAL 3 2 21 Please note that any printed or downloaded User Manuals may not reflect the most current revisions The information contained in these manuals is subject to change For the most current information available visit vpc ...

Page 2: ...e backshells slide up to provide access to wires and connectors To slide the backshell up be sure to first remove the screw s located at the base of the ITA The G10 has two screws at the base and the G6 has one Once the backshell is put back in place be sure to secure the screw s back in place as the EMI shielding provided by the backshell will not take effect otherwise 1 For drawings specs and mo...

Page 3: ...y for engagement with the receiver The receiver should be checked one last time for any foreign objects that may hinder engagement With the ITA in the upright position and the receiver handle open align guide pins with bushings on the ITA and mate The handle may now be moved to the upright closed position to engage contacts CAUTION When engaging the ITA with the receiver caution must be taken to e...

Page 4: ...A INSTALLED SCREW C INSTALLED PIN B OPEN PIN D OPEN SCREW B INSTALLED SCREW D INSTALLED PIN B INSTALLED PIN D INSTALLED SCREW B OPEN SCREW D OPEN PATTERN 2 PATTERN 5 RECEIVER ITA RECEIVER ITA PIN A INSTALLED PIN C OPEN SCREW A OPEN SCREW C INSTALLED PIN A OPEN PIN C INSTALLED SCREW A INSTALLED SCREW C OPEN PIN B INSTALLED PIN D OPEN SCREW B OPEN SCREW D INSTALLED PIN B INSTALLED PIN D OPEN SCREW B...

Page 5: ... or three oblong cable exits G10 for example each exit will hold a maximum of 683 signal 20 AWG wires OR 202 coax RG316 wires Formula to calculate approximate number of one wire type that will fit in each cable exit N D d 1 2 907 N Number of Wires D Diameter of Converted Oblong Bushing d Outside Diameter of Wire General Guidelines Wire Type Outside Diameter of Wire d Number of Wires N 20 AWG Signa...

Page 6: ...e information visit vpc com RETURN TO INDEX G6 G10 VERTICAL HINGED MOUNTING FRAME VERTICAL HINGED MOUNTING FRAME G10 5U PART 310 113 342 VERTICAL HINGED MOUNTING FRAME G6 5U PART 310 113 341 5 G10 5U PART 310 113 342 G6 5U PART 310 113 341 ...

Page 7: ...G6 G10 USER MANUAL VPC 3 16 21 For more information visit vpc com RETURN TO INDEX 6 RECEIVER MOUNTING SPECIFICATIONS G6 RCV PART 310 104 318 ...

Page 8: ...G6 G10 USER MANUAL VPC 3 16 21 For more information visit vpc com RETURN TO INDEX MOUNTING SPECIFICATIONS RECEIVER G10 10 MODULE PART 310 104 317 7 ...

Page 9: ...G6 G10 USER MANUAL VPC 3 16 21 For more information visit vpc com RETURN TO INDEX PANEL CUTOUT RECEIVER G10 10 MODULE PART 310 104 317 8 ...

Page 10: ...or damage Contact VPC user adjustments to system unless authorized will void warranty Check for foreign objects tools that may be obstructing proper engagement Verify the orientation of the receiver and ITA modules Inspect the mating modules to ensure they match Power ITA module is mating with power receiver module etc Forceful engagement of the receiver and the ITA will result in serious damage t...

Reviews: