38
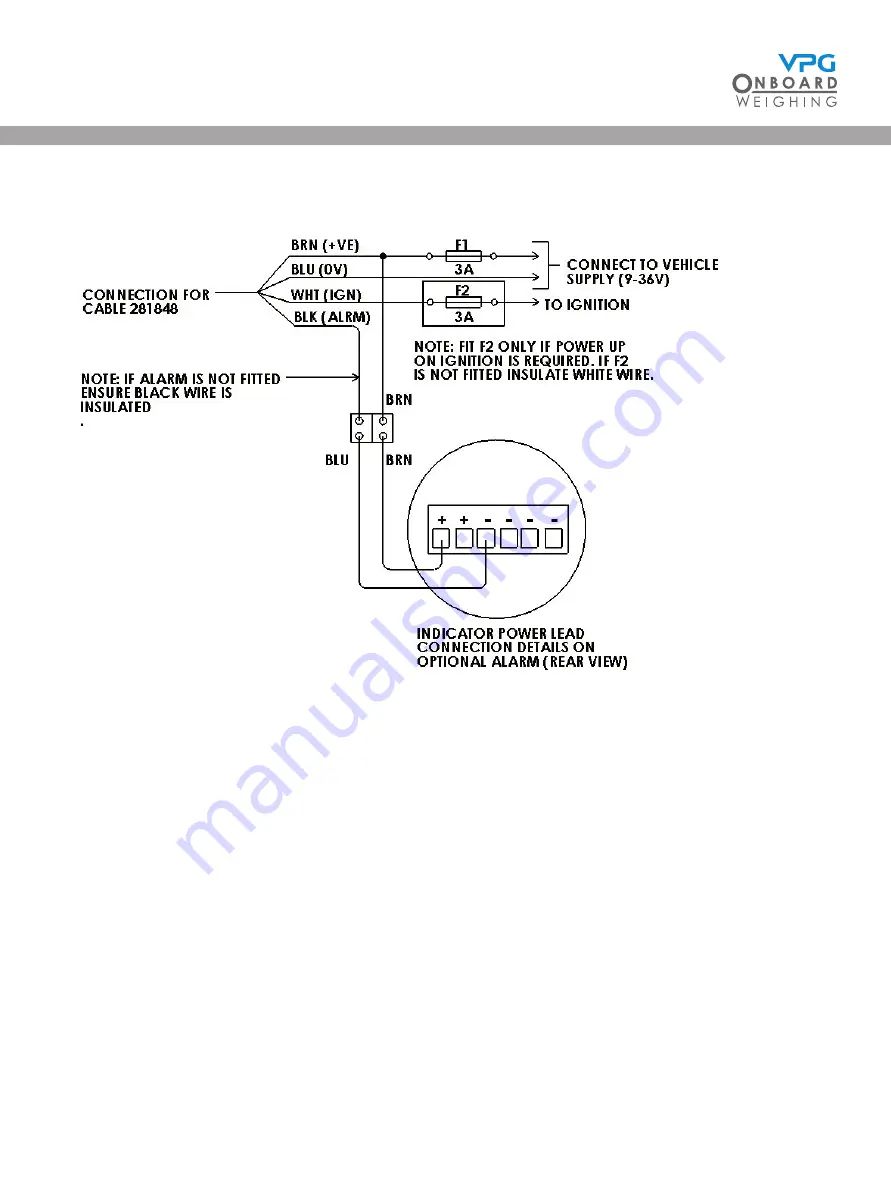
4. Connect the power cable to the connection point for the power supply in the vehicle
• The system can be powered from 12V or 24V DC power supplies
• The system has an operating range of 9V to 36V DC
• The white wire allows you to connect to the ignition if you want the monitor to power on and off
with the ignition
• The black wire allows you to connect the monitor to an alarm, if required
5. Mount the display unit:
• Use mounting cage to mount the display unit to the DIN mount in the cab of the vehicle. Use the
cage tabs to secure it in place
• Use the dash mount to mount the display unit to another location in the vehicle. Mount it to a
position which does obscure the drivers line of sight when driving the vehicle
• Ensure that the external domain cable and power cable are routed through the back of the
display unit
TruckWeigh
®
Summary of Contents for TruckWeigh
Page 1: ...vpgonboard com TruckWeigh Installation Setup and Calibration Manual...
Page 2: ...2 TruckWeigh...
Page 8: ...8 TruckWeigh...
Page 9: ...9 Installation TruckWeigh...
Page 15: ...15 Tractor Suzi Trailer Suzi Rigid Suzi TruckWeigh...
Page 41: ...41 Configuration TruckWeigh...
Page 87: ...87 Calibration TruckWeigh...
Page 98: ...98 TruckWeigh...
Page 99: ...99 System options TruckWeigh...
Page 114: ...114 TruckWeigh...
Page 115: ...115 Appendix A TruckWeigh...
Page 119: ...119 Appendix B TruckWeigh...
Page 122: ...122 TruckWeigh...
Page 123: ...123 Appendix C TruckWeigh...
Page 126: ...126 TruckWeigh...
Page 127: ...127 Appendix D TruckWeigh...


