Valves
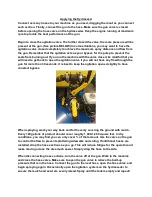
As you are looking at your machine you will notice there are three valves. The valve
located on the bottom of the tank/suction line is used to shut off the flow to the pump
during transport or any time you need to isolate the tank from the pump. This valve
needs to be opened during operation to provide flow to the pump. Failure to have this
valve open will result in damage to the pump. The second valve is located on the
pressure side (top) of the pump. This vertically orientated valve controls the flow to the
agitation jets in the tank and also acts as your bypass during operation. The third and
smallest valve is also located on the pressure side of the pump. This is the valve that
controls the flow to the hose and gun. Make sure this valve is CLOSED unless the hose
and gun are attached. If this valve were to be opened upon start up, water/hydroseed
would begin to spray out of the valve.
Plumbing
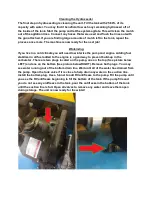
All of our machines run a flange style poly plumbing system. These systems provide less
resistance and better flow than conventional threading plumbing and are easy to
disassemble/reassemble. All of the flange clamps use a regular 5/16” socket or wrench.
You will find a gasket located in between the two connects parts. If you ever disassemble
your unit take time to make sure the gasket is properly seated and clean before
reassembly
Camlocks
Most pieces of the hydroseeder use camlock fittings. These fittings make removal of the
sections quick and easy. You will notice that the gun, tips, and hose sections are all
connected using these fittings. To connect these fittings, simply insert the male end into
the female end and push each cam lever down until they are fully closed. There are two
camlock fittings located on the unit. The first is located on the valve the hose attaches to.
Simply take the female end of your spray hose and attach it in the way previously
described. Take time to make sure the levers are fully locked! The second camlock is
located on the top of the unit. This is for your garden hose water fill line. We will be
covering this next.


