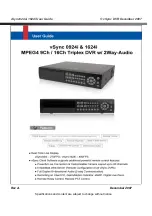
vSync924 & 1624i User Guide
© vSync DVR December 2007
Rev A.
December 2007
Specifications and content are subject to change without notice.
12
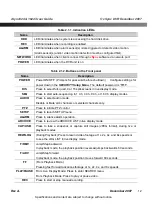
Table 2.1.1. Indication
LEDs
Name
Description
HDD
LED illuminates when system is accessing the hard disk drive.
REC
LED illuminates when recording is enabled.
ALARM
LED illuminates when alarm sensor(s) is/are triggered or detects video motion.
(Alarm sensor(s) and/or video motion detection must be configured first).
NETWORK
LED illuminates when clients connect through
vSync
software via network port.
POWER
LED illuminates when the DVR unit is on.
Table 2.1.2. Buttons on the Front panel
Name
Description
POWER
Power ON/OFF. (Prompts for password before shutdown) Configure settings for
power down in the
SECURITY Setup Menu
. The default password is “
1111
”.
DIS
Press to select full, quad, 9 or 16 split-screens in live display mode.
SEQ
Press to start auto-sequencing in 1 Ch, 4 Ch, 9 Ch, or 16 Ch display modes.
AUDIO
Press to select audio mode.
Disable or Mute all 4 channels or selected channels only.
PTZ
Press to initiate PTZ control
SETUP
Press to launch SETUP menu.
ALARM
Press to silence alarm operation.
ARCHIVE
Press to review the ARCHIVE LIST in live display mode.
CAP/USB
Press to take a snapshot, or capture still images (JPEG format), during live or
playback modes.
REW/LOG
(During Playback) Press to rewind video footage at 1x, 2x, 4x, and 8x speeds or
to see the LOG LIST in live display mode.
F/REW
Jump/Step backward.
In playback mode, the playback position reverses/jumps backwards 60 seconds.
F/ADV
Jump/Step forward.
In playback mode, the playback position moves forward 60 seconds.
FF
(From Playback Mode)
Pressing fast forward advances footage at 1x, 2x, 4x, and 8x speeds.
PLAY/PAUSE
From Live Display Mode: Press to enter SEARCH menu.
From Playback Mode: Press to play or pause video.
REC
Press to start or stop manual recording.

