- 8 -
Installation
Guide
♦
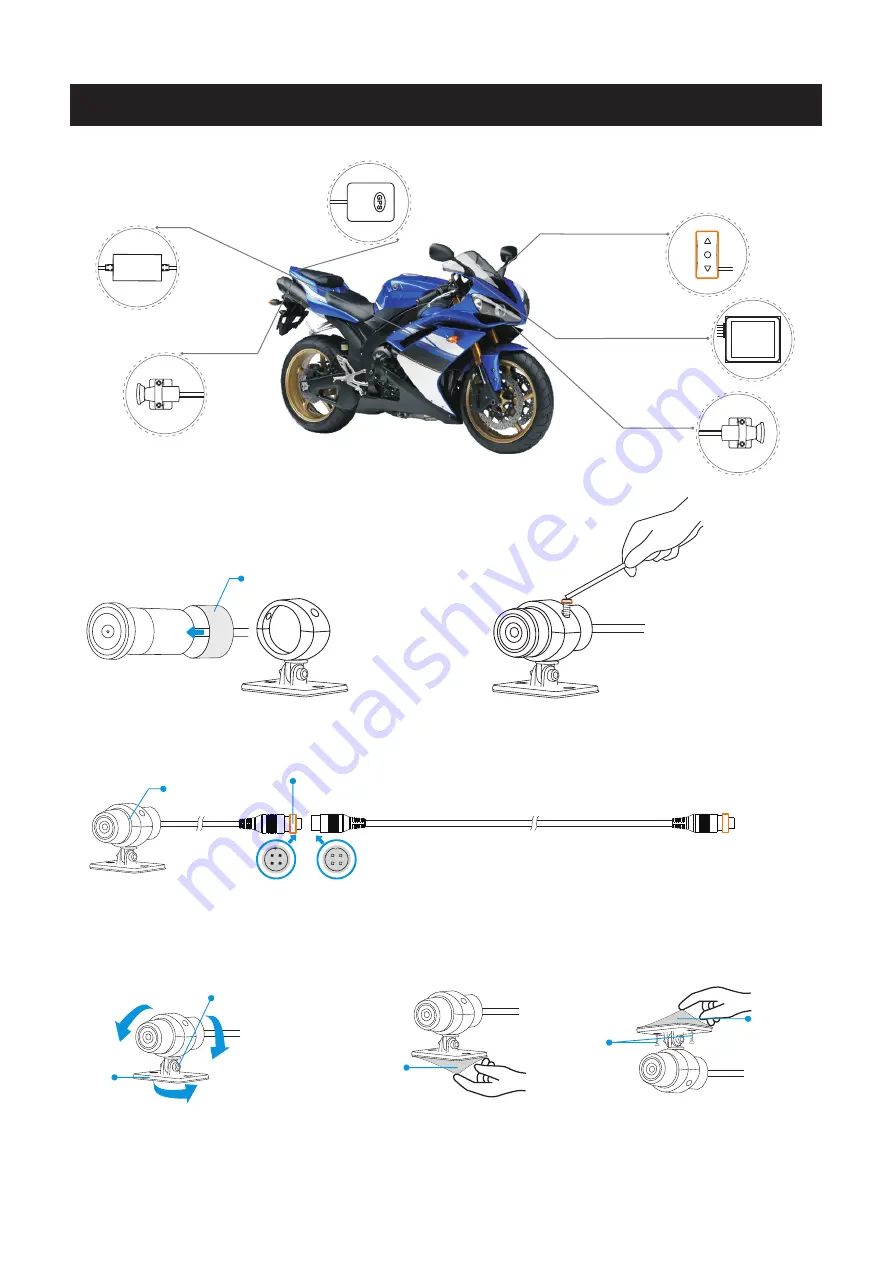
Shock Absorption Camera Bracket
Cameras
♦
shock absorption ring
①
Put the rubber shock absorption ring on the camera body.
②
Install the camera body on the bracket, and tighten
the screws to fix it after adjusting the proper angle.
Extension cable
During installation, it is recommended to install the extension cable first, and then connect the main unit and camera separately (so that the
installation is easier). If the distance between the main unit and the camera is less than 0.5 meters, it is recommended not to use the camera
extension cable (please keep the camera extension cable for future needs).
The concave and convex bayonet of
the joint shall be matched correctly
Connect to the main unit
Bracket
Double side tape
Screw
Double
side tape
shock absorption ring
Waterproof
Camera
Main
Unit
Waterproof
wire
controller
Power
Cable
Waterproof
GPS
module
It
is
suggested
to
install
it on
the
handlebar
Waterproof
camera
Main
Unit
OK
It
needs to be exposed in the
place where there is no
obstruction
.
And
the
distance
from
GPS
to
camera
and
main
unit
shall
be
about
30CM
to
avoid
signal
interference
.
Screw ring (After the cables are connected,tighten
the screw ring. Do not twist the wire position.)
Screw (Loosen the screw to
adjust the height of the camera)
Viewing the screen or smart phone screen via
WiFi and adjust the bracket around to find a
suitable horizontal view angle before fixed by
double-sided foam tape
Install the bracket downwards, tear off the double- sided
tape and paste it in a suitable position
(
Adjust the position of the bracket to a satisfactory angle,
and finally stabilize the cameras
)
The bracket is installed upwards, after
tearing off
the double-sided adhesive, it is
recommended to screw on the lens to
stabilize the cameras


