35
3. Now you can select the activities you want to add to your
ClassMaster™ Notebook
.
To select an activity or file, click on it, and then click the Add to List button. The number
of activities and data you can add to
ClassMaster™ Notebook
is limited by the amount
of available memory on your
ClassMaster™ Notebook
.
4. To remove an activity or file from the list, click on the item you want to remove, and
then click on the Remove from List button.
5. When you have finished making your list, press the Sync button on your
ClassMaster™
Notebook
. This begins the Sync session.
6. To play the new activities on your
ClassMaster™ Notebook
, go to the Main Menu
and select the Download Zone category. Then you’ll see a list of the new activities you
have downloaded.
Deleting Activities From Your ClassMaster™ Notebook
1. Go to the Main Menu and select Accessories.
2. Select File and Upload Manager from Accessories.
3. You will see a list of the activities and data files that you have stored in your
ClassMaster™ Notebook
.
4. Click on the activity or the data file that you want to delete.
5. Press the Action key to view the commands, then click on Delete or Delete All in the
action menu.
IMPORTANT!
Only activities or data that you have added can be deleted from your
ClassMaster™ Notebook
. Built-in activities cannot be deleted.
Uploading Files From Your ClassMaster™ Notebook to
Your Computer
You can upload Word Processor files, Animation Editor files and Artwork Studio pictures
to your PC if you want. After uploading the files, they are converted into RTF and BMP
format respectively. RTF format allows you to open the files in some common PC word
editor application. And BMP format is a common graphic format that can be opened in
many graphic applications. Therefore you can edit and/or print the files in your PC.
Here’s how to upload files into your PC:
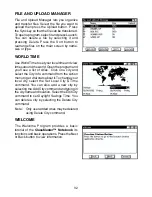
1. Go to Accessories category. Select the File and Upload Manager.
2. The File and Upload Manager will show you all the files that you can upload from your
ClassMaster™ Notebook
into your PC.
3. Select the file you want to upload then press the Upload button. Press the Sync button
on your
ClassMaster™ Notebook
to begin the Sync session.
All uploaded files will be saved in your personal folder. The default location of your Personal
Folder is the “ My Documents” folder in Windows. To view the current path of your personal


