background image

20

Using your phone

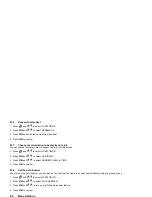
4.10.4 Transfer an External Call from Handset to Handset

During an external call:

1. Press  

and 

U

/

D

 to select 

INTERCOM

.

2. Press 

OK

 to select the desired handset to intercom with. 

3. The external call is put on hold automatically and the called handset rings.

4. Press 

T

 on the called handset to establish an internal call.

5. Press 

O

 on the calling handset or put the calling handset on the charging cradle to end the current call with the external party.

6. The external call is transferred to the called handset.

4.10.5 Transfer an External Call from Handset to the Retro Base

During an external call:

1. Press  

and 

U

/

D

 to select 

INTERCOM

.

2. Press 

OK

 to select the retro base to intercom with.

3. The external call is put on hold automatically and the called retro base rings.

4. Press 

s

 on the called retro base to establish an external call.

5. Press 

O

 on the calling handset or put the calling handset on the charging cradle to end the current call with the external party.

6. The external call is transferred to the called retro base.

4.10.6 Transfer an External Call from the Retro Base to Handset

During an external call on base:

1. Grab off the handset from base charging cradle, the external call on the retro base will be transferred to handset automatically, and the retro 

base will go to idle.

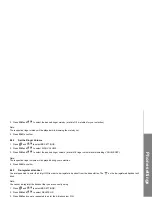
Summary of Contents for VT2032

Page 1: ...User s manual w w w v t e c h c o m h k t e l ...

Page 2: ...r a Call 15 4 8 Redial the last number 17 4 8 1 Redial a Number from the Redial List 17 4 8 2 Store a Redial Number into the Phonebook 18 4 8 3 Delete a Redial Number 18 4 8 4 Delete the Entire Redial List 18 4 9 Find the Handset 18 4 10 Make an Internal Call 19 4 10 1 Intercom Another Handset 19 4 10 2 Intercom the Retro Base 19 4 10 3 Call All Handsets and Retro Base 19 4 10 4 Transfer an Extern...

Page 3: ...t the Ringer Volume 32 8 3 4 Set Alert Tones 32 8 3 5 Set the Handset Language 32 8 3 6 Rename the Handset 33 8 3 7 Choose the Information to be displayed in idle 33 8 3 8 Set the Auto Answer 33 8 5 Registration 36 8 6 Reset Your Phone 36 9 ANSWERING MACHINE 37 9 1 Turn On Off the Answering Machine 37 9 2 Listen to the Messages in the Answering Machine 38 9 3 Delete All Messages in the Answering M...

Page 4: ...If the product does not operate normally by following the operating instructions If the product has been dropped and the cabinet has been damaged If the product exhibits a distinct change in performance 8 Avoid using a telephone other than a cordless type during an electrical storm There may be a remote risk of electric shock from lightning 9 Do not use the telephone to report a gas leak in the vi...

Page 5: ... environment place it away from electronic appliances such as televisions microwave ovens radios personal computers wireless devices or other cordless phones avoid facing radio frequency transmitters such as external antennas of mobile phone cell stations avoid plugging it into the same circuit as other major household electrical appliances because of the potential interference Try moving the appl...

Page 6: ...2 3 Connecting the telephone 1 Plug the power supply line cord into the base station 2 Plug the other end of power supply line cord into the mains socket Note Always use the cables provided in the box ...

Page 7: ...tery compartment cover back 4 Put the handset on the base and charge for 16 hours first time A beep indicates that the handset is properly placed on the base or charger Notes 1 Use only the power adapter provided for the base station 2 Use only NiMH rechargeable battery pack 3 If the handset will not be used for a long time disconnect and remove the battery pack to prevent possible leakage Battery...

Page 8: ...g mode Press and hold to go back to idle screen In idle mode Press and hold to power off the handset In idle mode when the handset is powered off 6 CHARGING PINS DESIGNATOR 7 FLASH In predialing number editing mode Press to insert a flash During a call Press to dial a flash 8 SPEAKERPHONE During a call Press to turn on off the speakerphone In Idle mode predialing mode Redial list Call List Phonebo...

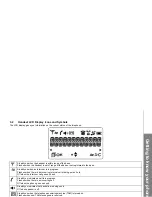
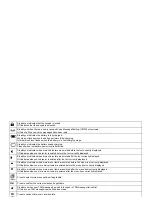
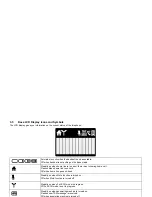
Page 9: ...tered to the base Steadily on when an intercom is in progress Flashes when there is an incoming internal call or being put on hold Off when the intercom call goes on hook Steadily on indicates a call is in progress Flashes when there is an incoming call Off when the phone goes on hook Steadily on indicates that handsfree is being used Off when speaker is off Steadily on when the telephone answerin...

Page 10: ...he text currently displayed Steadily on indicates when more characters are existed after the text currently displayed Off indicates when no character is existed after the text currently displayed Steadily on indicates when more menu items are existed before the menu item currently displayed Off indicates when no more menu items are existed before the menu item currently displayed Steadily on indic...

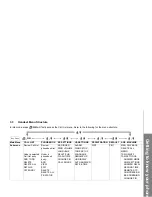
Page 11: ... List entry ADD TO PB DELETE DELETE ALL DETAILS CATEGORY Review phonebook list Under a phonebook entry ADD VIEW EDIT DELETE DELETE ALL PB STATUS BS RINGER RING VOLUME LANGUAGE DELETE HS FLASH TIME CHANGE PIN CALL SHARE ALARM RING SETUP TONE SETUP LANGUAGE RENAME HS HS DISPLAY AUTO ANSWER DATE TIME PIN PIN MSG PLAYBACK DELETE ALL MEMO TAM ON OFF TAM SETTINGS ANSWER MODE OGM SETTINGS ANSWER DELAY RE...

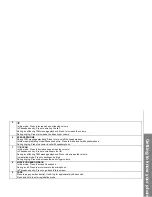
Page 12: ...the new message In TAM message playback mode Press to stop the message playback In Phonebook entry Press to go back to idle screen 3 RECALL In predialing mode Press to insert a flash During a call Press to dial a flash 4 ALPHANUMERIC KEYPAD STAR HASH Press to insert a digit character ...

Page 13: ... During ringing Press to answer a call with speakerphone 7 CLEAR In idle mode Press to decrease base screening volume In Phonebook entry Press to scroll down the list During a call during TAM message playback Press to decrease the volume In predialing mode Press to backspace a digit During ringing Press to decrease the base ringer volume 8 MUTE PHONEBOOK BACK In idle mode Press to access Phonebook...

Page 14: ...g on the base cradle Steadily on when home line is in use or there is an incoming home call Flashes when home line is on hold Off when home line goes on hook Steadily on when Mute function is turned on Off when Mute function is turned off Steadily on when Full ECO mode in progress Off Full ECO mode is not in progress Steadily on when answering machine is turned on Flashes new TAM message is receiv...

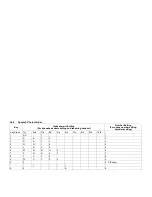
Page 15: ...f the last character entered Writing Tips 1 Once a character is selected the cursor will move to the next position after a short pause 2 You can move the cursor within the text by U Dto amend the text entry 3 Press RIGHT SOFT KEY to delete the last character 4 Press and hold RIGHT SOFT KEY to delete the entire text string 3 6 1 Latin Character Set Key Alphanumeric Editing For phonebook name editin...

Page 16: ... name editing and renaming handset Number Editing For phone number editing date time editing Key Press 1st 2nd 3rd 4th 5th 6th 7th 8th 9th 10th 1 SP 1 1 2 A B C 2 2 3 D E F 3 3 4 G H I 4 4 5 J K L 5 5 6 M N Ñ O 6 6 7 P Q R S 7 7 8 T U V 8 8 9 W X Y Z 9 9 0 0 0 P Pause ...

Page 17: ...he number Press to clear the entry 4 1 2 Post Dialing Using a handset Press Tor Sto take the line and enter the phone number Using the base Press sto take the line and enter the phone number 4 1 3 Call from the phonebook Using a handset 1 Press Pto access the phonebook 2 Press U Dto select the desired phonebook entry Alternatively press OK to access the phonebook to get the desired phonebook entry...

Page 18: ...sired redial number 3 Press Tor Sto dial the selected redial number 4 1 6 Call timer Your handset or base automatically times the duration of each call The call timer will display a few seconds after the call has ended It is shown in hours minutes and seconds format HH MM SS 4 2 Answer a Call Using a handset If the handset is not on the charging cradle When the phone rings press Tor Sto answer a c...

Page 19: ...and handsfree volume in the handset while there are 5 levels VOLUME 1 to VOLUME 5 to choose for handsfree volume in the base Using a handset During a call Press U Dto select volume 1 5 The current setting is shown When you end the call the setting will remain at the last selected level Using the base During a call Press to select volume 1 5 The current setting is shown When you end the call the se...

Page 20: ... the keypad lock The icon will be displayed on the LCD In keypad lock mode if you press any key other than holding the key the screen will display KEYS LOCKED for around 2 seconds and then display HOLD You can press and hold to turn off the keypad lock The icon will disappear 4 8 Redial the last number You can redial up to 20 of the last numbers called If you have stored a name in the phonebook to...

Page 21: ...to select phonebook melody 6 Press U Dto browse the melody list The respective melody will be played when browsing the melody list 7 Press OK to confirm 4 8 3 Delete a Redial Number 1 Follow Steps 1 and 2 in section 4 8 1 2 Press and U Dto select DELETE 3 Press OK to confirm 4 8 4 Delete the Entire Redial List 1 Follow Steps 1 and 2 in section 4 8 1 2 Press and U Dto select DELETE ALL 3 Press OK t...

Page 22: ...mbers of the registered handsets and retro base will display except the calling handset 2 Enter the desired handset number to intercom with 3 The called handset rings and press Ton the called handset to establish the internal call Note If only two handsets are registered to the base station press RIGHT SOFT KEY will call another handset immediately 4 10 2 Intercom the Retro Base 1 In idle mode pre...

Page 23: ...l Call from Handset to the Retro Base During an external call 1 Press and U Dto select INTERCOM 2 Press OK to select the retro base to intercom with 3 The external call is put on hold automatically and the called retro base rings 4 Press son the called retro base to establish an external call 5 Press Oon the calling handset or put the calling handset on the charging cradle to end the current call ...

Page 24: ...he external call 4 10 8 Make a 3 way Conference Call with Call Share If you turn on the call share function see section 8 4 6 for details to turn on off call share you can join the conversation with your handset or base easily as following when the other handset is on an external call During an external call 1 Press son the base to establish the conference call if any handset has answered the call...

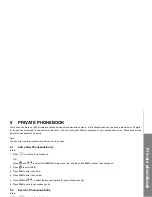
Page 25: ...entries are stored alphabetically by name Note You can only view the phonebook entries on the retro base 5 1 Add a New Phonebook Entry In idle 1 Press Pto access the phonebook OR Press and U Dto select PHONEBOOK main menu item and then press OK to access the phonebook 2 Press to select ADD 3 Press OK to enter the name 4 Press OK to enter the number 5 Press OK and U Dto select the desired ringtone ...

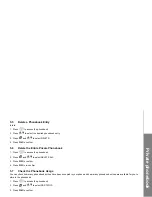
Page 26: ... more than 12 digits press LEFT SOFT KEY or RIGHT SOFT KEY to view the remaining digits Using the base 1 Press pto access the phonebook 2 Press to select the desired phonebook entry the name and number of the selected phonebook entry will display 5 4 Edit a Phonebook Entry In idle 1 Press Pto access the phonebook 2 Press U Dto select the desired phonebook entry 3 Press and U Dto select EDIT 4 Pres...

Page 27: ...ire Private Phonebook 1 Press Pto access the phonebook 2 Press and U Dto select DELETE ALL 3 Press OK to confirm 4 Press OK to re confirm 5 7 Check the Phonebook Usage You can check how many phonebook entries have been occupied in your phone and how many phonebook entries are available for you to store in the phonebook 1 Press Pto access the phonebook 2 Press and U Dto select PB STATUS 3 Press OK ...

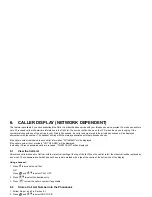
Page 28: ... send caller information WITHHELD will be displayed If the caller number is not provided OUT OF AREA will be displayed In standby if three unanswered calls are received 3 NEW CALLS will be displayed 6 1 View the Call List All received calls are saved in Call List with the latest call putting at the top of the list When the call list is full the oldest call will be replaced by a new call The unansw...

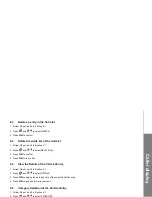
Page 29: ...2 in Section 6 1 2 Press and U Dto select DELETE ALL 3 Press OK to confirm 4 Press OK to re confirm 6 5 View the Details of the Call List Entry 1 Follow Steps 1 and 2 in Section 6 1 2 Press and U Dto select DETAILS 3 Press OK to display the date and time of the selected call list entry 4 Press OK to go back to previous screen 6 6 Category Selection of the Call List Entry 1 Follow Steps 1 and 2 in ...

Page 30: ... new message in your voice mailbox Using a handset 1 Press and U Dto select CALL LIST OR Press Uin idle to access the call list 2 Press U Dto select the desired VMWI entry 3 Press Tto dial to the voice mail server Note If a more recent VMWI entry is received from the same network server number of an existing VMWI entry the new VMWI will not be stored but the date time of the VMWI will be updated o...

Page 31: ...entries from the call list 1 Press and U Dto select CALL LIST OR Press Uin idle to access the call list 2 Press and hold 4to delete all VMWI entries The will disappear Note If you choose DELETE ALL function in the call list the handset will also delete all VMWI entries and CID entries ...

Page 32: ...nswering machine or call list entries 8 1 1 Change the Date Format 1 Press and U Dto select HS SETTINGS 2 Press OK and U Dto select DATE TIME 3 Press OK and U Dto select DATE FORMAT 4 Press OK and U Dto select your desired date format DD MM YY or MM DD YY 5 Press OK to confirm 8 1 2 Change the Time Format 1 Press and U Dto select HS SETTINGS 2 Press OK and U Dto select DATE TIME 3 Press OK and U D...

Page 33: ...ess is still applicable if handset keypad is locked and when the alarm time is reached 2 The alarm volume level is the same as the settings of the handset ringer volume If the handset ringer is set to VOLUME OFF the alarm still sounds at VOLUME 1 level 3 During an external call or internal call if an alarm is set and when the alarm time is reached the and ALARM ON will still flash An alarm tone wi...

Page 34: ...ls 1 Press and U Dto select HS SETTINGS 2 Press OK and U Dto select RING SETUP 3 Press OK and U Dto select INT RING 4 Press OK and U Dto select the desired ringer melody a total of 10 melodies for your selection for setting ringer melody for internal calls Note The respective ringer melody will be played while browsing the melody list 5 Press OK to confirm 8 3 2 Set the Ringer Melody for External ...

Page 35: ...splay 5 Press OK to confirm 8 3 4 Set Alert Tones A single beep is emitted when you press a key You can turn on or off the key tone You can also turn on the alert tones when low battery and out of range are detected Low battery tone will be emitted while you are talking with the phone to alert you that you need to charge up your battery 1 Press and U Dto select HS SETTINGS 2 Press OK and U Dto sel...

Page 36: ... your idle screen 1 Press and U Dto select HS SETTINGS 2 Press OK and U Dto select HS DISPLAY 3 Press OK and U Dto select HANDSET NAME or TIME 4 Press OK to confirm 8 3 8 Set the Auto Answer If you turn on the Auto Answer you can pick up the call from the cradle to answer a call without needing to press any key 1 Press and U Dto select HS SETTINGS 2 Press OK and U Dto select AUTO ANSWER 3 Press OK...

Page 37: ...E 3 Press OK and U Dto select the desired ringer volume a total of 6 ringer volume levels including VOLUME OFF Note The respective ringer volume will be played during your selection 4 Press OK to confirm 8 4 3 De register a Handset You are requested to enter the 4 digit PIN in order to de register a handset from the base station The on the de registered handset will blink Note You cannot de regist...

Page 38: ...anging the system settings of the base station It is used to protect your phone against unauthorized use The default system PIN code is 0000 1 Press and U Dto select BS SETTINGS 2 Press OK and U Dto select CHANGE PIN 3 Press OK and you are requested to enter the 4 digit system PIN 4 Enter the old system PIN 5 Press OK and enter the new system PIN 6 Press OK and enter the new system PIN again Note ...

Page 39: ... 4 digit system PIN 5 Press OK and go ahead with the following procedures using the base Using the base 6 Press and hold G on the base station for about five seconds the base station is entered into registration mode If the handset registration is successful you will hear a confirmation tone and the will stop flashing The handset will automatically be allocated the next available handset number Th...

Page 40: ...he Answering Machine You can turn on or off the answering machine through the base or handset When the answering machine is set to ON calls will be answered after the set answer delay and the caller can then leave you a message When the answering machine is set to OFF calls will be answered after 14 rings and the answer only message will be played to your callers They will not be able to leave you...

Page 41: ...ayback is placed at the centre of the bottom of the LCD to indicate that it is a new message If this message has been read or listened the will disappear and will be reflected next time when you listen to this message again If there are no new messages Press OK to display 00 00 00 00 on the handset and return back to ANS MACHINE menu 4 During message playback press Uor Dto increase or decrease the...

Page 42: ... no new messages press to display NO MESSAGES on the base and return to the idle screen Note You can use the following keys to control different operations during message playback Press to stop message playback Press to skip to repeat playing the current message from the beginning Press twice to skip backward to the previous message Press to skip forward to play next message Press to delete the cu...

Page 43: ...answering machine is turned off 1 Press and U Dto select ANS MACHINE 2 Press OK and U Dto select MEMO 3 Press OK to start memo recording and RECORDING is displayed 4 Press OK to stop memo recording and save the memo OR Press RIGHT SOFT KEY to stop memo recording without saving and return back to ANS MACHINE menu 9 5 Answering Machine Settings You can use the TAM SETTINGS menu through the handset t...

Page 44: ...RECORDING is displayed on the screen 7 Press OK to stop and save your personalized OGM Your newly saved OGM will playback automatically Alternatively press to return to previous screen without saving the personalized OGM 9 5 3 Playback and Delete the Outgoing Message OGM You can playback your own personalized OGM or the pre set OGM for ANS REC mode or ANSWER ONLY mode and choose to delete your per...

Page 45: ...rts playing your OGM You can set the answering machine to answer after two to eight rings or TIME SAVER 1 Press and U Dto select ANS MACHINE 2 Press OK and U Dto select TAM SETTINGS 3 Press OK and U Dto select ANSWER DELAY Available options 2 RINGS 4 RINGS 6 RINGS 8 RINGS or TIME SAVER 4 Press OK and U Dto select your desired answer delay 5 Press OK to confirm 9 5 5 Set the Recording Time of Incom...

Page 46: ...vels of recording incoming message The lower the compression rate the higher the recording quality level attained 1 Press and U Dto select ANS MACHINE 2 Press OK and U Dto select TAM SETTINGS 3 Press OK and U Dto select COMPRESSION 4 Press OK and U Dto select your desired compression rate 5 Press OK to confirm 9 5 8 Activate Remote Access Your phone lets you check your messages or otherwise operat...

Page 47: ...Remote Access 1 Press and U Dto select ANS MACHINE 2 Press OK and U Dto select TAM SETTINGS 3 Press OK and U Dto select REMOTE ACCESS 4 Press OK and U Dto select ON or OFF to turn on or off the remote access respectively 5 Press OK to confirm 9 5 8 3 Access Your Answering Machine Remotely You can ring your Retro Phone from another tone dialing phone to switch on or off the answering machine and li...

Page 48: ...omatically after some messages have been deleted 9 5 9 Call Screening When the answering machine is set to ON and when there is an incoming message the base will start call screening automatically after the preset numbers of rings of answer delay Keys Functions While message is not playing While message is playing 2 Skip forward to play the next message 3 Delete the current message playback 4 Skip...

Page 49: ... MELODY 6 HANDSET RING VOLUME VOLUME 5 EARPIECE VOLUME VOLUME 3 SPEAKER VOLUME VOLUME 4 HANDSET NAME HANDSET 1 number of the actual handset KEY TONE ON LOW BATTERY TONE ON OUT OF RANGE ON AUTO ANSWER OFF DATE FORMAT DD MM YYYY TIME FORMAT 24 HR SET DATE SET TIME ALARM OFF ECO MODE ON Default Settings of Base BASE RINGER MELODY 1 ...

Page 50: ...Default Settings of TAM TAM ON OFF ON ANSWER MODE ANS REC ANSWER DELAY 4 RINGS RECORD TIME 120S BS SCREENING ON REMOTE ACCESS ON COMPRESSION HIGH REMOTE ACCESS PIN 0000 ...

Page 51: ...ions Unplug and plug back in the mains Check that the telephone line cord has been plugged into the base station and the phone socket b Check the base station plug and the 220V plug remove and plug in c Wait until the line is unoccupied d Use the original connection cord When connected to a PBX no and or wrong connection after dialing Dialing prefix is needed Insert the dialing prefix OUT OF RANGE...

Page 52: ... turned off b Message memory may be full a Turn on the answering machine b Erase unnecessary messages I cannot operate the answering machine remotely a You may be entering the wrong remote access code b You may be pressing the dial keys too quickly c The answering machine may be turned off d You may be using a pulse telephone a If you forget the remote access code reset to the default settings b P...

Page 53: ...mm Weight Handset 130 8g Base 322 2g Charger 102g Power consumption Base 2 7W Charger 1 8W Valid range Indoor 50m Outdoor 300m Handset Operating Time Standby time 100Hours Talk time 10Hours RF Parameter Transmission Power Base 25dBm Handset 25dBm Frequency 1881 792 1897 344 MHz Number of Channels 10 Supply Power Base Input AC100 240V output DC6V 450MA adaptor ...

Page 54: ...Customer Service Centre Suite 1601 Lever Tech Centre 69 71 King Yip Street Kwun Tong Kowloon Hong Kong Customer Service Hotline 852 2666 5558 Technical Inquiry Hotline 852 2667 7433 ...

Reviews: