– 10 –
ELECTRICAL CONNECTION
Appliances equipped with a
fl
exible electric supply cord are provided with a three-
prong grounding plug. It is imperative that this plug be connected into a properly grounded three-
prong receptacle. If the receptacle is not the proper grounding type, contact an electrician. Do not
remove the grounding prong from this plug.
Electrical and grounding connections must be in accordance with local codes, or
in the absence of local codes, with the National Electrical Code, ANSI/NFPA 70, or the Canadian
Electrical Code, CSA C22.2, as applicable.
Disconnect electrical power supply and follow lockout / tagout procedures.
The wiring diagram is located on the inside surface of the right side panel as you face the oven. Use
copper wire rated for at least 194°F (90°C) for the connection.
Do not drill a hole in the back panel for electrical connection. Use the strain relief locations
provided. This will allow proper access to components for service.
To make the electrical connections, remove the right side protective panel. Insert the power supply cable
through the strain relief at the rear of the unit. Once the optimal cable length is established for the connections
to the terminal board, clamp the cable using the strain relief. Connect the cables with the terminal board
as indicated on the wiring diagram. The wires on the terminal board must be clamped
fi
rmly.
Gas Model Electrical Connection
Not recommended for ground-fault circuit-interrupter (GFCI) 125-volt, single-phase, 15- and 20-ampere
receptacle. Electronic burner ignition systems are prone to nuisance tripping and possible ignition failure.
GROUNDING
The oven must be properly grounded. Connect the ground conductor to the terminal block in the position
indicated on the terminal block label.
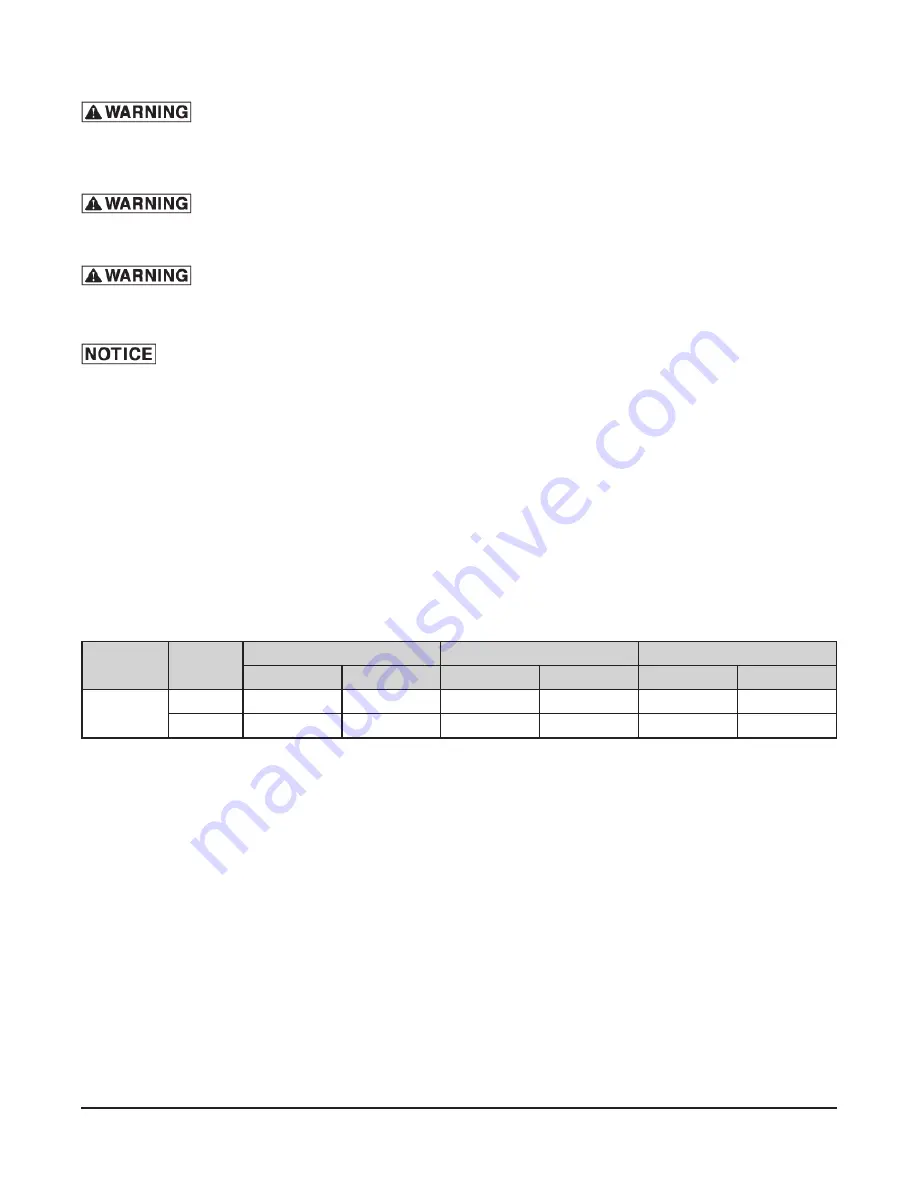
Model
PH
208 V.
240 V.
480 V.
KW
AMP
KW
AMP
KW
AMP
ABC7E
1
18
86.5
24
100
-
-
3
18
50
24
57.8
24
28.9
* Breaker rating is based on electrical standard 125% increase over actual amps used.
NOTE:
Single-phase blower motors are used on these ovens so there is no need to check direction of
motor rotation. The fan will rotate in the proper direction.
VENT HOOD
Local codes may require the oven to be located under an exhaust hood. Information on the construction
and installation of ventilating hoods may be obtained from Vapor Removal from Cooking Equipment, NFPA
Standard No. 96 (latest edition).
BEFORE FIRST USE
Calibration of the humidity measurement system must be performed prior to
fi
rst use. Refer to the
service instructions on how to perform this step prior to
fi
rst use. Altitude and gas supply affect humidity
measurement system so calibration is required before
fi
rst use.
Before using the oven for the
fi
rst time, it must be "burned in" to release any odors that might result from
heating the new surfaces in the oven. Remove any packaging material and instructions from inside and
outside of the unit as the surfaces will get hot. Operate the oven at maximum thermostat setting for 45
minutes.


