background image

– 9 –

HIGH LIMIT DEVICE

A high limit device will shut the fryer down if the oil overheats.  

DO NOT

 relight pilot until oil temperature

has lowered to at least 350°F (176°C).  If the situation persists, contact your local Vulcan-Hart
authorized servicer.

DAILY FILTERING

Turn the gas valve off when draining or filling the fryer.

Allow frying compound to cool before draining or filling.

If you have used melted solid frying compound, always filter the frying compound when the cold zone
area under the tubes is hot and liquefied.  A cold fryer heated up will not drain properly because the frying
compound under the cold zone tube area will remain solid.  If necessary, the drain stick may be used
to carefully stir up solid frying compound to an area above the tubes where it will melt.  After the cold
zone is liquefied, turn the fryer thermostat and gas valve OFF.

Open the filter bag and slip it over the end of the drain valve nipple.  Tie it securely in place behind the
ring on the drain valve nipple so it won't slide off.  Place receptacle under the bag and carefully open
the drain valve.

When the fry tank is empty, flush out scraps and sediment in the fry tank with a small amount of warm
oil.  Allow fry tank to drain thoroughly.

Remove filter bag, dispose of crumbs, and wash filter bag.

If it is necessary to clean the fry tank more thoroughly, follow the procedures shown in CLEANING —
WEEKLY OR AS REQUIRED.

Close drain valve and pour filtered frying compound back into fry tank.

FRYING COMPOUND MAINTENANCE

Frying compound life may be extended by following these procedures:

Do not salt foods over the fryer.

Use good quality frying compound.

Filter frying compound daily at a minimum.

Replace frying compound if it becomes poorly flavored.

Keep equipment and surroundings clean.

Set thermostats correctly.  Do not use excessively high temperatures.

Remove excess moisture and particles from food products before placing in fryer.

Dip out several cups of frying compound from the fry tank every day and add fresh frying compound
to replace it.

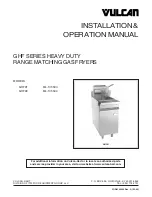
Summary of Contents for GHF90

Page 1: ... GHF90 ML 135504 FORM 35609 Rev A 03 05 GHF91 For additional information on Vulcan Hart or to locate an authorized parts and service provider in your area visit our website at www vulcanhart com VULCAN HART DIVISION OF ITW FOOD EQUIPMENT GROUP LLC P O BOX 696 LOUISVILLE KY 40201 0696 TEL 502 778 2791 ...

Page 2: ...PPLIER IMPORTANT IN THE EVENT A GAS ODOR IS DETECTED SHUT DOWN UNITS AT MAIN SHUTOFF VALVE AND CONTACT THE LOCAL GAS COMPANY OR GAS SUPPLIER FOR SERVICE FOR YOUR SAFETY DO NOT STORE OR USE GASOLINE OR OTHER FLAMMABLE VAPORS OR LIQUIDS IN THE VICINITY OF THIS OR ANY OTHER APPLIANCE WARNING IMPROPER INSTALLATION ADJUSTMENT ALTERATION SERVICE OR MAINTENANCE CAN CAUSE PROPERTY DAMAGE INJURY OR DEATH R...

Page 3: ...s with the specifications on the fryer data plate which is located on the inside of the door Also be sure the fryer is built for the installation elevation The fryer must be restrained with adequate ties to prevent tipping when installed in order to avoid the splashing of hot liquid UNPACKING This fryer was carefully inspected before leaving the factory The transportation company assumes full resp...

Page 4: ...ns which create air cross currents within the room INSTALLATION CODES AND STANDARDS Your Vulcan fryer must be installed in accordance with In the United States of America 1 State and local codes 2 National Fuel Gas Code ANSI Z223 1 latest edition Copies may be obtained from The American Gas Association Inc 1515 Wilson Blvd Arlington VA 22209 3 National Electrical Code ANSI NFPA 70 latest edition C...

Page 5: ...inal installed position Battery Installations When the fryer is part of a battery lineup line the fryer up front to back and side to side with adjacent battery equipment Equipment front tops and manifold pipes must be aligned with adjacent equipment Once the fryer is in its exact location in the battery lineup place a spirit level on top of the fryer Adjust the legs to ensure that the fryer is lev...

Page 6: ...TESTING THE GAS SUPPLY SYSTEM When test pressures exceed 1 2 psig 3 45 kPa the fryer and its individual shutoff valve must be disconnected from the gas supply piping system When test pressures are 1 2 psig 3 45 kPa or less the fryer must be isolated from the gas supply system by closing its individual manual shutoff valve FLUE CONNECTIONS DO NOT obstruct the flow of flue gases from the flue locate...

Page 7: ...thoroughly and wipe dry Seasoning Light seasoning of the backsplash area is required to avoid possible surface corrosion With a soft lint free cloth apply a thin layer of cooking oil over entire backsplash area This should also be done after every cleaning FILL FRY TANK WITH LIQUID SHORTENING CAUTION Before turning the burners on the fry tank must be filled with liquid shortening If this is not do...

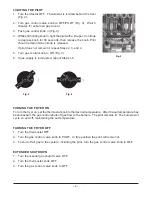
Page 8: ...y is interrupted repeat Steps 1 5 TURNING THE FRYER ON To turn the fryer on set the thermostat knob to the desired temperature After the set temperature has been reached the gas control shuts off gas flow to the burners The pilot remains lit The burners will cycle on and off maintaining the set temperature TURNING THE FRYER OFF 1 Turn the thermostat OFF 2 Turn the gas control valve knob to PILOT I...

Page 9: ...alve nipple Tie it securely in place behind the ring on the drain valve nipple so it won t slide off Place receptacle under the bag and carefully open the drain valve When the fry tank is empty flush out scraps and sediment in the fry tank with a small amount of warm oil Allow fry tank to drain thoroughly Remove filter bag dispose of crumbs and wash filter bag If it is necessary to clean the fry t...

Page 10: ...igerate if necessary 2 Close drain valve and fill tank with hot water Add a good grade of non corrosive grease dissolving commercial cleaner 3 Set thermostat to 300 F 148 C and bring to a boil Boil long enough to loosen all varnish and carbon 15 20 minutes If necessary scrub inside of the tank with a long handled pot brush Do not leave fryer unattended 4 Drain cleaning solution from the fry tank s...

Page 11: ...oap or detergent and water Burned On Foods and Grease Soaking with hot soapy water will help greatly to remove burned on foods and grease Stubborn deposits can be removed with scouring powder mixed into a paste and applied with stainless steel wool or sponges Precautions When scraping off heavy deposits of grease or oil from stainless steel equipment never use ordinary steel scrapers or knives Par...

Page 12: ...l check the flue and clear any obstructions SERVICE AND PARTS INFORMATION To obtain service and parts information concerning this model contact the Vulcan Hart Service Agency in your area refer to our website www vulcanhart com for a complete listing of Authorized Service and Parts depots When calling for service the following information must be available model number serial number manufacture da...

Page 13: ...e lorsque la friteuse est froide vérifier le conduit d évacuation pour s assurer qu il n est pas obstrué SERVICE DE L ENTRETIEN ET PIÈCES DE RECHANGE Pour l entretien de l appareil ou pour obtenir des renseignements sur des pièces de rechange communiquer avec le service de l entretien Vulcan Hart le plus près pour une liste complète de nos succursales de service de l entretien et de pièces autoris...

Page 14: ... l eau savonneuse ou au détergent Graisse et aliments brûlés La graisse et les aliments brûlés s enlèvent facilement à l eau chaude savonneuse Enlever les dépôts rebelles à l aide d une pâte de poudre à récurer que l on applique au moyen d une laine d acier inoxydable ou d une éponge Précautions Ne jamais utiliser une racle en acier ordinaire ou un couteau pour enlever les dépôts tenaces de graiss...

Page 15: ...c d eau chaude et d un produit de nettoyage et de dégraissage sans acide pour usage commercial de qualité 3 Régler le thermostat à 148 C 300 F et amener la solution à ébullition Laisser bouillir suffisamment pour faire décoller toutes les particules de 15 à 20 minutes Frotter l intérieur du bac au besoin au moyen d une brosse à long manche pour marmites Ne pas laisser la friteuse sans surveillance...

Page 16: ...t en place au moyen de la bague du mamelon de façon à ce qu il ne puisse pas glisser Placer un récipient en dessous du sac et ouvrir le robinet de vidange avec précaution Lorsque le bac à frire est vide rincer les résidus présents dans le bac au moyen d une petite quantité de graisse tiède Vidanger complètement le bac et l essuyer Enlever le sac filtrant jeter les résidus et laver le sac S il s av...

Page 17: ...st coupée ALLUMAGE DE LA FRITEUSE Pour mettre la friteuse en marche régler le bouton du thermostat à la température désirée Lorsque la température désirée est atteinte l alimentation en gaz des brûleurs est coupée et la flamme s éteint La friteuse s allume et s éteint par intermittence de manière à maintenir la température ARRÊT DE LA FRITEUSE 1 Régler le thermostat à OFF arrêt 2 Tourner le levier...

Page 18: ...à frire avec un chiffon propre et doux Nettoyer tous les accessoires de la friteuse les rincer et les essuyer Apprêtage Il est nécessaire de procéder à l apprêtage du dosseret pour empêcher la formation de rouille À l aide d un chiffon doux non pelucheux appliquer une mince couche d huile de cuisson sur toute la surface du dosseret Répéter après chaque nettoyage REMPLISSAGE DU BAC À FRIRE DE GRAIS...

Page 19: ...a canalisation de gaz est supérieure à 3 45 kPa 1 2 psi lors d essais de pression débrancher la friteuse et son robinet d arrêt de la conduite de gaz Lorsque la pression d essai est égale ou inférieure à 3 45 kPa 1 2 psi isoler l appareil de la canalisation de gaz en fermant son robinet manuel CONDUIT D ÉVACUATION NE PAS obstruer le débit des gaz de combustion dans le conduit d évacuation à l arri...

Page 20: ...binet d arrêt dans la conduite de gaz en amont de l appareil La canalisation de gaz doit être composée d un tuyau de fonte d au moins 12 7 mm 1 2 po Dans le cas d une friteuse munie d un tuyau flexible doté d un raccord à débranchement rapide en option utiliser un tuyau en fonte de 19 mm 3 4 po à moins que des raccords de réduction de 19 à 12 7 mm 3 4 à 1 2 po soient utilisés S assurer que les tuy...

Page 21: ...es ventilateurs muraux qui produisent des courants d air CODES D INSTALLATION ET NORMES L installation de votre friteuse Vulcan doit se faire selon les codes suivants Aux États Unis 1 Codes locaux 2 Norme ANSI Z223 1 dernière édition du National Fuel Gas Code dont on peut se procurer un exemplaire auprès de l American Gas Association Inc 1515 Wilson Blvd Arlington VA 22209 3 Norme ANSI NFPA n 70 d...

Page 22: ... spécifications de la plaque signalétique se trouvant sur l intérieur de la porte S assurer aussi que l appareil a été conçu en fonction de l altitude de l endroit où il sera installé Stabiliser la friteuse à l aide d attaches appropriées pour l empêcher de basculer et éviter ainsi les éclaboussures de composé à friture chaud DÉBALLAGE Cette friteuse a été inspectée avant de quitter l usine En acc...

Page 23: ...OURANT NE PAS FAIRE FONCTIONNER CET APPAREIL AVERTISSEMENT L INSTALLATION LE RÉGLAGE LA MODIFICATION ET L ENTRETIEN INCORRECTS DE CET APPAREIL PEUVENT CAUSER DES DOMMAGES MATÉRIELS DES BLESSURES ET MÊME LA MORT LIRE LES INSTRUCTIONS D INSTALLATION DE FONCTIONNEMENT ET D ENTRETIEN AVANT DE PROCÉDER À TOUTE INSTALLATION OU TOUT ENTRETIEN MESURE DE SÉCURITÉ NE PAS RANGER NI UTILISER DE L ESSENCE NI T...

Page 24: ...e autorisé le plus près visiter notre site Web à www vulcanhart com VULCAN HART P O BOX 696 LOUISVILLE KY 40201 0696 UNE DIVISION DE GROUPE ITW ÉQUIPEMENT ALIMENTAIRE LLC TÉL 502 778 2791 WWW VULCANHART COM F35609 Rév A 03 05 FRITEUSE AU GAZ POUR AGENCEMENT AUX CUISINIÈRES À SERVICE INTENSE DE LA SÉRIE GHF MODÈLES GHF91 ML 135503 GHF90 ML 135504 ...

Reviews: