51 vwr.com Instruction manual VWR
®
Imager Chemi Premium
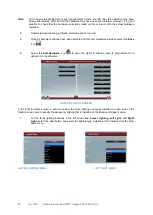
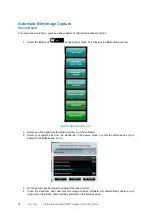
3. Select your sample size from the standards in the pop-up menu, or enter the dimensions of your
sample in the
Size
boxes, in cm.
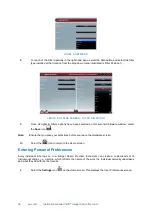
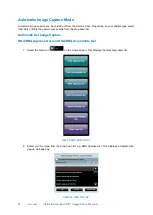
4. From the dye selection screen select the dye e.g. Ethidium Bromide from the list. Use the green
arrow to move forward to the sample positioning screen.
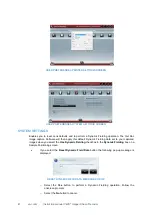
5. On the sample positioning screen adjust the lens controls. Press capture to capture an image.
Visible Protein Gel
For all visible protein gels the visible light converter screen is required. Place the converter screen on top of
the UV transilluminator and then place the sample on top in a central position.
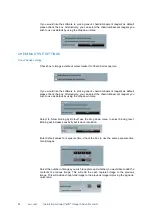
1. Select Visible Protein Gel from the Gel drop down menu.
2. Select the sample size from the standards in the pop-up menu, or enter the dimensions of your
sample in the
Size
boxes, in cm.
3. From the dye selection screen select the dye e.g. Coomassie blue from the list. Use the green
arrow to move forward to the sample positioning screen.
4. On the sample positioning screen adjust the lens controls.
5. Check the box to perform Dynamic Fielding. Press capture to capture an image.
Fluorescent Protein Gel
For all Fluorescent protein gels the black anti-reflective screen is required. Place the black screen on top of
the UV transilluminator and then place the sample on top in a central position.
1. Select Fluorescence Protein Gel from the Gel drop down menu.
2. Select the sample size from the standards in the pop-up menu, or enter the dimensions of your
sample in the
Size
boxes, in cm.
3. From the dye selection screen select the dye (s) e.g. Alexa Fluor 488 from the list. If multiplexing
e.g. Alexa Fluor 488 and Alexa Fluor 647 you can image up to 5 different dyes at a time depending
on your hardware set-up. Use the green arrow to move forward to the sample positioning screen.
Note
if you get
the message
‘You do not have the hardware for this multiplex. To find out more
contact VWR you may need to purchase additional lighting or filters to be able to image this dye.
4. On the sample positioning screen adjust the lens controls.
5. Select the level of binning from the drop down menu. This will bin each colour channel to the same
level.
6. The software will automatically capture individual images for each dye and then combine the
images as a composite image. Gel Doc image capture software will automatically colour the bands
for each dye selected in the composite image according to the emission filter used. You can
change the colour using the ‘arrow’ button at the side of the image.
Stain Free Gel
Stain free gel imaging technology utilises a proprietary polyacrylamide gel chemistry that makes proteins
fluoresce directly in the gel after a period of photoactivation allowing the immediate visualisation of proteins
under UV light.
1. Select Stain Free Gel from the Gel drop down menu.
2. Select the incubation time from the drop down menu. Choose between 1 minute incubation (used
for activating the stain free gel before transferring the gel to membrane), 2.5 minutes (offers
medium sensitivity) and 5 minutes (for maximum sensitivity).
3. Select the sample size from the standards in the pop-up menu, or enter the dimensions of your
sample in the
Size
boxes, in cm.
4. On the sample positioning screen adjust the lens controls. Press capture.
5. The incubation period will start and after the incubation period the image will be captured.

