background image

2

I

nstallatIon

Upon receiving the VWR Vortex Mixer, check to ensure that no damage has 

occurred during shipment. It is important that any damage that occurred in 

transport is detected at the time of unpacking. If you do find such damage the 

carrier must be notified immediately.
After unpacking, remove the protective coverings from the feet and place the 

Vortex Mixer on a level bench or table, away from explosive vapors. Ensure that 

the surface on which the unit is clean and free of dust. Always place the unit on 

a sturdy work surface.
The Vortex Mixer is supplied with a power cord that should be plugged into a 

properly grounded outlet. If the supplied power cord does not meet your needs, 

please use an approved power cord that suits local codes and electric supply. 

Replacement of the plug must be made by a qualified electrician.

M

aIntenance

 & s

ervIcIng

The Vortex Mixer is built for long, trouble-free, dependable service. No lubrication 

or other technical user maintenance is required. The unit should be given the 

care normally required for any electrical appliance. Avoid wetting or unnecessary 

exposure to fumes. Spills should be removed promptly. DO NOT use a cleaning 

agent or solvent on the front panel which is abrasive or harmful to plastics, nor one 

which is flammable. Always ensure the power is disconnected from the unit prior 

to any cleaning. If the unit ever requires service, contact your VWR representative.

e

nvIronMental

 c

ondItIons

Operating Conditions: Indoor use only.

  Temperature: 

18 to 33°C 

  Humidity: 

20% to 85% relative humidity, non-condensing

  Altitude: 

0 to 2000 M above sea level

Non-Operating Storage:

  Temperature: 

-20 to 65°C 

  Humidity: 

20% to 85% relative humidity, non-condensing

Installation Category II and Pollution Degree 2 in accordance with IEC 664.

e

quIPMent

 d

IsPosal

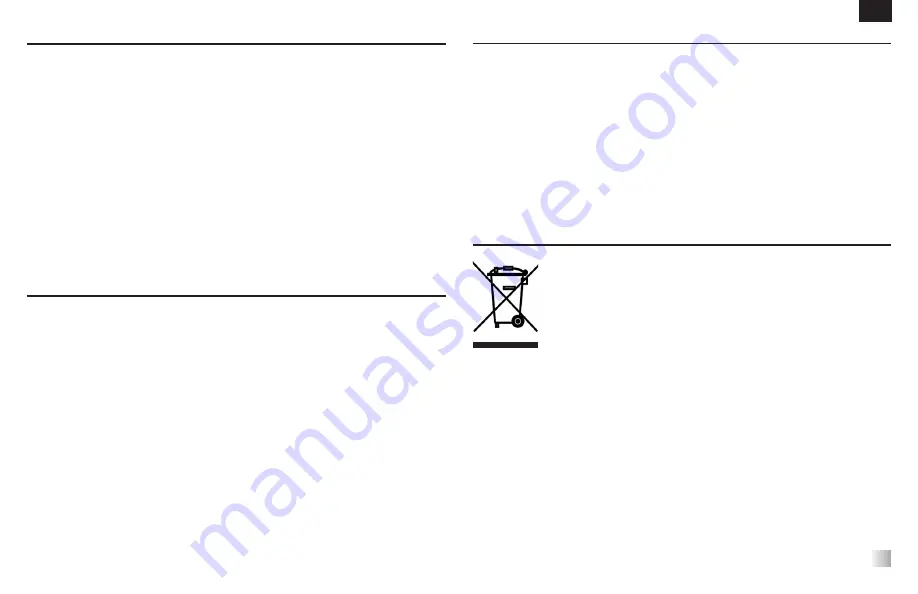
This equipment must not be disposed of with unsorted waste. It is

your responsibility to correctly dispose of the equipment at 

life-cycleend by handing it over to an authorized facility for 

separate collection and recycling. It is also you responsibility to 

decontaminate the equipment in case of biological, chemical, and/

or radiological contamination, so as to protect the persons involved 

in the disposal and recycling of the equipment from health hazards.

For more information about where you can drop off your waste 

of equipment, please contact your local dealer from whom you 

originally purchased this equipment. By doing so, you will help to 

conserve natural and environmental resources and you will ensure 

that your equipment is recycled in a manner that protects human 

health.

EN

Summary of Contents for Analogue Heavy Duty Vortex

Page 1: ...ogue Heavy Duty Vortex Mixers Microplate Vortex Mixers European Catalogue Numbers Analogue Heavy Duty Vortex Mixers Euro plug and Swiss adapter 444 7133 UK plug 444 7134 Digital Heavy Duty Vortex Mixe...

Page 2: ...ntioned remedies IT IS EXPRESSLY AGREED THAT THIS WARRANTY WILL BE IN LIEU OF ALL WARRANTIES OF FITNESS AND IN LIEU OF THE WARRANTY OF MERCHANTABILITY Compliance with local laws and regulations The cu...

Page 3: ...vent on the front panel which is abrasive or harmful to plastics nor one which is flammable Always ensure the power is disconnected from the unit prior to any cleaning If the unit ever requires servic...

Page 4: ...ecting the power cord from the wall outlet Disconnect unit from the power supply prior to maintenance and servicing Spills should be removed promptly DO NOT immerse the unit for cleaning DO NOT operat...

Page 5: ...al 50 60 Hz 0 13 amps 30 watts Fuses 5mm x 20mm 5 amp 250 volt quick acting Speed range On Mode 300 2500rpm Touch Mode 300 3500rpm Orbit 3 5mm Duty rating Continuous duty Controls Analogue Touch off o...

Page 6: ...plays accumulated time continuous mode or how much time is remaining timed mode The display range is from 0 to 9 999 minutes in one 1 second increments The display will indicate minutes and seconds un...

Page 7: ...ng Instructions 1 Make sure the 3 way rocker switch is in the center off position Plug the power cord into a properly grounded outlet 2 For continuous operation push the rocker switch to the right on...

Page 8: ...imed mode programmed time start by pressing the rocker switch to the left touch position Press the up down arrows below the time display until you reach the desired time While running unit in timed mo...

Page 9: ...n the microplate or material of the microplate Rubber vibration dampeners on the bottom of the microplate tray and universal holder may need to be reinserted into the proper position when vortexing at...

Page 10: ...gle Tube Holder onto Vortex Mixer see figure 3 the magnets will hold the Single Tube Holder in place To realign this attachment pull up from the handle until the magnets release check the alignment an...

Page 11: ...to verify the load has not been exceeded 3 Check and clear any possible obstructions of the head mount 4 If the unit still does not work please contact your VWR representative Technical Service For mo...

Page 12: ...tex Mixer Designed for mixing one tube at a time Cat No 444 7136 Single Tube Holder Single tube hands free mixing designed to fit on the VWR Heavy Duty Vortex Mixer Easily attached to the top of mixer...

Page 13: ...8 1 5 to 2 0mL micro tubes Cat No 444 7142 FoamInsertfor15 18mmtesttubes Foam insert holds 20 15 18mm diameter test tubes Ideal for 15mL centrifuge tubes Cat No 444 7144 Foam Insert for 0 5mL microtub...

Page 14: ...Vortex robustes num riques Fiche Euro et adaptateur suisse 444 7130 Fiche RU 444 7131 Agitateurs Vortex microplaque analogiques Fiche Euro et adaptateur suisse 444 0986 Fiche RU 444 0993 Agitateurs Vo...

Page 15: ...le client contre un ventuel dommage ou une ventuelle perte Cette garantie se limitera aux engagements susmentionn s IL EST EXPR SSEMENT CONVENU QUE CETTE GARANTIE REMPLACERA TOUTES LES GARANTIES D AD...

Page 16: ...uit de nettoyage ni de solvant sur le panneau avant qui soit abrasif ou nocif pour les plastiques ni un qui soit inflammable Assurez vous toujours que l alimentation lectrique soit d connect e de l un...

Page 17: ...l unit en d branchant le cordon d alimentation de la prise murale D connectez l unit de l alimentation lectrique avant toute maintenance et tout entretien Les renversements doivent tre rapidement nett...

Page 18: ...20mm 5 amp 250 volt action rapide Plage de vitesse Mode On 300 2500rpm Mode tactile 300 3500rpm Orbital 3 5mm Facteur de service Fonctionnement continu Contr les Analogique Tactile off on interrupteur...

Page 19: ...accumul en mode continu ou le temps restant mode minut La plage d affichage va de 0 9 999 minutes en intervalles d une 1 seconde L affichage indiquera les minutes et les secondes jusqu ce que le minu...

Page 20: ...urez vous que l interrupteur trois voies se trouve au centre en position off arr t Branchez le cordon d alimentation dans une prise de courant correctement mise la terre 2 Pour un fonctionnement conti...

Page 21: ...auche de l interrupteur sur la position touch Appuyez sur les fl ches vers le haut bas sous l affichage de la dur e jusqu obtenir la dur e souhait e Lorsque l unit fonctionne en mode minut l affichage...

Page 22: ...ndre de la hauteur de la jupe de la microplaque ou du mat riau de la microplaque Les mouilleurs vibration en caoutchouc sur le bas de la plaque de la microplaque et le support universel peuvent devoir...

Page 23: ...unique sur l agitateur Vortex voir figure 3 les aimants maintiendront le support de tube unique en place Pour r aligner cet accessoire tirez sur la poign e jusqu ce que les aimants le rel che v rifie...

Page 24: ...iez qu il n y ait pas d ventuelles obstructions de la monture de la t te et nettoyez le cas ch ant 4 Si l unit ne fonctionne toujours pas veuillez contacter votre repr sentant VWR Entretien Technique...

Page 25: ...r un tube la fois N Cat 444 7136 Support de tube unique Tube unique agitation d une seule main con u pour s adapter l agitateur Vortex robuste VWR Facile fixer sur le dessus de l agitateur et est s cu...

Page 26: ...icrotubes 1 5 2 0mL Insert en mousse maintenant 38 microtubes de 1 5 2 0mL N Cat 444 7142 Insert en mousse pour tubes essaide15 18mm Insert en mousse maintenant 20 tubes essai d un diam tre de 15 18mm...

Page 27: ...areas pesadas Enchufe europeo y adaptador suizo 444 7130 Enchufe para Reino Unido 444 7131 Microplaca de los mezcladores de v rtice anal gicos Enchufe europeo y adaptador suizo 444 0986 Enchufe para R...

Page 28: ...contra posibles da os o p rdidas Esta garant a se limitar a las reparaciones antes mencionadas SE HA ACORDADO EXPRESAMENTE QUE ESTA GARANT A ESTAR EN EL LUGAR DE TODAS LAS GARANT AS DE ADECUACI N Y E...

Page 29: ...es Los derrames deber n eliminarse r pidamente NO utilice un agente de limpieza o disolvente en el panel frontal que sea abrasivo o da ino para los pl sticos ni uno que sea inflamable Aseg rese siempr...

Page 30: ...la alimentaci n de la unidad desconectando el cable de alimentaci n de la toma de corriente Desconecte la unidad de la fuente de alimentaci n antes de realizar el mantenimiento y la reparaci n Los der...

Page 31: ...m x 20mm 5 amperios 250 voltio actuaci n r pida Rango de velocidad Modelo activado 300 2500rpm Modo t ctil 300 3500rpm rbita 3 5mm Carga nominal Carga continua Controles Anal gico Tecla off on conmuta...

Page 32: ...o Muestra el tiempo acumulado modo continuo o la cantidad de tiempo restante modo temporizado El rango de visualizaci n es de 0 a 9 999 minutos en incrementos de un 1 segundo La pantalla indicar minut...

Page 33: ...gico 1 Aseg rese de que el interruptor basculante de 3 v as est en el centro en la posici n de apagado Conecte el cable de alimentaci n a una toma de corriente debidamente conectada a tierra 2 Para u...

Page 34: ...ido Para ejecutar en modo temporizado tiempo programado inicie pulsando el interruptor basculante a la izquierda posici n t ctil Presione las flechas arriba abajo debajo de la pantalla de tiempo hasta...

Page 35: ...pender de la altura del fald n en la microplaca o el material de la microplaca Los amortiguadores de vibraciones de goma en la parte inferior de la bandeja de la microplaca y en el soporte universal p...

Page 36: ...sobre el mezclador de v rtice v ase la figura 3 los imanes sostienen el soporte del tubo individual en su lugar Para volver a alinear este accesorio levante el mango hasta que los imanes se suelten r...

Page 37: ...uebe que la carga no haya sido excedida 3 Compruebe y elimine todas las posibles obstrucciones del soporte de la cabeza 4 Si la unidad todav a no funciona p ngase en contacto con su representante de V...

Page 38: ...Dise ado para mezclar un tubo a la vez Cat N 444 7136 Soporte para un solo tubo El tubo individual de mezcla en manos libres est dise ado para adaptarse a un mezclador de v rtice para tareas pesadas V...

Page 39: ...ubos de 1 5 a 2 0 ml Cat N 444 7142 Pieza de espuma para tubos de ensayode15 18mm Pieza de espuma que sujeta tubos de ensayo de entre 20 15 18mm de di metro Ideal para tubos de centrifugaci n de 15 ml...

Page 40: ...resa europea e adattatore per Svizzera 444 7130 Presa britannica 444 7131 Vortex Mixer analogico per micropiastre Cavo con presa europea e adattatore per Svizzera 444 0986 Presa britannica 444 0993 Vo...

Page 41: ...ro possibili danni o perdita Questa garanzia da considerarsi limitata alle ragioni suddette SI ACCETTA CHE QUESTA GARANZIA SOSTITUISCE QUALSIASI ALTRA GARANZIA DI IDONEIT O COMMERCIABILIT Conforme con...

Page 42: ...sia esposto a fumi Eventuali fuoriuscite devono essere eliminate prontamente NON usare un solvente o detersivo abrasivo o pericoloso o che sia infiammabile per la plastica sul pannello frontale Assicu...

Page 43: ...ioni toglierecompletamente l alimentazione elettrica dall unit scollegando il cavo dalla presa Scollegare l unit dall alimentazione per la manutenzione e i controlli Le fuoriuscite devono essere rimos...

Page 44: ...amp 250 volt ad azione rapida Velocit Modalit On 300 2500rpm Modalit touch 300 3500rpm Orbita 3 5mm Cicli operativo Ciclo continuo Controlli Analogico Touch off on interruttore oscillante Manopola vel...

Page 45: ...ce B Schermo per la durata Mostra il tempo accumulato modalit continua o il tempo rimasto modalit a tempo Il tempo indicato va da 0 a 9 999 minuti con incrementi di un 1 secondo Lo schermo indicher i...

Page 46: ...ttore a 3 opzioni sia in posizione centrale in posizione off attaccare il cavo dell alimentazione in una presa della corrente con messa a terra 2 Per la modalit continua spostare l interruttore oscill...

Page 47: ...ar funzionare il dispositivo in modalit programmata portare l interruttore oscillante verso sinistra in posizione touch Premere le frecce su gi sotto lo schermo della durata fino a raggiungere la dura...

Page 48: ...a micropiastra o dal suo materiale Il riduttore delle vibrazioni in gomma sulla parte inferiore del vassoio della micropiastra e il supporto universale potrebbero dover essere reinserite nella posizio...

Page 49: ...ortex mixer vd Immagine 3 la calamita terr il supporto in posizione Per riallineare questo accessorio tirare verso l alto la manopola fino a quando la calamita non rilasciata controllare l allineament...

Page 50: ...erato il carico massimo 3 Controllare ed eliminare qualsiasi ostacolo alla testa del dis positivo 4 Se l unit continua a non funzionare contattare il rappresent ante VWR Servizio Tecnico Per maggiori...

Page 51: ...44 7136 Supporto per tubo singolo Il tubo singolo per n mescolamento in cui non necessario usare le mani progettato per essere usato con il Vortex mixer resistente di VWR Facile da installare sopra la...

Page 52: ...to a schiuma per tubi da test di15 18mm Inserto a schiuma per tubi da test di 15 18mm 32 Ideale per tubi da centrifuga di 15mL Cat No 444 7144 Inserto a schiuma per microtubi da 0 5mL Inserto a schium...

Page 53: ...xmischer Euro Stecker und Adapter f r die Schweiz 444 7130 GB Stecker 444 7131 Analoger Mikrotiterplatten Vortexmischer Euro Stecker und Adapter f r die Schweiz 444 0986 GB Stecker 444 0993 Digitaler...

Page 54: ...f hrten Abhilfema nahmen beschr nkt ES WIRD AUSDR CKLICH VEREINBART DASS DIESE GARANTIE ALLE EIGNUNGSGARANTIEN UND DIE MARKTG NGIGKEITSGARANTIE ERSETZT Einhaltung rtlicher Gesetze und Vorschriften Der...

Page 55: ...rnt werden Verwenden Sie KEINE Reinigungs oder L sungsmittel auf dem Frontpanel die auf Kunststoff scheuernd oder sch dlich wirken oder leicht entflammbar sind Achten Sie immer darauf dass das Ger t v...

Page 56: ...Sie die Stromversorgung des Ger ts vollst ndig ab indem Sie das Netzkabel von der Steckdose trennen um einen Stromschlag zu vermeiden Trennen Sie das Ger t vor der Wartung und Instandhaltung von der...

Page 57: ...re 30 watt Sicherungen 5mm x 20mm 5 Ampere 250 volt schnell wirkend Drehzahlbereich AN Modus 300 2500rpm Touch Modus 300 3500rpm Umlauf 3 5mm Einschaltdauer Dauerbetrieb Steuerungen Analog Touch Aus A...

Page 58: ...eigt die akkumulierte Zeit Dauerbetrieb oder die verbleibende Zeit Timer Modus an Der Anzeigebereich reicht von 0 bis 9999 Minuten in Schritten von 1 Sekunde Die Anzeige zeigt die Minuten und Sekunden...

Page 59: ...icher dass sich der 3 Wege Kippschalter in der mittleren Position der Aus Stellung befindet Stecken Sie das Netzkabel in eine ordnungsgem geerdete Steckdose 2 F r den Dauerbetrieb m ssen Sie den Kipps...

Page 60: ...m ssen Sie zuerst den Kippschalter nach links in die Touch Stellung dr cken Dr cken Sie die Auf Ab Pfeiltasten unterhalb der Drehzahlanzeige bis die gew nschte Zeit erreicht ist Bei Betrieb des Ger ts...

Page 61: ...e oder dem Material der Mikrotiterplatte abh ngen Gummi Schwingungsd mpfer auf der Unterseite des Mikrotiterplatte Tabletts und des Universalhalters m ssen eventuell wieder in die richtige Positionein...

Page 62: ...erung auf den Vortexmischer herab siehe Abbildung 3 bis die Magnete die Position der Einzelr hrchenhalterung fixieren Um diese Befestigung neu auszurichten m ssen Sie den Griff nach oben ziehen bis di...

Page 63: ...itten wurde 3 Pr fen und entfernen Sie alle m glichen Hindernisse an der Kopfhalterung 4 Wenn das Ger t immer noch nicht funktioniert wenden Sie sich an einen VWR Vertreter Technische Daten F r weiter...

Page 64: ...7136 Einzelr hrchenhalterung Freihand Mischen von Einzelr hrchen entwick elt f r den Einsatz mit dem VWR Hochleistungs Vortexmischer Kann leicht auf dem Kopf des Mischers befestigt werden und wird mag...

Page 65: ...aumstoffeinsatz f r 15 18mm Reagenzgl ser Schaumstoffeinsatz h lt 20 15 18mm Reagenzgl ser Ideal f r 15 ml Zentrifugen r hrchen Kat Nr 444 7144 Schaumstoffeinsatz f r 0 5 ml Mikror hrchen Schaumstoffe...

Page 66: ...es Digitais Vortex para Uso Intensivo Ficha Europeia e adaptador Su o 444 7130 Ficha UK 444 7131 Misturadores Anal gicos Vortex de Microplaca Ficha Europeia e adaptador Su o 444 0986 Ficha UK 444 0993...

Page 67: ...ente a unidade desligando o cabo de alimenta o da tomada de parede Desligue a unidade da fonte de alimenta o antes da manuten o e assist ncia Os derrames devem ser removidos imediatamente N O mergulhe...

Page 68: ...tempo acumulado modo cont nuo ou o tempo restante modo temporizado O intervalo de exibi o de 0 a 9 999 minutos em incrementos de 1 um segundo O visor indicar os minutos e segundos at que o temporizado...

Page 69: ...erifique se a carga n o foi excedida 3 Verifique e limpe todas as obstru es poss veis na monta gem da cabe a 4 Se a unidade ainda n o funcionar contacte o seu represent ante VWR Servi o T cnico Para o...

Page 70: ...oor zwaar gebruik Eurostekker en Zwitserse adapter 444 7130 Britse stekker 444 7131 Analoge microtiterplaat vortexmixers Eurostekker en Zwitserse adapter 444 0986 Britse stekker 444 0993 Digitale micr...

Page 71: ...lektrische schokken te voorkomen moet u de stroom van het apparaat volledig uitschakelen door de stekker uit het stopcontact te halen Haal de stekker uit het stopcontact v r reparatie of onderhoud Mor...

Page 72: ...ijd continu modus weer of hoeveel tijd er nog over is getimede modus Het weergavebereik is van 0 tot 9 999 minuten in stappen van een 1 seconde Het display geeft minuten en seconden aan tot de timer 9...

Page 73: ...overschreden 3 Controleer en verwijder eventuele obstructies van de kop 4 Als het apparaat nog steeds niet functioneert neem dan con tact op met de VWR dealer Technische Assistentie Voor meer informa...

Page 74: ...dere Europeisk plugg og sveitsisk adapter 444 7130 Engelsk plugg 444 7131 Analoge vortex blandere med mikroplate Europeisk plugg og sveitsisk adapter 444 0986 Engelsk plugg 444 0993 Digitale vortex bl...

Page 75: ...str mmen til enheten fullstendig ved koble str mledningen fra stikkontakten Koble enheten fra str mforsyningen f r vedlikehold og service S l m fjernes omg ende Enheten SKAL IKKE senkes i vann for re...

Page 76: ...idsangivelse viser akkumulert tid kontinuerlig modus eller hvor mye tid som gjenst r tidsbestemt modus Visningsomr det er fra 0 til 9999 minutter i trinn p ett 1 sekund Skjermen viser minutter og seku...

Page 77: ...for kontrollere at lasten ikke er overskredet 3 Unders k og fjern eventuelle hindringer for hodet 4 Hvis enheten fremdeles ikke fungerer ta kontakt med VWR representanten Teknisk Service For mer infor...

Page 78: ...Duty Vortex Mixers EU stik og Schweizisk adapter 444 7130 UK stik 444 7131 Analogue Microplate Vortex Mixers EU stik og Schweizisk adapter 444 0986 UK stik 444 0993 Digital Microplate Vortex Mixers E...

Page 79: ...eden ved at tage netledningen ud af stikkontakten F r vedligeholdelse og servicering skal enheden afbrydes fra str mforsyningen Spild b r fjernes omg ende Neds nk IKKE enheden i v ske i forbindelse me...

Page 80: ...B Tidsvisning Viser akkumulerede tid kontinuerlig tilstand eller hvor meget tid der er tilbage tidstilstand Displayet g r fra 0 til 9999 minutter i en 1 sekund intervaller Displayet viser minutter og...

Page 81: ...tionen 2 Kontroller at belastningen ikke bliver overskre det 3 Kontroller og fjern eventuelle forhindringer p hovedholderen 4 Hvis enheden stadig ikke virker skal du kon takte din VWR repr sentant Tek...

Page 82: ...ch schweiziska adapter 444 7130 Europeisk plugg 444 7131 Analog mikrovirvelblandare Euro kontakt och schweiziska adapter 444 0986 Europeisk plugg 444 0993 Digitala mikrovirvelblandare Euro kontakt och...

Page 83: ...mmen till enheten genom att koppla ur str msladden ur v gguttaget Koppla enheten fr n str mf rs rjningen f re underh ll och service Spill b r tas bort omedelbart INTE ner produkten f r reng ring Anv...

Page 84: ...funktionen B Tidsvisning Visar ackumulerad tid kontinuerligt l ge eller hur mycket tid som terst r tidsl ge Displayen str cker sig fr n 0 till 9999 minuter i en 1 sekund steg Displayen visar minuter o...

Page 85: ...kontrollera lasten inte har verskridits 3 Kontrollera och rensa eventuella hinder av huvudf stet 4 Om enheten fortfarande inte fungerar kontakta din VWR representant Teknisk Service F r mer informati...

Page 86: ...rtex sekoittimet Europistoke ja Sveitsi sovitin 444 7130 UK pistoke 444 7131 Analogiset mikrotiitterilevyn vortex sekoittimet Europistoke ja Sveitsi sovitin 444 0986 UK pistoke 444 0993 Digitaaliset m...

Page 87: ...yritet n nostaa niist kiinni pit m ll AROITUS S hk iskujen v ltt miseksi laite tulee irrottaa kokonaan verkkovirrasta irrottamalla laitteen virtapistoke pistorasiasta Laite tulee irrottaa virtal htees...

Page 88: ...n n ytt N ytt kulunutta aikaa jatkuva tila tai j ljell olevaa aikaa ajastettu tila N yt alue on 0 9 999 minuuttia yhden 1 sekunnin tarkkuudella N yt ss esitet n aika minuuteissa ja sekunneissa kunnes...

Page 89: ...arkista ett kuorma ei ylit sallittua 3 Tarkista ja poista mahdolliset p osan esteet 4 Jos laite ei viel k n toimi ole hyv ja ota yhteytt VWR edustajaasi Tekninen Huolto Lis tietoja tai teknist huoltoa...

Page 90: ...teherbir s kever g pek Eur pai csa dug s sv jci adapter 444 7130 UK dug 444 7131 Anal g mikrolemezes kever g p Eur pai csa dug s sv jci adapter 444 0986 UK dug 444 0993 Digit lis mikrolemez kever g p...

Page 91: ...ljesen az ramk bel a csatlakoz b l val kih z s val H zza ki a k sz l ket az ramell t sb l karbantart s s szervizel s el tt A ki nt seket gyorsan fel kell t r lni NE mossa a k sz l ket viz al meritve N...

Page 92: ...tja a felhalmozott id t folyamatos m d vagy hogy mennyi id maradt m g id zit s m d A kijelz tartom nya 0 s 9 999 perc k z tt van egy 1 m sodperces emel sekkel A kijelz jelzi a perceket s m sodperceket...

Page 93: ...azt nem l pte t l 3 Ellen rizze s t r lj n minden lehets ges akad lyt a t lcs rn l 4 Ha a k sz l k m g mindig nem m k dik vegye fel a kapcso latot a VWR k pvisel vel M szaki Szerviz Tov bbi adatokat...

Page 94: ...iki wirowe do du ych obci e Wtyczka euro oraz adapter szwajcarski 444 7130 Wtyczka UK 444 7131 Analogowe mikrop ytkowe mieszalniki wirowe Wtyczka euro oraz adapter szwajcarski 444 0986 Wtyczka UK 444...

Page 95: ...GA ABY unikn pora enia pr dem ca kowicie od cz zasilanie przez wyj cie wtyczki w gniazda na cianie Przed konserwacj lub napraw od cz urz dzenie od r d a napi cia Nale y od razu usuwa wycieki NIE zanur...

Page 96: ...B Wy wietlanie czasu Wy wietla czas kt ry ju min tryb ci g y lub ile czasu jeszcze pozosta o tryb czas wki Wy wietlany zakres wynosi od 0 do 9999 minut przy zmianie co 1 sekund Wy wietlacz wskazuje m...

Page 97: ...nie nie jest za du e 3 Skontroluj czy nie dosz o do uszkodzenia g owicy 4 Je eli urz dzenie dalej nie pracuje skontaktuj si ze swoim sprzedawc VWR Serwis Techniczny W celu uzyskania wi kszej ilo ci in...

Page 98: ......

Page 99: ......

Page 100: ...Email vwr_india vwr com Ireland Northern Ireland VWR International Ltd VWR International Northern Ireland Ltd Orion Business Campus Northwest Business Park Ballycoolin Dublin 15 Tel 01 88 22 222 Fax 0...

Reviews: