


11
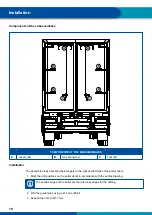
Installation
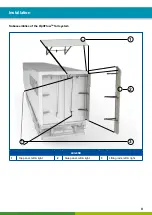
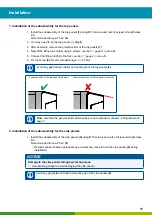
1. Installation of the subassembly for the top panels
1. Install the subassembly of the top panels
(1)
using M10 screws and nuts of at least strength class
8.8.
Recommended torque: 25 ±3 Nm
2. You may need to tip the top panels (1) slightly.
3.
After assembly, remove the protective film of the top panels
(1)
.
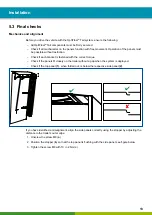
4.
Now fit the lifting rods holder using 2 screws
A
.
5. Connect the lifting rod
(3)
to the fork
C
.
6. Fix the screw
(C)
. Recommended torque: 3 +0.5 Nm.
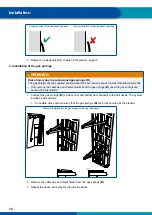
Avoid any gap between trailer and sealing lip of the top panels
(2)
.
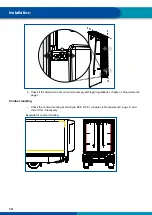
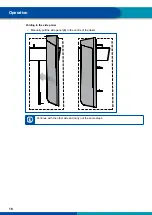
Correct position of the top panel (side view)
Incorrect position of the top panel (side view)
Make sure that the general trailer dimensions are not exceeded
2. Installation of the subassembly for the side panels
1. Install the subassembly of the side panels
(2)
using M10 screws and nuts of at least strength class
8.8.
Recommended torque: 25 ±3 Nm
•
Recommended: Where appropriate use a workshop crane to hold the side panels
(2)
during
installation.
NOTICE
Damage to the side panels through workshop crane
–
Use retaining straps to avoid damaging the side panels.
Avoid any gap between trailer and sealing lip of the side panels
(2)
.
Summary of Contents for OptiFlow Tail
Page 1: ...INSTALLATION MANUAL...
Page 2: ......
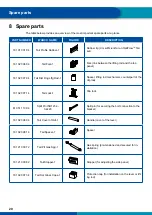
Page 21: ...21 Spare parts...
Page 22: ...Notes 22...
Page 23: ......


