2 /4
Feed options
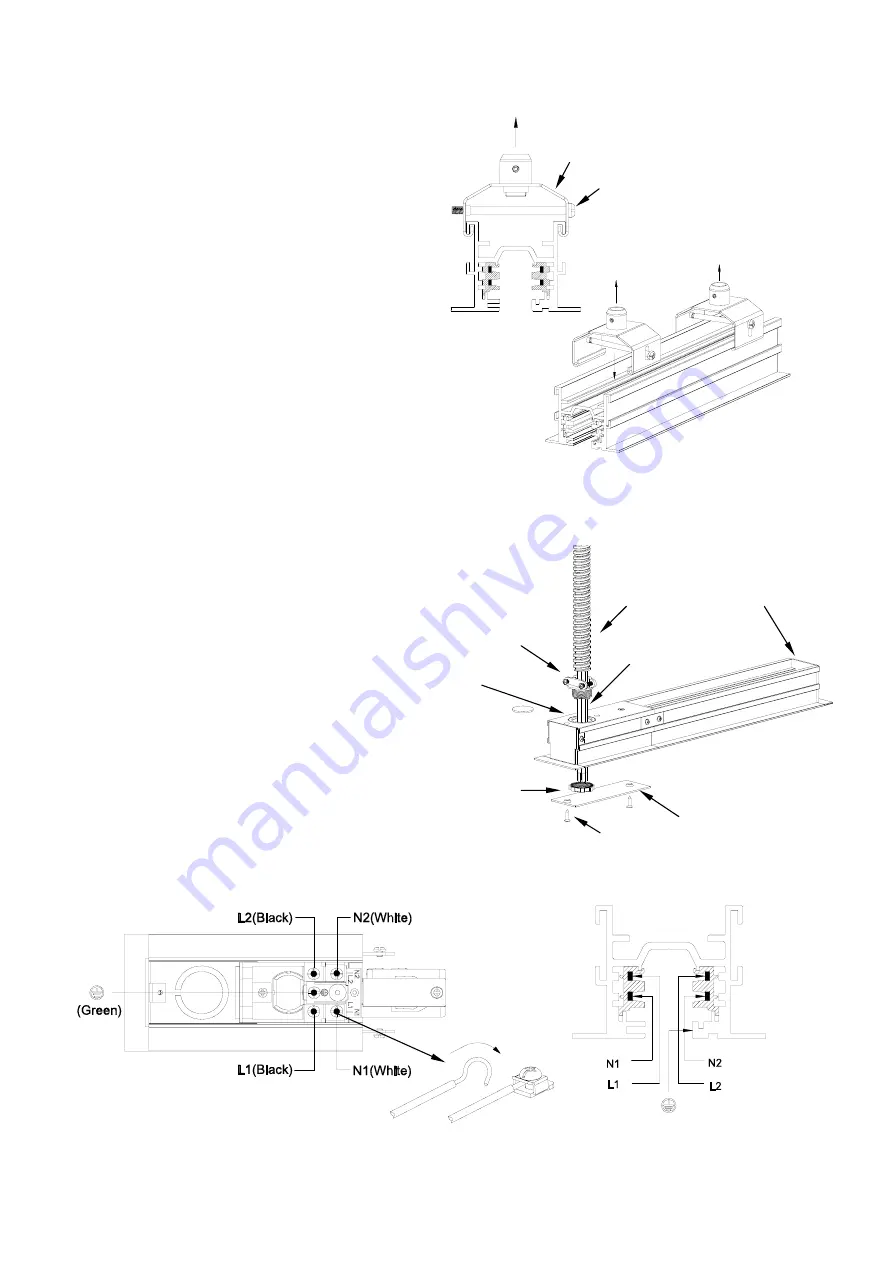
Live End Connector can be fed directly
from above using a 1/2 inch or 3/4 inch
electrical connector.
z
Make sure power is off before wiring.
z
Note the polarity indicator of the track and
accessories
z
Remove cover and save.
z
Remove knockout in top plate.
z
Secure conduit by conduit connector (1/2 or 3/4
size recommended) to top plate and lock the
nut.
z
Pass
wires
(
12AWG
)
through conduit and
connector .Cut and strip each end of the wire,
then a single conductor is clamped directly
under the head of the screw when it is
tightened. The single conductor is bent around
the screw in a 3/4 loop, insert the wires to the
corresponding terminals (see fig. below) and
secure tightly with a screw.
z
Secure the track to the ceiling (see mounting
options on previous page).
z
Replace
the
cover.
z
Insert the spline and secure to the track with two
screws.
C: Suspension Mounting
z
Slide or snap the hanger clips (WMT-RT) onto
the track, and space the clips evenly along the
track length.
z
Secure the bolt and make sure the hanger clips
tightly hook in the track groove.
z
Assemble the stem or cable suspender
(
refer to
WT/WHT track suspension system
)
to the
hanger clips. Level track and secure to building
structure.
z
Recommended: two clips for 4' track, three clips
for 8' track, and four clips for 12' track. Always
use more than one clip for each track length.
Additional clips may be added for more support.
To Building Structure
Hanger Clip
Bolt
Knock out
Conduit Connector
(1/2” or 3/4”)
Conduit
Electrical Wire (5-12AWG)
Locking Nut
Screw
Cover
End Cap


