Maintenance
PS (3-Phase) Series
wc_tx000132gb.fm
30
A worn impeller may have sharp edges that can cause injury, and
should be handled with care.
5.3.4
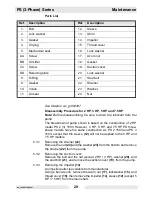
If necessary, remove the volute (10) and remove the mechanical seal
(5).
After removing the bolt (1) and the lockwasher (2), remove the volute
(10) from the pump. At this time, be careful not to damage the sliding
surface of the mechanical seal (5). Remove the mechanical seal (5)
from the main shaft.
Note:
Also refer to the “Mechanical Seal Handling Procedure” that
comes with the mechanical seal sold separately as a spare part.
See Graphic: wc_gr000337
Reassembly Procedure
5.3.5
The reassembly procedure is the reverse sequence of disassembly.
Note:
After completing reassembly, do not forget to pour the specified
amount of lubricant into the pump.
Note:
The gaskets and O-rings must be replaced with new parts. Also
replace any parts that are worn or damaged.
5.3.6
Using a clean rag without lubricant, wipe the sliding surface of the
mechanical seal (5). Apply lubricant to the outer circumference of the
cushion rubber to facilitate insertion.
Note:
For further details on how to install the mechanical seal (5), refer
to the “Mechanical Seal Handling Procedure” that comes with the
mechanical seal (5) that is sold separately as a spare part.
5.3.7
After installing the impeller (14), and after completing the reassembly,
check that the impeller (14) rotates smoothly and that it does not come
in contact with the suction cover (19).
5.3.8
To make sure that the pump operates normally, perform a trial
operation before placing the pump back into service.
CAUTION
Summary of Contents for PS 43703
Page 1: ...Pump PS 3 Phase Series OPERATOR S MANUAL 0154623en 002 0107 0 1 5 4 6 2 3 E N ...
Page 2: ......
Page 4: ...Table of Contents PS 3 Phase Series wc_bo0154623002enTOC fm 2 ...
Page 38: ......
Page 39: ......
Page 40: ......
Page 41: ......
Page 42: ......
Page 43: ......
Page 44: ......
Page 45: ......
Page 46: ......
Page 47: ......
Page 48: ......
Page 49: ......


