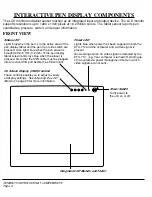
INTERACTIVE PEN DISPLAY COMPONENTS
Page 8
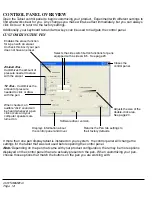
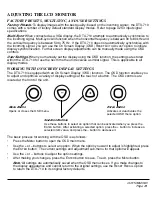
PEN COMPONENTS
As you work with the DTU-710, you can rest your hand lightly on the display screen, just as if it were a
drawing board or sheet of paper. Hold the Wacom pen like you would a pencil. Make sure the side
switch is in a convenient location where you can press it with your thumb or forefinger, but not
accidentally press the switch while drawing. You can tilt the pen in any way that feels most comfortable
for drawing.
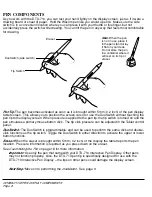
Pen Tip:
The pen becomes activated as soon as it is brought within 5 mm (0.2 inch) of the pen display
tablet screen. This allows you to position the screen cursor or use the DuoSwitch without touching the
pen tip to the display screen. When pressure is applied to the pen tip, the tip switch is turned on and the
pen simulates a primary mouse button click. The tip click pressure can be adjusted in the Tablet control
panel.
DuoSwitch:
The DuoSwitch is programmable, and can be used to perform the same click and double-
click functions as the tip switch. Toggle the DuoSwitch in either direction to activate the upper or lower
button functions.
Eraser:
When the eraser is brought within 5 mm (0.2 inch) of the display the tablet reports the pen
location. Pressure information is reported as you press down on the eraser.
See
Customizing the Pen
on page 18 for more information.
Important:
Use only the pen that came with your DTU-710 Interactive Pen Display. Other pens
may not function properly. Also, the DTU-710 pen tip is specifically designed for use with the
DTU-710 Interactive Pen Display – the tips on other pens could damage the display screen.
Next Step:
Move on to performing the
Installation
. See page 9.
DuoSwitch (side switch)
Tip Switch
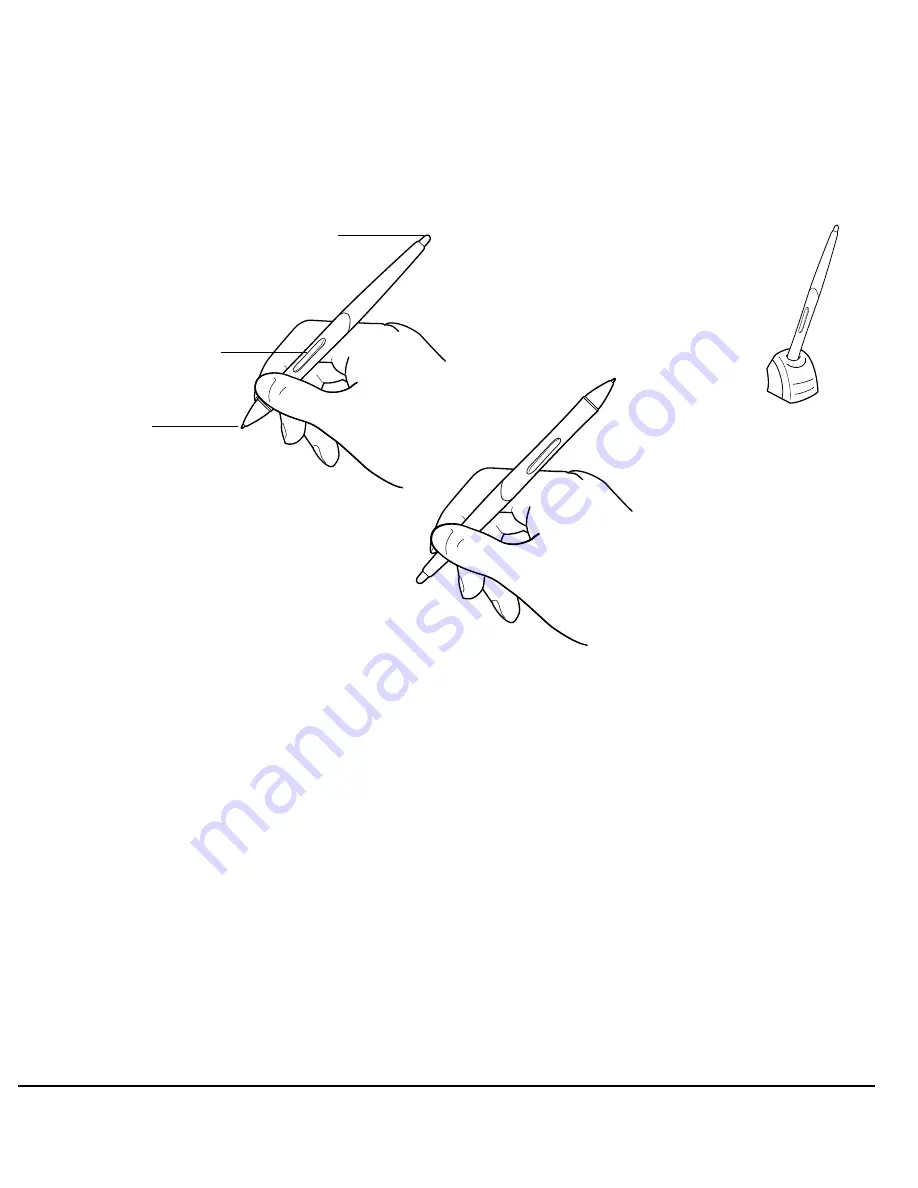
Note:
When the pen
is not in use, place it
in the pen stand or lay
it flat on your desk.
Do not store the pen
in a container where it
will rest on its tip or
eraser.
Eraser
DTU-710_Manual.fm Page 8 Monday, August 30, 2004 3:49 PM


