background image

CUSTOMIZING

     Page  19

CALIBRATING THE DTU-710

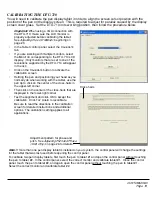
You will need to calibrate the pen display tablet in order to align the screen cursor position with the 
position of the pen on the display screen.  This is required to adjust for parallax caused by the display 
screen cover glass.  Set the DTU-710 in its working position, then follow the procedure below. 

Important:

 When using a VGA connection with 

the DTU-710, make sure the LCD monitor is 
properly adjusted before calibrating the tablet.  
See 

Adjusting the LCD Monitor

, beginning on 

page 23.

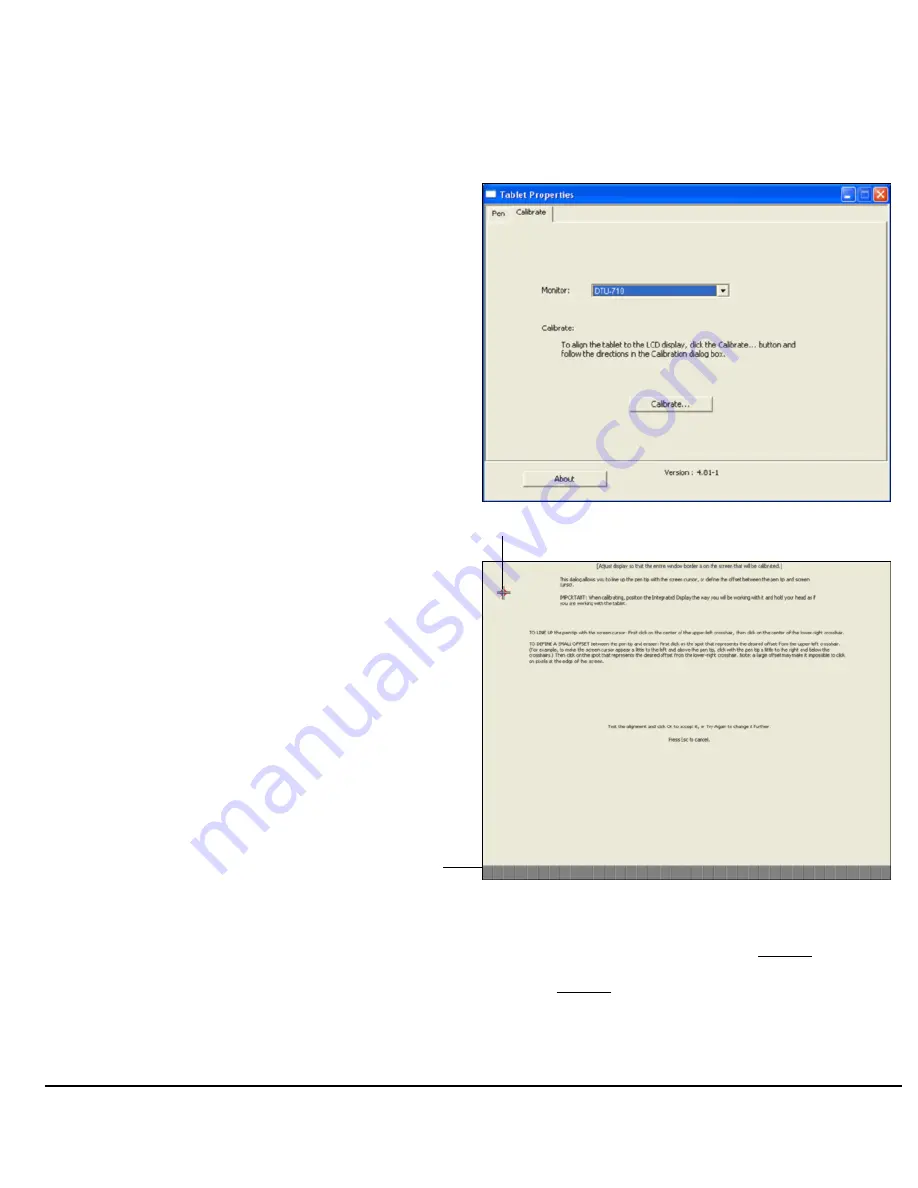
In the Tablet control panel, select the C

ALIBRATE


tab.

If you are working with multiple monitors, select 
the M

ONITOR

 corresponding to the DTU-710 LCD 

display.  (Only monitors that are set to one of the 
resolutions supported by the DTU-710 will appear 
in the list.)

Click on the C

ALIBRATE

 button to activate the 

calibration screen.

Holding the pen and positioning your head as you 
normally do when working with the tablet, use the 
pen tip to click on the center of the cross-hairs in 
the upper-left corner.

Then click on the center of the cross-hairs that are 
displayed in the lower-right corner.

Test the alignment and click OK to accept the 
calibration.  Click T

RY

 A

GAIN

 to recalibrate.

Be sure to read the directions in the calibration 
screen for detailed instructions and additional 
options.  The calibration setting applies to all 
applications.

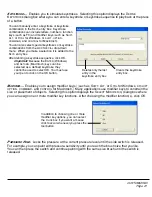
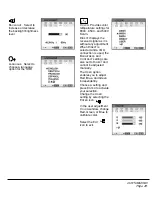
Cross-hairs

Adjustment pattern for phase and 
pitch.  See 

Adjusting Pitch and Phase 

(VGA Only)

 on page 26 for details.

Note:

 If more than one pen display tablet is installed on your system, the control panel will change the settings 

for the tablet that was last used before opening the control panel.

To calibrate two pen display tablets, first touch the pen to tablet #1 and open the control panel without touching 
the pen to tablet #2.  In the control panel, select the correct monitor and calibrate tablet #1.  Close the control 
panel, touch the pen to tablet #2, and again open the control panel without touching the pen to tablet #1.  
Select the correct monitor and calibrate tablet #2.

DTU-710_Manual.fm  Page 19  Monday, August 30, 2004  3:49 PM

Summary of Contents for CINTIQ 17SX

Page 1: ...Interactive Pen Display Installation Guide User s Manual www wacom com DTU 710...

Page 2: ...nual Penabled and DuoSwitch are trademarks and Wacom is a registered trademark of WACOM Company Limited Photoshop is either a registered trademark or a trademark of Adobe Systems Incorporated in the U...

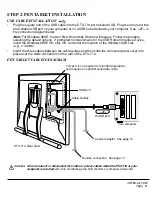
Page 3: ...te pieces of hardware the LCD monitor and the pen tablet Therefore the installation process is completed in two stages First install the LCD monitor portion of the DTU 710 Then install the DTU 710 s p...

Page 4: ...e the DTU 710 where Temperature changes are severe or exceed specifications e g outdoors or inside a vehicle The DTU 710 and pen are exposed to direct sunlight or heat from an appliance The DTU 710 an...

Page 5: ...the tilt angle of the DTU 710 be careful to avoid catching your finger in the gap of the movable portion of the stand CAUTION Do not lift the DTU 710 by the stand this may damage the stand mechanism W...

Page 6: ...710 15 Setting Up Your Work Area 15 Using the Pen 16 Customizing 17 Opening the Control Panel 17 Control Panel Overview 18 Control Panel Settings 20 Adjusting the LCD Monitor 23 Troubleshooting 28 Te...

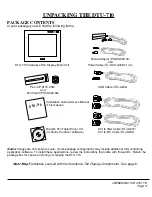
Page 7: ...t came with those CDs Retain the package box for use when storing or shipping the DTU 710 Next Step Familiarize yourself with the Interactive Pen Display Components See page 6 DTU 710 Interactive Pen...

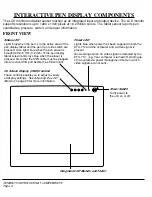
Page 8: ...when power has been supplied to both the DTU 710 and the computer and a video signal is present Glows orange when no video signal is detected by the DTU 710 e g Your computer is turned off starting u...

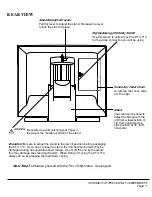
Page 9: ...n place Stand The stand can be used to adjust the tilt angle of the unit from a low position of 18 from horizontal to a high position of 72 from horizontal CAUTION Be careful to avoid catching your fi...

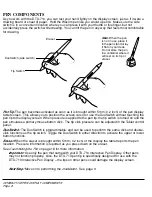
Page 10: ...pressure can be adjusted in the Tablet control panel DuoSwitch The DuoSwitch is programmable and can be used to perform the same click and double click functions as the tip switch Toggle the DuoSwitc...

Page 11: ...used alone or with another display such as a CRT monitor or LCD projector To use the DTU 710 with another display you will need two video cards or a video card with dual output Depending on the capab...

Page 12: ...wn for DIGITAL DVI or ADC and move it up for ANALOG VGA See A in the connection diagram on page 11 Follow the instructions below for your video connector See B in the connection diagram on page 11 Be...

Page 13: ...ot come with the DTU 710 use of an improper cable may damage the unit Make sure your video card has a DVI or VGA connector and that you correctly set the DTU 710 DIGITAL ANALOG DVI VGA switch for the...

Page 14: ...lay you may first need to enable the DTU 710 in your Display Properties control panel After the LCD monitor portion of the DTU 710 is working to your satisfaction move on to the next section Step 2 Pe...

Page 15: ...insert the Windows 98SE CD click OK and enter the location of the Windows CAB files e g D WIN98 Insert the three cables between the cable guides and then slide the connector panel cover into place ov...

Page 16: ...on program After the software installation has been completed make sure you can use your pen on the DTU 710 display to move the screen cursor The screen cursor should be located approximately beneath...

Page 17: ...10 the pen and your keyboard so they are easily accessible without unnecessary reaching The pen display and any other monitors should be positioned so you can view them comfortably with a minimum of e...

Page 18: ...From the GENERAL tab select the option SINGLE CLICK TO OPEN AN ITEM POINT TO SELECT Windows 98SE Open a folder select the VIEW pull down menu and FOLDER OPTIONS From the GENERAL tab select the WEB ST...

Page 19: ...ay tablet Windows Click on the Windows START button and choose ALL PROGRAMS For versions other than Windows XP choose the PROGRAMS group Then select TABLET PROPERTIES and choose the TABLET PROPERTIES...

Page 20: ...ions displayed on the control panel than are actually present on the pen When customizing your pen choose those options that match the buttons on the pen you are working with Returns the PEN tab setti...

Page 21: ...en working with the tablet use the pen tip to click on the center of the cross hairs in the upper left corner Then click on the center of the cross hairs that are displayed in the lower right corner T...

Page 22: ...e click For easier double clicking use this function instead of tapping twice with your pen tip MIDDLE CLICK Simulates a middle mouse button click RIGHT CLICK This is the default setting for the lower...

Page 23: ...ou can then press the switch and continue painting with the same size brush until the switch is released You can manually enter a keystroke or keystroke combination in the KEYS entry box Keystroke com...

Page 24: ...o the entire space on each monitor and the screen cursor will be displayed on each monitor simultaneously With the pen display tablet correctly calibrated in pen mode the screen cursor should always f...

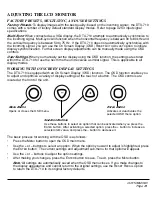
Page 25: ...SETTINGS The DTU 710 is equipped with an On Screen Display OSD function The OSD function enables you to adjust and optimize a variety of display settings at the touch of a button The OSD controls are...

Page 26: ...rtical distortion lines To automatically adjust use the RESET option RESET Provides two options Use AUTO ADJUST to reset only the image parameters Use RECALL to reset all screen options to the factory...

Page 27: ...VGA connection is used the BRIGHTNESS and CONTRAST settings are also set to DIRECT and cannot be adjusted manually The USER option enables you to adjust Red Blue and Green independently Choose a setti...

Page 28: ...tiple monitors be sure the display corresponding to the DTU 710 is selected in the MONITOR menu Click on the CALIBRATE button to activate the calibration screen Using the OSD controls open the OSD Men...

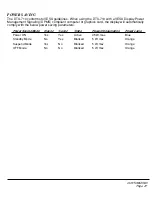
Page 29: ...MS compliant computer or graphics card the display will automatically comply with the below power saving parameters Power Saving Mode H sync V sync Video Power Consumption Power Lamp Power ON Yes Yes...

Page 30: ...erify that the cabling between the DTU 710 and your computer is correct Be sure the power adaptor is plugged into an active AC outlet and that it is connected to the DTU 710 Verify that any other disp...

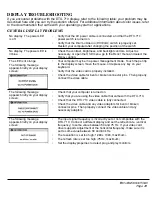
Page 31: ...n tip to the display screen move the mouse or depress any key on your keyboard Verify that the video card is properly installed Check the video cable for bent or broken connector pins Then properly co...

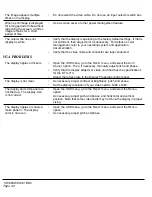
Page 32: ...flickers Open the OSD menu go to the RESET menu and select the AUTO ADJUST option Then if necessary manually adjust pitch and phase Verify that the display adaptor or video card matches the specificat...

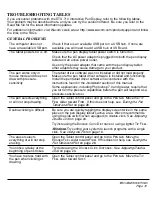
Page 33: ...ance with the instructions found in the Installation section of this manual Some applications including Photoshop 7 0 and greater require that you turn on the pressure capabilities before the pen will...

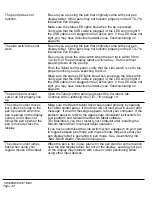
Page 34: ...ctive hardware see Troubleshooting on page 28 The pen tip and screen cursor do not properly line up Open the Tablet control panel and select the CALIBRATE tab Continue with Calibrating the DTU 710 on...

Page 35: ...gle user delete the tablet preferences by first choosing your HOME folder from the GO menu Then open your home LIBRARY folder Within your home LIBRARY folder open the PREFERENCES folder and delete the...

Page 36: ...pen away from the pen display tablet surface and bring it back to within 5 mm 0 2 inch over an area of the tablet that is mapped to a display area Windows 98SE or Me Your pen does not function inside...

Page 37: ...page 37 The pen display tablet works correctly when initially installed under OS v10 2 7 or 10 2 8 but fails to work after restart There may be a problem in the KEXT CACHE file 1 Unplug the pen displ...

Page 38: ...our HOME Open the LIBRARY and PREFERENCES folders Then remove the following preferences com apple ink framework plist com apple ink inkpad plist com apple ink inkpad sketch 3 Go back to SYSTEM PREFERE...

Page 39: ...product was purchased See the Wacom tablet Read Me file located on the Wacom Pen Tablet Driver CD for contact information If you have an Internet connection you can download the latest software drive...

Page 40: ...al and South America Europe Middle East and Africa Japan Asia Pacific English China Worldwide Web http www wacom com productsupport Software updates Anonymous FTP Site ftp wacom com pub drivers Softwa...

Page 41: ...ergent to clean the display screen this may damage the screen Please note that damage of this kind is not covered by the manufacturer s warranty REPLACING THE PEN TIP The pen tip nib will wear with no...

Page 42: ...latform 1 Turn off your computer and power off the DTU 710 Then disconnect all cables from the unit 2 Protect the display screen surface by spreading a soft cloth onto a flat table and placing the DTU...

Page 43: ...ct the DTU 710 from the computer Windows 98SE Me or 2000 1 Click the Windows START button Then choose SETTINGS and CONTROL PANEL 2 In the CONTROL PANEL window double click on the ADD REMOVE PROGRAMS i...

Page 44: ...tical Resolution 1280 x 1024 pixels SXGA 1024 x 768 pixels XGA 800 x 600 pixels SGA 640 x 480 pixels VGA Refresh rate 50 to 75 Hz vertical Pixel pitch 0 264 x 0 264 mm 0 010 x 0 010 in Color depth 16...

Page 45: ...r or Technical Support using the appropriate number for your region To purchase parts and accessories in other countries please contact your local dealer or distributor Reading technology Electromagne...

Page 46: ...interference to radio communications However there is no guarantee that interference will not occur in a particular installation You can determine whether the tablet equipment is causing interference...

Page 47: ...2001 electromagnetic immunity EN 55022 1998 A1 2000 Class B electromagnetic emissions EN 61000 3 2 2000 Class D electromagnetic emissions EN 61000 3 3 1995 A1 2001 electromagnetic emissions EN 60950...

Page 48: ...dled or stored other than in accordance with Wacom s storage instructions Any descriptions drawings specifications samples models bulletins or similar material used in connection with the sale of the...

Page 49: ...our local dealer or distributor In all other respects the terms of the warranty as set forth above apply to such sales Should you have any questions about this Agreement or if you desire to contact Wa...

Page 50: ...or repair or b the product has been handled or stored other than in accordance with WACOM s storage instructions or c the failure is due to normal wear and tear or d you fail to fulfill your obligati...

Page 51: ...7 Krefeld Germany Telephone General 49 0 2151 3614 0 Fax 49 0 2151 3614 111 WACOM Co Ltd 2 510 1 Toyonodai Otone Machi Kitasaitama Gun Saitama 349 1148 Japan Telephone General 81 0 480 78 1213 Fax 81...

Page 52: ...ay Installation Guide User s Manual WACOM Co Ltd UE 0292 Watch for the Penabled logo to ensure you are getting the natural feel and superior performance of Wacom s patented cordless and battery free p...

Reviews: