


10
10
10
10
GETTING STARTED
When you have unpacked your Cintiq and are ready to begin using it, complete the following steps to turn
on your Cintiq and launch the Setup wizard.
Note: You must install the Windows or Macintosh driver for Cintiq to work properly in Desktop mode.
Before you begin, read the Quick Start Guide that is included in the box with your Cintiq.
Make sure your computer meets the following minimum system requirements:
•
Windows 7 or 8 (32-bit or 64-bit configurations) or Mac OS X 10.6 or later
•
Available USB port
•
Available HDMI port
Note: If your computer does not have an HDMI (video out) port, you will need an HDMI adapter to connect
your computer to the Cintiq.
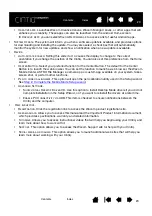
STEP 1: CONNECT THE CINTIQ TO YOUR COMPUTER
Complete the connections from the Cintiq to your computer. Make sure to use the power cable to connect
to an external power source. Refer to the connection diagram.
1. Connect the interface and video plugs of the 3-in-1 cable to the available USB and HDMI ports on your
computer. Note that Wacom recommends connecting the USB cable directly to your computer, and not
to a USB hub attached to your computer.
2. Connect the adapter plug of the 3-in-1 cable to the power adapter.
3. Connect the remaining end of the 3-in-1 cable to the Cintiq.
4. Install the wall plug on the power adapter. Note that the plug can be turned to accommodate different
outlets.
5. Plug the power adapter into an AC outlet.