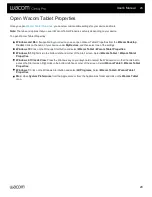


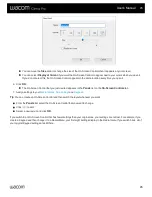

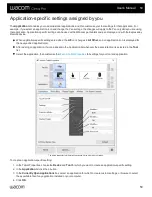


Use On-Screen Controls as shortcuts
On-Screen Controls are menus that display on your pen display screen or monitor. You can use On-Screen Controls as shortcuts
to the settings that you use the most.
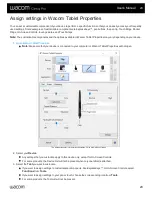
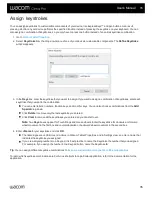
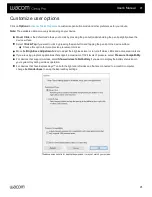
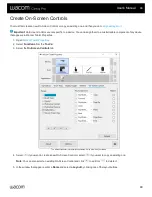
How to create and use an On-Screen Control
.
that you created.
3.
Assign the On-Screen Control to a customizable component
of your device, such as an ExpressKey™ or pen button.
4. Press the button, ExpressKey™, or other component to open the On-Screen Control.
For example, if you assigned an On-Screen Control to an ExpressKey™, press the ExpressKey™ to display the On-
Screen Control.
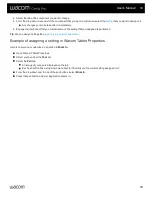
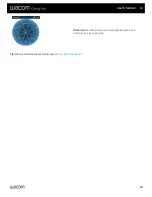
5. Click a button or slice in the On-Screen Control to activate the setting you assigned.
For example, if you assigned
Zoom In
to a Screen Key, click that Screen Key to zoom in.
Tip
: Instead of opening the On-Screen Control every time you need it, you can select the push pin icon to keep it open at all
times.
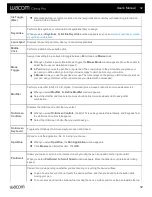
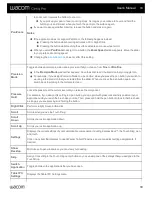
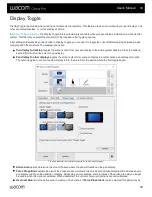
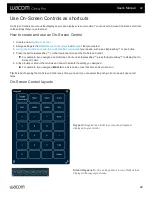
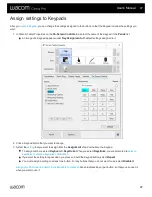
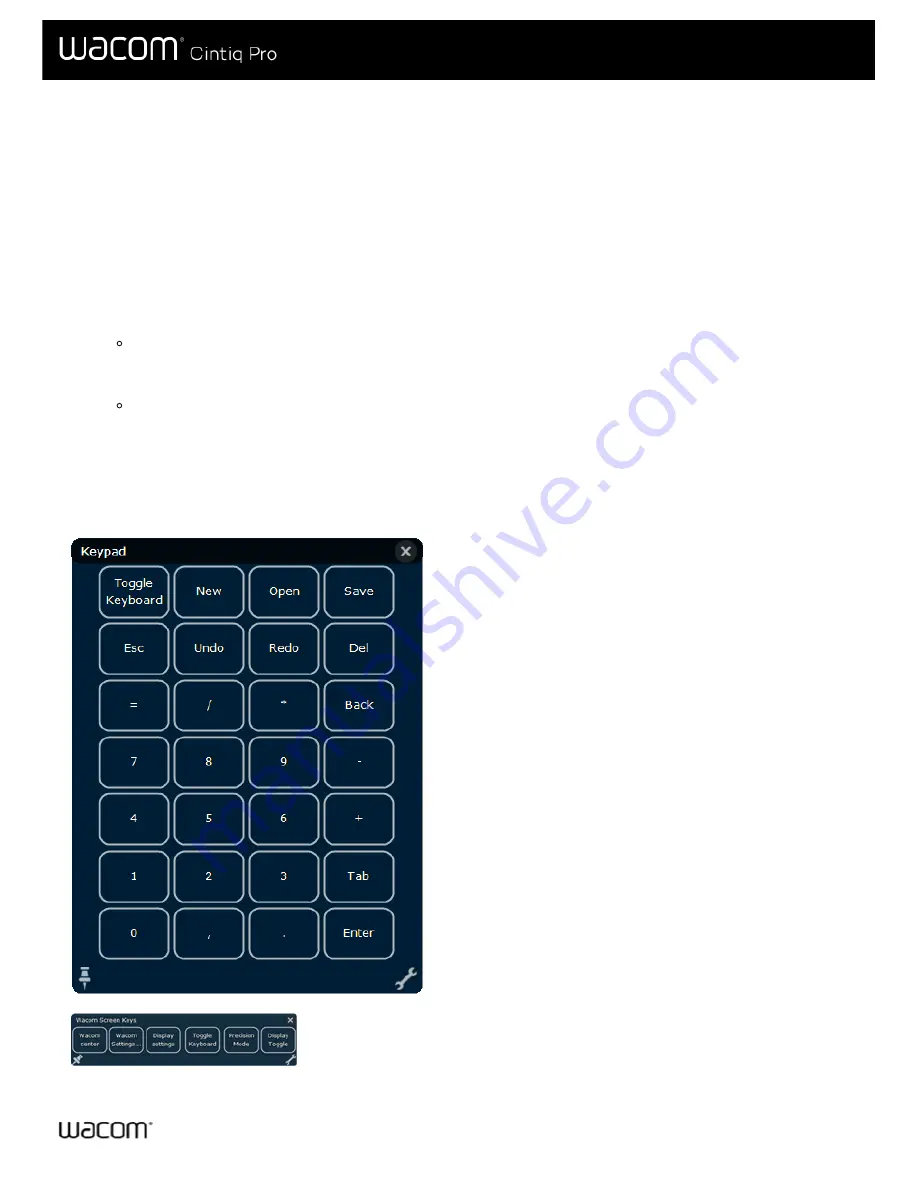
Keypad
: A Keypad is a similar to your keyboard keypad,
displayed on your monitor.
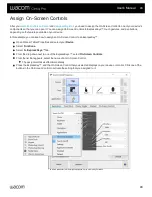
Screen Key panel
: A Screen Key panel is a row of buttons that
displays in the layout you choose.
User's Manual
42
42


