background image

 24  


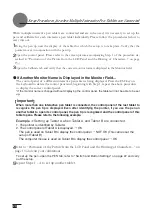
When multiple interactive pen tablets are connected and are to be used, it is necessary to set up the 

pen and calibrate for each interactive pen tablet individually. Please follow the procedures below to 

carry this out.

1

Bring the pen tip near the display of  the tablet for which the setup is to take place. Verify that the 

pointer moves in conjunction with the pen tip.

2

Open the control panel. (Please refer to the screen picture accompanying Step 1 of  the procedure de-

scribed in “Protrusion of  the Picture from the LCD Panel and the Blurring of  Characters...” on page 

15.)

3

Open the Calibrate tab and verify that the correct monitor name is displayed in the Monitor field.

If Another Monitor Name is Displayed in the Monitor Field...

  The control panel of  a different interactive pen tablet is being displayed. Press the ESC key on  

  the keyboard to delete the control panel and, beginning with Step 1, repeat the above procedure  

  to display the correct control panel.

*If the monitor name is changed without displaying the control panel, the tablet will not be able to be set 
up.

 【

Important


When more than one interactive pen tablet is connected, the control panel of the last tablet to  

  recognize  the  pen  tip  is  displayed.  Even  after  identifying  the  pointer,  if  you  use  the  pen  on  
  another tablet to open its control panel, the pen tip is recognized and the control panel of this  
  tablet opens. Please refer to the following example.

  Example >

Setting up Tablet A when Tablet A and Tablet B are connected.

  1. The pointer is identified by Tablet A.

  2. The control panel of Tablet A is displayed.

OK

    The pen is used on Tablet B to display the control panel

NOT OK (This carries out the  

    setup of Tablet B)

    The computer mouse is used on Tablet B to display the control panel

OK

4

Refer to “Protrusion of the Picture from the LCD Panel and the Blurring of Characters...” on 

page 15 and carry out calibrations. 

To set up the pen, open the PEN tab, refer to “Switch and Button Settings” on page 22 and carry 
out the setup.

5

Repeat Steps 1 ‒ 4 to set up another tablet.

Summary of Contents for DTF-521 series

Page 1: ...duct Unauthorized opening of the back cover may lead to fire or electric shock When this product ceases to operate normally due to being dropped or a similar cause remove the power source cable from t...

Page 2: ...for 15 minutes or longer Also consult a physician Do not use excessive force with the cable Please do not step on or place heavy objects on any of the product s cables Also do not apply excessive forc...

Page 3: ...ny cable while the product or your computer is on Do not connect or disconnect any cable including the USB cable or the power adapter while your computer or this product is turned on This may cause da...

Page 4: ...d trademarks of each concerned company Precautions Depending on what is being displayed bright or dark green red and blue dots may show up on a very small portion of the LCD display screen These do no...

Page 5: ...Characters 15 Button Functions 16 Adjusting the Brightness and Contrast of the Display 16 Pen 19 Basic Operations of the Pen 20 How to use the Tablet Button 21 Using the Control Panel 22 Displaying th...

Page 6: ...ghts blue when power has been supplied the DTF 521 and the computer and video signals is present Glows orange when no video signal is detected by the DTF 521 Status LED When the pen switch is on this...

Page 7: ...ent lever 2Let the stand down Using the Penholder Pull the penholder towards you as shown in the illustration below 1 2 Caution Always close the stand and as shown in the above illustration lay the ta...

Page 8: ...ay unit face down on a at surface To prevent harm to the front of the unit first spread a cloth or other similar material on the at surface Unscrew Component Functions This product conforms to the Vid...

Page 9: ...r Guide This booklet Serial Cable User Guide Tablet Driver CD ROM Application CD ROM Accessory Check Important Do no throw the box away it is useful for the storage and transport of the product Applic...

Page 10: ...off your computer and the product 8Connect a USB connector of the product to a USB port of your computer using a USB cable 9Turn on your computer and the product 10Install the DTF 521 driver Please r...

Page 11: ...e Power cable Power Adapter DC Power Input Terminal To analog RGB port To USB port DTI 520UB Rear View Computer Outlet Ground Wire To monitor or projector Output Input Analog RGB connector Analog RGB...

Page 12: ...P TIONS CABS folder 2Insert the DTF 521 tablet driver CD into the CD ROM drive The DTF 521 menu should automatically display If the menu does not display double click on the INSTALL icon lo cated on t...

Page 13: ...ssword Macintosh OS x 10 2 and newer versions include as a standard feature the Inkwell function If this function is on the yellow Inkwell memo pad will appear after installation of the Tablet Driver...

Page 14: ...nge Blue Off Mode No No No Less than 1W Orange The DTF 521 Power Saving Function Important In order to ensure optimal display image quality this product utilizes the Auto Adjust function When the Auto...

Page 15: ...ng in the picture blurring and protruding from the LCD panel If this happens adjust the pitch and phase At 1024 x 768 bit the resolution is optimally adjusted Procedure 1Open the Tablet Control Panel...

Page 16: ...ttons You can select an option that can be activated After activatng a selected option press the button to increase a selected item value and press the button to decrease it Menu button Opens or close...

Page 17: ...adjust red blue and green independently Selecting DIRECT displays the received signal as it is without any adjustment Choose a setting to work with and press Enter to activate your selection You can...

Page 18: ...n Select to reduce or eliminate vertical distortion lines P 18 To automatically adjust use the Reset option Select to move the screen image left or right To automatically adjust use the Reset option S...

Page 19: ...en Tip You can change the position of the screen pointer by moving the tip of the pen By varying the amount of pressure applied the boldness of lines and the size of points can be adjusted If the pen...

Page 20: ...lightly once with the tip of the pen to click Double clicking Tap in the same place twice quickly with the tip of the pen to double click Dragging Select an icon or folder and then while keeping the p...

Page 21: ...ll the button driver to your PC P12 Component Functions 1 3 5 5 No Function Description 1 The left mouse button It works like the left mouse button 2 The right mouse button It works like the right mou...

Page 22: ...operties Opening the Control Panel in Macintosh Open System Settings and then Wacom Tablet NO Setting Item Description 1 Tip Feel Customizes the amount of pressure needed to click or draw with the pen...

Page 23: ...en using multiple tablets see page 24 1Click on Calibrate and the screen used for making adjustments will appear 2Click in the middle of the cross mark in the upper left hand corner of the screen whil...

Page 24: ...rocedure to display the correct control panel If the monitor name is changed without displaying the control panel the tablet will not be able to be set up Important When more than one interactive pen...

Page 25: ...oak a clean soft cloth with a water diluted detergent mixture wring thoroughly and wipe off If the protective covering for the LCD display becomes soiled wipe with a dry soft cloth If the stain is dif...

Page 26: ...t the video signal cable is connected Verify that the video signal cable connector pins are not bent or broken If you are using a cable other than the video signal cable that was included with the pro...

Page 27: ...at the computer graphics board is correctly installed Verify that the power cable is connected and turn the power switch on Adjust the pitch and phase Verify that your computer display adapter is comp...

Page 28: ...es that either the pen or the tablet is probably defective If possible quickly click in the same area In the control panel set the double clicking interval to a longer setting and set the pen nib sens...

Page 29: ...Manager folders Next check and make sure that USB Universal Serial Bus Controller appears in the list that is displayed If it isn t present it will be necessary to adjust your computer Please consult...

Page 30: ...ynchronous input Synchronous frequency horizontal 30 56 5 kHz vertical 45 75 Hz When resolution is 1024 768 dot XGA vertical frequency is in the 45 70Hz range Scanning method all non interlace Plug an...

Page 31: ...product Frequently Asked Questions on the Wacom web site FAQ http club wacom co jp wacom en servlet support user Swusr101Sv00 Support Staff If you think your DTF 521 Interactive Pen Display is not wo...

Page 32: ...nce to radio communications However there is no guarantee that interference will not occur in a particular installation You can determine whether the tablet equipment is causing interference by poweri...

Reviews: