background image

6

INSTALACJA OPROGRAMOWANIA

Ważne: Zainstalowanie oprogramowania sterownika Wacom jest NIEZBĘDNE, aby zapewnić 

prawidłową funkcjonalność pióra.

Zapisz swoją pracę i zamknij wszystkie uruchomione aplikacje. Tymczasowo wyłącz programy 
antywirusowe.

Włóż płytę instalacyjną do napędu komputera. Jeśli menu instalacji oprogramowania nie zostanie 
wyświetlone automatycznie, dwukrotnie kliknij ikonę I

NSTALUJ

 w folderze płyty CD.

Kliknij Z

AINSTALUJ


TABLET

 i postępuj zgodnie z instrukcjami wyświetlanymi na ekranie, aby 

zainstalować oprogramowanie sterownika.

Ponownie włącz program antywirusowy.

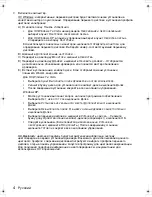
Po zakończeniu instalacji oprogramowania sprawdź, czy poruszanie piórem po interaktywnym 
ekranie piórkowym powoduje ruch kursora ekranowego.
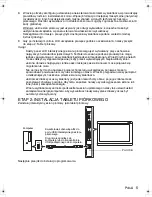
Gdy końcówka pióra dotyka ekranu wyświetlacza kursor ekranowy powinien zostać natychmiast 
przesunięty do miejsca położonego tuż poniżej końcówki pióra. Unieś końcówkę pióra i opuść 
ją w innym miejscu ekranu wyświetlacza. Kursor powinien natychmiast zostać przesunięty do 
nowego miejsca. Funkcja ta, określana mianem pozycjonowania bezwzględnego, pozwala na 
zmianę miejsca kursora ekranowego bez konieczności przeciągania pióra po powierzchni ekranu 
wyświetlacza.

Przeczytaj plik Read Me, aby zapoznać się z najbardziej aktualnymi informacjami. Jeśli podczas 
instalacji ekranu piórkowego pojawią się problemy, zapoznaj się z częścią poświęconą 
rozwiązywaniu problemów.

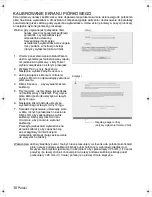
Następnie przeprowadź kalibrację ekranu piórkowego, aby precyzyjnie zgrać kursor ekranowy 
z końcówką pióra. 
Więcej informacji na ten temat można znaleźć na stronie 10.

Polski

DTU-Queen_QSG_WEG.book  Page 6  Tuesday, January 12, 2010  4:00 PM

Summary of Contents for DTU-2231

Page 1: ...EN DE NL FR IT ES RU PL Quick start guide Snelgids Schnellstartanleitung Guide de mise en route Guida rapida Gu a de arranque r pido Podr cznik szybkiej instalacji DTU 2231...

Page 2: ......

Page 3: ...ect video cable Select DVI or VGA page 3 Connect power cable Turn on pen display then computer page 4 Adjust screen resolution and settings Connect USB cable page 5 Install driver software from CD pag...

Page 4: ...mode the pen display will map to the entire space on each monitor See your hardware and operating system documentation for details on configuring your system for use with multiple monitors A Display T...

Page 5: ...a projector or monitor Fully install the hardware and software before connecting another device 3 DVI D to DVI I cable or VGA to DVI I cable Video card DVI I IN Computer 4 DC input To AC outlet 5 Pow...

Page 6: ...y corresponds to the pen display Select the number corresponding to the pen display B Click ADVANCED SETTINGS C Select the MONITOR tab and click PROPERTIES D Select the DRIVER tab and click UPDATE DRI...

Page 7: ...perfect display and some panels may exhibit a certain number of pixels that show an incorrect color If an image has fine striping such as screen stripes it may appear to flicker or display a moir patt...

Page 8: ...our pen on the interactive pen display to move the screen cursor When you place the pen tip on the display screen the screen cursor should immediately jump to a corresponding position approximately be...

Page 9: ...not need to touch the pen tip to the display surface Toggle the switch in either direction to activate the button functions By default the upper switch is set to DOUBLE CLICK and the lower switch is...

Page 10: ...ser specific preferences are supported After logging in each user can customize their personal settings in the Wacom Tablet control panel Switching to another user will automatically load the settings...

Page 11: ...to the factory settings Note Application specific settings are for advanced users See the user s manual Tabs display customizable settings for the selected TOOL Displays an information dialog box and...

Page 12: ...ay 4 Click CALIBRATE to activate the calibration screen 5 Hold the pen and position your head as you normally do when working with the pen display Use the pen tip to click on the center of the crossha...

Page 13: ...active pen display first check the appropriate installation section in this guide to make sure the unit is installed correctly Then review the troubleshooting procedures in your electronic user s manu...

Page 14: ......

Page 15: ...VI oder VGA Seite 3 Schlie en Sie das Netzkabel an Schalten Sie das Stift Display und anschlie end den Computer ein Seite 4 Passen Sie die Bildschirmaufl sung und die Einstellungen an Schlie en Sie da...

Page 16: ...iziert Weitere Informationen zur Konfiguration Ihres Systems f r die Verwendung mit mehreren Bildschirmen finden Sie in der Dokumentation zu Ihrer Hardware und Ihrem Betriebssystem F r die Verwendung...

Page 17: ...elsweise einen Projektor oder Bildschirm Installieren Sie die Hardware und Software vollst ndig bevor Sie andere Ger te anschlie en 3 DVI D zu DVI I Kabel oder VGA zu DVI I Kabel Grafikkarte DVI I EIN...

Page 18: ...ie auf EIGENSCHAFTEN D ffnen Sie die Registerkarte TREIBER und klicken Sie auf AKTUALISIEREN Ein Dialogfeld oder Assistent zum Aktualisieren des Treibers wird angezeigt E Legen Sie die Installations C...

Page 19: ...en Displays weist eine bestimmte Anzahl von Pixeln m glicherweise eine falsche Farbe auf Wenn ein Bild feine Streifen aufweist wie Bildschirmstreifen ist ein Flimmern oder ein Moir Muster zu sehen ben...

Page 20: ...eraktiven Stift Display bewegen k nnen Wenn Sie die Stiftspitze auf den Bildschirm setzen sollte der Bildschirmcursor sofort an die entsprechende Stelle unter der Stiftspitze springen Heben Sie die St...

Page 21: ...e Stiftspitze sich im Aktionsbereich der Bildschirmoberfl che befindet Sie m ssen die Stiftspitze nicht auf die Bildschirmoberfl che aufsetzen Sie k nnen die jeweiligen Funktionen der Taste durch Vers...

Page 22: ...nn jeder Benutzer seine pers nlichen Einstellungen im Kontrollfeld f r das Wacom Tablett anpassen Nach dem Wechseln zu einem anderen Benutzer werden die Einstellungen f r diesen Benutzer automatisch g...

Page 23: ...eis Anwendungsspezifische Einstellungen sollten nur von erfahrenen Benutzern angepasst werden Informationen dazu finden Sie im Benutzerhandbuch Registerkarten zeigen anpass bare Einstellun gen f r das...

Page 24: ...irmen arbeiten w hlen Sie unter MONITOR die f r das Stift Display zutreffende Option aus 4 Klicken Sie auf KALIBRIEREN um das Kalibrierungsfenster aufzurufen 5 Halten Sie den Stift und Ihren Kopf wie...

Page 25: ...n Sie zun chst im Abschnitt Installation dieses Handbuchs nach und stellen Sie sicher dass das Ger t richtig installiert ist berpr fen Sie anschlie end im elektronischen Benutzerhandbuch die Verfahren...

Page 26: ......

Page 27: ...lecteer DVI of VGA pagina 3 Sluit de stroomkabel aan Schakel eerst het pendisplay in en daarna de computer pagina 4 Pas de schermresolutie en instellingen aan Sluit de USB kabel aan pagina 5 Installee...

Page 28: ...ojecteerd op de volledige ruimte op elk beeldscherm Hoe u uw systeem voor gebruik met meerdere beeldschermen kunt configureren staat in de documentatie van uw hardware en besturingssysteem De functie...

Page 29: ...talleer eerst de hardware en software volledig voordat u nog een apparaat aansluit 3 DVI D naar DVI I kabel of VGA naar DVI I kabel Videokaart DVI I IN Computer 4 DC invoer Naar stopcontact 5 Stroomad...

Page 30: ...dat overeenkomt met het pendisplay B Klik op GEAVANCEERDE INSTELLINGEN C Selecteer het tabblad BEELDSCHERM en klik op EIGENSCHAPPEN D Selecteer het tabblad STUURPROGRAMMA en klik op STUURPROGRAMMA BIJ...

Page 31: ...men kunnen een bepaald aantal pixels hebben die een onjuiste kleur weergeven Als een beeld fijne strepen vertoont zoals strepen over het scherm kan het lijken te flikkeren of zijn er vlekken te zien O...

Page 32: ...et interactieve pendisplay kunt gebruiken om de schermcursor te verplaatsen Wanneer u de penpunt op het beeldscherm plaatst moet de schermcursor onmiddellijk verspringen naar de corresponderende posit...

Page 33: ...bevindt U hoeft het oppervlak van het scherm niet aan te raken met de penpunt Schuif de schakelaar in de gewenste richting om de knopfuncties te activeren De bovenste penknop is standaard ingesteld o...

Page 34: ...n iedere gebruiker de instellingen aanpassen in het regelpaneel van het Wacom tablet Bij het schakelen naar een andere gebruiker worden automatisch de instellingen voor die gebruiker geladen MEER INFO...

Page 35: ...voor geavanceerde gebruikers Raadpleeg de gebruikershandleiding De tabbladen bevatten de instellingen van het gese lecteerde APPARAAT Hiermee geeft u een informa tiedialoogven ster weer en een optie...

Page 36: ...KALIBREREN om het kalibratievenster te activeren 5 Houd de pen vast zoals u dat altijd doet en ga in de houding zitten waarin u altijd zit wanneer u met het pendisplay werkt Klik met de penpunt op het...

Page 37: ...lte in deze handleiding over de installatie om te controleren of de eenheid goed is ge nstalleerd Lees vervolgens de procedures voor het oplossen van problemen in de elektronische Gebruikershandleidin...

Page 38: ......

Page 39: ...ionnez DVI ou VGA page 3 Connectez le c ble d alimentation Mettez l cran interactif puis l ordinateur sous tension page 4 R glez la r solution et les param tres de l cran Connectez le c ble USB page 5...

Page 40: ...la zone de travail sur chaque moniteur Pour plus d informations concernant la configuration de votre syst me en vue de l utilisation de plusieurs moniteurs consultez la documentation du mat riel et d...

Page 41: ...ur Terminez l installation mat rielle et logicielle avant de connecter un autre appareil 3 C ble DVI D DVI I ou c ble VGA DVI I Carte vid o DVI I IN Ordinateur 4 Entr e c c Vers la prise secteur 5 Ada...

Page 42: ...cran interactif S lectionnez le num ro correspondant l cran interactif B Cliquez sur PARAM TRES AVANC S C S lectionnez l onglet MONITEUR et cliquez sur PROPRI T S D S lectionnez l onglet PILOTE et cl...

Page 43: ...a absolument parfait certaines tablettes peuvent pr senter un certain nombre de pixels associ s une mauvaise couleur Si une image pr sente de fines rayures elle peut scintiller ou afficher un moirage...

Page 44: ...rmin e v rifiez que vous pouvez d placer le curseur sur l cran interactif l aide du stylet Lorsque vous placez la pointe du stylet sur l cran le curseur doit se placer imm diatement l endroit correspo...

Page 45: ...aire que la pointe touche la surface de l cran pour l utiliser Basculez le bouton d un c t ou de l autre pour lui attribuer les fonctions du bouton Par d faut le DOUBLE CLIC est affect au bouton sup r...

Page 46: ...une session chaque utilisateur peut personnaliser ses propres param tres dans le panneau de configuration de la tablette Wacom Le basculement vers un autre utilisateur charge automatiquement ses param...

Page 47: ...es param tres sp cifiques aux applications sont destin s aux utilisateurs avanc s Reportez vous au manuel de l utilisateur Les onglets affichent les param tres personnalisa bles de l OUTIL s lectionn...

Page 48: ...t l cran interactif 4 Cliquez sur TALONNAGE pour afficher la fen tre d talonnage 5 Tenez le stylet et installez vous comme vous le faites habituellement pour utiliser l cran interactif Avec la pointe...

Page 49: ...urer que l installation de l unit a t effectu e correctement Puis r f rez vous aux proc dures de d pannage dans votre manuel de l utilisateur lectronique Si vous tes connect Internet vous pouvez t l c...

Page 50: ......

Page 51: ...DVI o VGA pagina 3 Collegare il cavo di alimentazione Accendere il display interattivo quindi il computer pagina 4 Regolare la risoluzione e le impostazioni dello schermo Collegare il cavo USB pagina...

Page 52: ...attivo corrisponde all intera superficie di ogni monitor Per informazioni sulla configurazione del sistema per l uso con pi monitor consultare la documentazione dell hardware e del sistema operativo d...

Page 53: ...llazione completa dell hardware e del software prima di collegare un altro dispositivo 3 Cavo DVI D DVI I o cavo VGA DVI I Scheda video DVI I IN Computer 4 Ingresso CC Alla presa CA 5 Adattatore di al...

Page 54: ...E C Selezionare la scheda MONITOR e fare clic su PROPRIET D Selezionare la scheda DRIVER e fare clic su AGGIORNA DRIVER Viene visualizzata una finestra per l aggiornamento del driver o per l installaz...

Page 55: ...ivo di difetti e alcuni pannelli potrebbero presentare un certo numero di pixel di colore errato Se un immagine presenta strisce sottili pu apparire tremolante o creare un effetto moir Non applicare u...

Page 56: ...display interattivo per spostare il cursore del video Ogni volta che si posiziona la punta della penna sul display il cursore dovrebbe saltare ad un punto corrispondente sotto la punta della penna So...

Page 57: ...la punta della penna Spostare l interruttore in una delle due direzioni per attivare le funzioni dei pulsanti Per impostazione predefinita l interruttore superiore impostato su DOPPIO CLIC e quello i...

Page 58: ...iascun utente pu personalizzare le proprie impostazioni nel pannello di controllo della tavoletta Wacom Passando da un utente all altro verranno caricate automaticamente le impostazioni personali di q...

Page 59: ...nsigliate solo agli utenti pi esperti Consultare la guida per l utente Le schede visualizzano le impostazioni personalizzabili per lo STRU MENTO selezio nato Visualizza una finestra di dia logo conten...

Page 60: ...chermata di calibrazione fare clic sul pulsante CALIBRA 5 Tenere la penna e assumere la posizione della testa come richiesto dall uso di un normale display interattivo Quindi con la punta della penna...

Page 61: ...y interattivo con penna controllare innanzitutto la sezione Installazione della presente guida per assicurarsi che l unit sia stata installata correttamente Quindi consultare le procedure per la risol...

Page 62: ......

Page 63: ...ne DVI o VGA p gina 3 Conecte el cable de alimentaci n Encienda el monitor interactivo y a continuaci n el ordenador p gina 4 Ajuste la resoluci n y configuraci n de pantalla Conecte el cable USB p gi...

Page 64: ...monitores Consulte la documentaci n del hardware y del sistema operativo para obtener m s informaci n sobre la configuraci n del sistema para su uso con varios monitores Dispone de una funci n de camb...

Page 65: ...are y el software antes de conectar otro dispositivo 3 Cable DVI D a DVI I o cable VGA a DVI I Tarjeta de v deo ENTRADA DVI I Ordenador 4 Entrada de CC A toma de corriente alterna 5 Adaptador de corri...

Page 66: ...nitor interactivo B Haga clic en CONFIGURACI N AVANZADA C Seleccione la ficha MONITOR y haga clic en PROPIEDADES D Seleccione la ficha CONTROLADOR y haga clic en ACTUALIZAR CONTROLADOR Aparecer un cua...

Page 67: ...pueden garantizar la perfecci n absoluta de la pantalla y es posible que algunos paneles muestren algunos de p xeles con un color incorrecto Si una imagen muestra finas l neas puede que de la impresi...

Page 68: ...eractive pen display para mover el cursor de la pantalla Al colocar la punta del l piz sobre la pantalla el cursor deber a saltar inmediatamente a la posici n correspondiente aproximadamente justo deb...

Page 69: ...l l piz sobre la misma Accione el interruptor en cualquier direcci n para activar las funciones del bot n De forma predefinida la posici n del bot n superior se ha definido en DOBLE CLIC y la posici n...

Page 70: ...s de usuario Despu s de iniciar sesi n cada usuario puede personalizar sus ajustes personales en el panel de control de la tableta Wacom Cuando se cambie de usuario se cargar n autom ticamente los aju...

Page 71: ...s ajustes espec ficos de una aplicaci n son para usuarios experimentados Consulte el manual del usuario Las fichas muestran los ajustes perso nalizables de la HERRAMIENTA seleccionada Muestra un cuadr...

Page 72: ...Haga clic en CALIBRAR para activar la pantalla de calibraci n 5 Sujete el l piz y mantenga la cabeza en la misma posici n que cuando trabaja con el pen display Utilice la punta del l piz para hacer cl...

Page 73: ...ractive pen display compruebe en primer lugar la secci n de instalaci n correspondiente en esta gu a para asegurarse de que la unidad est correctamente instalada A continuaci n lea los procedimientos...

Page 74: ......

Page 75: ...1 DVI VGA 3 4 USB 5 6 2 3 4 5 6 7 VGA DVI RU...

Page 76: ...2 Windows 7 Vista XP 32 64 DVI VGA USB CD ROM Macintosh X 10 4 1 DVI VGA USB CD ROM DVI DVI VGA DVI DVI I Wacom...

Page 77: ...3 1 USB 1 6 2 DVI VGA DVI I 3 DVI D DVI I VGA DVI I DVI I 4 5 VGA DVI DVI VGA DVI VGA...

Page 78: ...4 7 Windows Macintosh A Windows 7 Vista Windows XP B C D E Wacom Windows 7 Vista Windows XP E...

Page 79: ...5 8 Windows 9 2 USB USB USB...

Page 80: ...6 Wacom Read Me 10...

Page 81: ...7 5 Wacom Tablet Wacom Tablet 5...

Page 82: ...8 Windows Windows WACOM WACOM Macintosh Apple WACOM Wacom Wacom Tablet Adobe Reader pdf...

Page 83: ...9 Wacom...

Page 84: ...10 VGA VGA 1 Wacom Tablet 2 3 4 5 6 7 OK 25 25 VGA...

Page 85: ...11 Wacom 1 Wacom 2 3 Read Me Wacom FAQs Wacom 4 Wacom 5 Wacom Read Me Wacom Wacom Wacom Wacom 10 00 20 00 Wacom...

Page 86: ......

Page 87: ...lub VGA strona 3 Pod cz przew d zasilania W cz ekran pi rkowy a nast pnie komputer strona 4 Ustaw rozdzielczo ekranu i wprowad inne ustawienia Pod cz przew d USB strona 5 Zainstaluj oprogramowanie st...

Page 88: ...monitora Aby uzyska szczeg owe informacje na temat konfiguracji systemu do pracy z wieloma monitorami nale y odwo a si do dokumentacji dostarczonej ze sprz tem i systemem operacyjnym W systemach z kil...

Page 89: ...nale y zainstalowa sprz t i jego oprogramowanie 3 Przew d DVI D do DVI I lub przew d VGA do DVI I Karta graficzna WEJ CIE DVI I Komputer 4 Wej cie zasilania pr d sta y Do zasilania sieciowego pr d zmi...

Page 90: ...emu Wybierz numer odpowiadaj cy ekranowi pi rkowemu B Kliknij USTAWIENIA ZAAWANSOWANE C Wybierz kart MONITOR i kliknij W A CIWO CI D Wybierz kart STEROWNIK i kliknij AKTUALIZUJ STEROWNIK Pojawi si okn...

Page 91: ...zie absolutnie doskona y W niekt rych panelach mo e zdarzy wyst powanie pewnej liczby pikseli wy wietlaj cych nieprawid owy kolor Je li na obrazie znajduj si cienkie paski takie jak paski ekranowe mo...

Page 92: ...anie pi rkowym powoduje ruch kursora ekranowego Gdy ko c wka pi ra dotyka ekranu wy wietlacza kursor ekranowy powinien zosta natychmiast przesuni ty do miejsca po o onego tu poni ej ko c wki pi ra Uni...

Page 93: ...erzchni wy wietlacza ko c wk pi ra Przestaw prze cznik w dowolnym kierunku aby uaktywni funkcje przycisku Domy lnie g rna cz przycisku odpowiada DWUKROTNEMU KLIKNI CIU a dolna KLIKNI CIU PRAWYM PRZYCI...

Page 94: ...ka Po zalogowaniu ka dy u ytkownik mo e dostosowa swoje ustawienia osobiste w panelu sterowania tabletu Wacom Prze czenie na innego u ytkownika spowoduje automatyczne wczytanie jego ustawie WI CEJ INF...

Page 95: ...dobierane do aplikacji powinny by wykorzystywane przez zaawansowanych u ytkownik w Patrz instrukcja obs ugi Na kartach wy wietlane s ustawienia dla wybranego NARZ DZIA kt re mo na zmieni Wy wietla okn...

Page 96: ...adaj cy ekranowi pi rkowemu 4 Kliknij KALIBRUJ aby wy wietli ekran kalibracji 5 Trzymaj pi ro i ustaw g ow jak podczas normalnej pracy z tabletem Przy u yciu pi ra kliknij po rodku krzy yka w lewym g...

Page 97: ...e y przede wszystkim sprawdzi w cz ci po wi conej instalacji czy urz dzenie zosta o zainstalowane prawid owo Nast pnie nale y zapozna si z procedurami rozwi zywania problem w przedstawionymi w elektro...

Page 98: ......

Page 99: ......
Page 100: ...chten voorbehouden Wacom is een gedeponeerd handelsmerk van Wacom Company Ltd Andere product en bedrijfsnamen zijn handelsmerken en of gedeponeerde handelsmerken van hun respectievelijke eigenaars 201...

Reviews: