14
Your Wadia di322 has been factory configured allow-
ing for immediate enjoyment of superb audio. If you
wish to make changes to the factory default settings, a
6HWXS)HDWXUHLVSURYLGHGWRFXVWRPL]HWKHRSHUDWLRQ
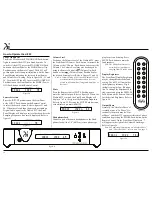
by using the Front Panel Information Display. Refer to
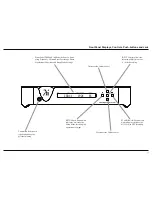
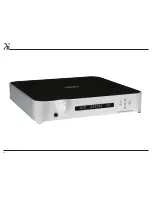
the di322 Front Panel Illustration on the previous page
while performing the following steps.
1RWH,IWKHGLLVFXUUHQWO\2QSURFHHGWRVWHS
3UHVVWKH67$1'%<213XVKEXWWRQRQWKH)URQW
3DQHORUSUHVVWKH02'(3RZHU3XVKEXWWRQRQ
the Remote Control to switch On the di322. The
di322 will go through a brief startup intialization
with the Front Panel Display indicating the last
XVHG,QSXW6RXUFHDQGYROXPHVHWWLQJ5HIHUWR
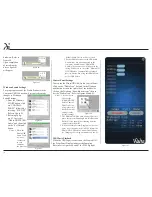
figure 1.
3UHVVWKH6(7833XVKEXWWRQUHSHDWHGO\XQWLOWKH
Front Panel Information Display indicates “Firm-
ware V1.00” or higher. Refer to figure 2.
3UHVVWKH6(7833XVKEXWWRQWRH[LWIURPWKH
6HWXS0RGH7KH/('DERYHWKH6(7833XVK
button will extinguish and the Front Panel Display
ZLOOUHYHUWEDFNWRLWVGLVSOD\RI,QSXW6DPSOLQJ
Frequency and Volume %. Refer to figure 1.
The di322 functionality is controlled by internal
software know as “Firmware”. The current Version of
WKH)LUPZDUHFDQEHLGHQWLILHGE\XWLOL]LQJWKH6HWXS
0RGH
5HSHDWHGO\SUHVVWKH6(7833XVKEXWWRQXQWLO
³),50:$5(9BBBB´LVLQGLFDWHGRQWKH
Front Panel Display. Refer to figure 2.
3UHVVWKH6(7833XVKEXWWRQXQWLOWKH/('DERYH
WKH6(7833XVKEXWWRQLVH[WLQJXLVKHG
How to Operate the Setup Mode
7KH'HIDXOW6HWWLQJV&KDUWWKDWIROORZVLQGLFDWHVWKH
)XQFWLRQ1DPH'HIDXOW6HWWLQJDQGWKH3DJH1XPEHU
for additional information.
Default Settings
Firmware Version
Default Settings
Function Name
Setting
Page No.
AUTO POWER OFF
(1$%/('
14
),50:$5(
V_ _.__
14
Setup
F I R M W A R E V 1 . 0 0
Figure 2
The di322 incorporates an Auto Power Off Feature,
which can automatically place the di322 into the
3RZHU6DYLQJ6WDQGE\2II0RGH7KLVRFFXUVDSSUR[
-
imately 30 minutes after there has been an absence of
D'LJLWDO$XGLR6LJQDORQWKHFXUUHQWO\VHOHFWHGGL
Input. If it is desirable to change the default Auto Off
6HWWLQJRI(QDEOHGWR'LVDEOHGSHUIRUPWKHIROORZLQJ
steps:
3UHVVWKH6(7833XVKEXWWRQ
2. The Front Panel Display will momentarily indicate
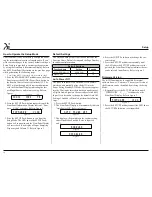
“Auto Power Off”. Refer to figure 3.
3. The display will then indicate the current setting,
either Disabled or Enabled. Refer to figures 4
and 5.
Auto Power Off
A U T O P O W E R O F F
Figure 3
D I S A B L E D
Figure 5
E N A B L E D
Figure 4
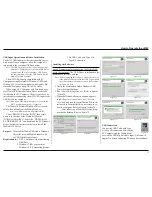
Figure 1
C O A X 1 1 9 2 K 7 5
VOLUME %
INPUT
SAMPLING FREQUENCY
F I R M W A R E V 1 . 0 0
Figure 2
4. Press the INPUT Push-button to change the cur-
rent setting.
3UHVVWKH6(7833XVKEXWWRQUHSHDWHGO\XQWLO
WKH/('DERYHWKH6(7833XVKEXWWRQLVH[WLQ
-
guished, the Front Panel Display indicates the cur-
UHQWO\VHOHFWHG,QSXW6RXUFH5HIHUWRILJXUH
Summary of Contents for di322
Page 15: ...15 Notes ...
Page 20: ...20 ...
Page 21: ...21 Photos ...
Page 27: ...di322 digital audio decoder ...


