background image

EN

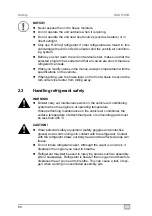
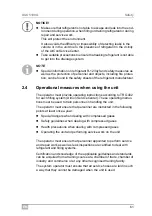
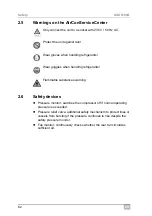
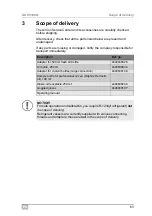
Initial start-up

ASC5100G

70

7.5

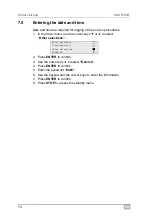
Entering the date and time

Date and time are required for logging of the service procedures.
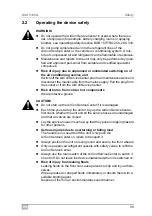
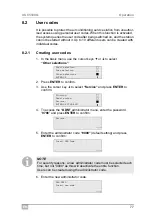
1. In the basic menu, use the cursor keys 

 or 

 to select 

“Other selections”

:

2. Press 

ENTER

 to confirm.

3. Use the cursor key 

 to select 

“Service”

.

4. Press 

ENTER

 to confirm.

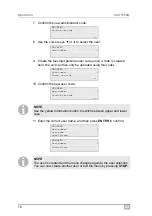
5. Enter the password 

“8463”

.

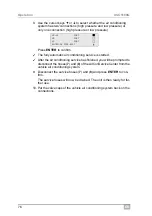
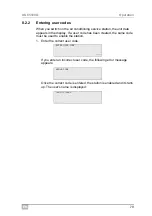
6. Use the keypad and the cursor keys to enter the information.
7. Press 

ENTER

 to confirm.

8. Press 

STOP

 to access the standby menu.

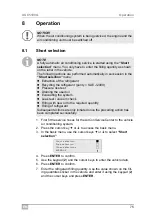
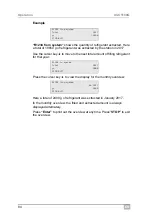
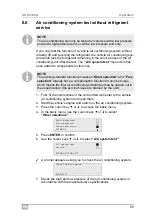
Short selection

Free selection

Other selections

ENTER-OK

Summary of Contents for AirConServiceCenter ASC5100G

Page 1: ...Klimaserviceger t Bedienungsanleitung EN 54 Air conditioning service unit Operating manual ES 107 Estaci n de mantenimiento de aire acondicionado Instrucciones de uso FR 161 Poste de service climatis...

Page 2: ......

Page 3: ...wendung 13 6 Das AirConServiceCenter im berblick 14 6 1 Vorderseite 14 6 2 R ckseite und Seitenansicht 15 7 Erste Inbetriebnahme 16 7 1 Aufstellen und Einschalten 16 7 2 Stand by Men 17 7 3 Sprachausw...

Page 4: ...ensor kalibrieren 42 9 5 Vakuumpumpen l wechseln 43 9 6 Z hlerst nde 46 9 7 Softwareupdate ber USB durchf hren 47 10 Reinigung und Pflege 49 11 Entsorgung 50 11 1 Entsorgung der r ckgewonnenen Fl ssig...

Page 5: ...eachten Sie dar ber hinaus auch Das Schulungshandbuch Fahrzeugklimatisierung Technische Grundlagen von Dometic WAECO Die Informationsbrosch re Fahrzeugklimatisierung Gesetzliche Grundlagen von Dometic...

Page 6: ...auf dem Ger t befinden ENTER dr cken Fett Displaymeldungen Schnellstart Text Text Aufz hlung in beliebiger Reihen folge Sicherheitsdruckw chter berdruckventile 1 Text 2 Text 3 Text Handlungsschritte d...

Page 7: ...und Grundprinzipien des AirConServiceCenters von K hl oder Klimaanlagen sowie von K ltemitteln kennt Benutzen Sie dieses Ger t nur f r den angegebenen Verwendungs zweck VORSICHT F hren Sie keine nderu...

Page 8: ...n Stecker an der Steckdose oder am AirConServiceCenter ab Verbrennungsgefahr durch kalte bzw hei e Bauteile Tragen Sie Schutzhandschuhe VORSICHT Nehmen Sie das AirConServiceCenter nicht in Betrieb wen...

Page 9: ...cht in der N he von W rmequellen z B Heizungen oder in direktem Sonnenlicht Verwenden Sie ausschlie lich das K ltemittel R 1234yf Wird das K ltemittel mit anderen K ltemitteln gemischt kann dies zu Sc...

Page 10: ...ontagegruben Sickersch chte Das K ltemittel ist schwerer als Sauerstoff und verdr ngt daher den f r die Atmung erforderlichen Sauerstoff Bei Arbeiten in ungel fteten Montage gruben kann es zu Sauersto...

Page 11: ...f r sorgen dass Personal das mit Service und Reparaturarbeiten sowie der Dichtheitspr fung beauftragt wird zertifiziert ist im Umgang mit K ltemitteln und F llanlagen Die Zertifizierung sowie Kenntnis...

Page 12: ...ie nach der Anlieferung ob alle unten genannten Teile vor handen und unbesch digt sind Informieren Sie bei fehlenden oder besch digten Teilen umgehend das f r den Transport verantwortliche Unternehmen...

Page 13: ...rfolgen welche die entsprechenden Fachkenntnisse zur Wartung von Klimaanlagen besitzen Mit dem AirConServiceCenter d rfen nur Fahrzeug Klimaanlagen gewartet werden in denen das K ltemittel R 1234yf ve...

Page 14: ...Center im berblick 6 1 Vorderseite 1 Display 2 Bedientastatur 3 Niederdruckmanometer 4 Hochdruckmanometer 5 Frontabdeckung 6 Feststellbare Vorderr der 7 Serviceschlauch Niederdruckanschluss blau 8 Ser...

Page 15: ...DE 15 ASC5100G Das AirConServiceCenter im berblick 6 2 R ckseite und Seitenansicht 10 Beh lter f r Frisch l 11 Alt lbeh lter 12 Hauptschalter 13 L fter 11 10 13 12...

Page 16: ...play 1 f r einige Sekunden die Software Versionsnummer SW Softwarestand DB Datenbank SN Seriennummer LF Sprachdatei Zum Abschluss des Startvorgangs zeigt das AirConServiceCenter folgendes I HINWEIS Da...

Page 17: ...ce w hlen 5 Zur Best tigung ENTER dr cken 6 Passwort 5264 eingeben 7 Mit den Pfeiltasten oder die gew nschte Sprache w hlen 8 Zur Best tigung ENTER dr cken 9 STOP dr cken Die gew hlte Sprache ist akti...

Page 18: ...hen Taste C kurz dr cken Zum L schen der angezeigten Zeile Taste C l nger dr cken 8 Zur Best tigung ENTER dr cken 9 STOP dr cken Die eingestellten Daten sind aktiv 10 Erneut STOP dr cken um in das Sta...

Page 19: ...ten oder Weitere Menues w hlen 2 Zur Best tigung ENTER dr cken 3 Mit der Pfeiltaste Service w hlen 4 Zur Best tigung ENTER dr cken 5 Passwort 7388 eingeben 6 Mit der Bedientastatur und den Pfeiltasten...

Page 20: ...eh lter f r le einsetzen I 1 Beh lter an den Schnellverschl ssen aufstecken Beh lter f r frisches l 10 Alt lbeh lter 11 HINWEIS Verwenden Sie ausschlie lich f r R 1234yf freigegebene le Beachten Sie d...

Page 21: ...t Steigrohr Diese K ltemittelflaschen besitzen einen Anschluss Beim Bef llen des AirConServiceCenters muss sich der Anschluss oben befinden Flasche aufrecht stellen K ltemittelflaschen mit Steigrohr D...

Page 22: ...ter wird bef llt Das Ende des F llvorgangs wird durch ein akustisches Signal best tigt Ventile schlie en und mit ENTER best tigen 6 Nach dem Bef llen wird die Menge des K ltemittels im internen Beh lt...

Page 23: ...und ENTER dr cken ACHTUNG W hrend der Klimaservice durchgef hrt wird m ssen Motor und Klima anlage abgestellt sein HINWEIS Mit dem Men Schnellstart wird ein vollautomatischer Klimaservice durchgef hr...

Page 24: ...ntilkappen der Fahrzeug Klimaanlage auf die Anschl sse auf schrauben 8 2 Benutzercodes Es besteht die M glichkeit die Klima Service Station mit pers nlichen Benutzercodes vor unbefugtem Zugriff zu sch...

Page 25: ...utzercode anlegen Wird hier ein Code angelegt kann das Ger t nur noch mit diesem Code in Betrieb genommen werden 10 Neuen Benutzercode best tigen Service Insert ADM Code HINWEIS Aus Sicherheitsgr nden...

Page 26: ...Eingabe eines falschen Benutzercodes wird folgender Fehler meldung angezeigt Nach erfolgreicher Eingabe wird die Station freigeschaltet und f hrt hoch Der Name des Benutzers wird angezeigt HINWEIS Mit...

Page 27: ...ltasten oder Datenbank w hlen und mit ENTER best tigen 5 Personal DB w hlen und mit ENTER best tigen 6 In diese hier leere Datenbank mit den Pfeiltasten oder den jeweiligen Eintrag w hlen und mit ENTE...

Page 28: ...eichert die Station s mtliche zugeh rigen Daten im internen Speicher Aus diesen Daten kann ein Report generiert und auf einen USB Stick bertragen werden IJeder Report wird in zwei Formaten gespeichert...

Page 29: ...nen Monats oder Jahresreport auf einen USB Stick bertragen 1 Den USB Stick in den USB Anschluss 9 stecken 2 Im Grundmen mit den Pfeiltasten oder Weitere Menues w hlen 3 Zur Best tigung ENTER dr cken 4...

Page 30: ...iltasten oder Weitere Menues w hlen 2 Zur Best tigung ENTER dr cken 3 Mit der Pfeiltaste Service w hlen und mit ENTER best tigen 4 Passwort 9051 eingeben und mit ENTER best tigen 5 Mit den Pfeiltasten...

Page 31: ...tels des entsprechenden Jahres angezeigt Durch Dr cken der Pfeiltaste wird die Monats bersicht im Display dar gestellt Hier wurden im Januar 2017 insgesamt 2400 g K ltemittel abgesaugt In der Monats b...

Page 32: ...oder Weitere Menues w hlen 5 Zur Best tigung ENTER dr cken 6 Mit den Pfeiltasten oder Klimaanlagentest w hlen Es erscheint die Aufforderung die Klimaanlage zu kontrollieren 7 Hoch und Niederdruck der...

Page 33: ...eldungen werden angezeigt 10 Um den Klimaanlagentest zu beenden Taste STOP dr cken HD Schnellkupplung der Klimaanlage entfernen ENTER OK HINWEIS Wenn Sie zum Entkoppeln der HD Schnellkupplung den Fahr...

Page 34: ...viceprotokoll gedruckt 1 Die entsprechenden Anschl sse des AirConServiceCenters zun chst mit der Fahrzeug Klimaanlage verbinden und ffnen 2 Im Grundmen mit den Pfeiltasten oder Einzelne Prozesse w hle...

Page 35: ...auf Seite 36 3 Mit der Pfeiltaste die gew nschte Vakuumkontrollzeit eingeben 4 Beide Einstellungen mit ENTER best tigen I Klimaanlage Ja entleeren Nein ENTER OK STOP EXIT Wartezeit f r den Druckanstie...

Page 36: ...e Einstellungen mit ENTER best tigen I Klimaanlage Ja bef llen Nein ENTER OK STOP EXIT Frisch l ml 0 K ltemittel g 500 ENTER OK STOP EXIT HINWEIS Wenn im gleichen Prozessablauf ein Absaugvorgang statt...

Page 37: ...e mit ENTER starten 8 7 5 Nach Beendigung des Klimaservices Nachdem der Klimaservice beendet ist erscheint die Aufforderung die Serviceschl uche des AirConServiceCenters von der Fahrzeug Klimaanlage a...

Page 38: ...eit f r den Druckanstieg min auf 1 stellen Zur Best tigung ENTER dr cken 6 Vakuum erzeugen mit Nein abw hlen Zur Best tigung ENTER dr cken 7 Klimaanlage bef llen mit Nein abw hlen Zur Best tigung ENTE...

Page 39: ...1 O Ringe E ersetzen Neue O Ringe vor dem Einbau mit K lte mittel l benetzen 12 Neuen Trockner einsetzen und Schraube mit 15 Nm anziehen 13 Netzstecker einstecken 14 Ger t einschalten VORSICHT Die fol...

Page 40: ...ngef gt wurde Vakuumzeit gibt an wie lange die Vakuumpumpe seit der letzten R ckstellung siehe Datum in Betrieb war HINWEIS Nach dem Erledigen der Servicearbeiten m ssen Sie die jeweiligen Servicemeld...

Page 41: ...eiten an die seit der letzten R ckstellung siehe Datum mit dem Klimaserviceger t durchge f hrt wurden 9 3 1 Dichtheitskontrolle F hren Sie nach dem Wechseln des Filters eine Dichtheitskontrolle mit ei...

Page 42: ...leicht sich mit dem Umgegungsdruck ab 10 Servicekupplungen wieder auf die Serviceschl uche 7 und 8 handfest aufschrauben dabei die blauen und roten Kennzeichnun gen von Servicekupplungen und Servicesc...

Page 43: ...0 Minuten laufen manuell ber die Men auswahl 2 Frontabdeckung demontieren Schrauben D des Bedienfeldes herausdrehen und Bedienfeld nach oben klappen Dann Schrauben E unten an der Frontabdeckung heraus...

Page 44: ...f llen und leinf llschraube G wieder hineindrehen 8 Frontabdeckung und Bedienfeld montieren und Netzstecker ein stecken I HINWEIS Nach dem Erledigen der Servicearbeiten m ssen Sie die jeweiligen Servi...

Page 45: ...ltemittel seit der letzten R ckstellung siehe Datum ber den Men punkt Schnellstart oder auch Einzelne Prozesse in Klimaanlagen eingef llt wurde Vakuumzeit gibt an wie lange die Vakuumpumpe seit der l...

Page 46: ...eingef llt wurde Vakuumzeit gibt an wie lange die Vakuumpumpe seit der Produktion des Ger tes siehe Datum in Betrieb war HINWEIS Das Ger t speichert verschiedene Z hlerst nde ab Um die Totalwerte abzu...

Page 47: ...Daten in den internen Speicher der Station gespeichert aktuelle Software des AirConServiceCenters aktuelle Datenbank mit allen g ngigen Fahrzeugtypen und den entsprechenden Klimaanlagen F llmengen Si...

Page 48: ...ngezeigt 4 Zum Aktualisieren der Software oder Datenbank ENTER dr cken Die Station zeigt Fortschritt der Aktualisierung an Nach der Aktualisierung stellt die Station die Werkseinstellungen ein Anschli...

Page 49: ...ceschl uche 7 und 8 Nehmen Sie das AirConServiceCenter nicht in Betrieb wenn es besch digt ist 3 F hren Sie jedes halbe Jahr eine Dichtheitspr fung mit einem elektronischen Lecksuchger t durch WARNUNG...

Page 50: ...des Altger tes Wenn Sie das AirConServiceCenter endg ltig au er Betrieb nehmen entleeren Sie das Ger t zun chst von allen Fl ssigkeiten und entsorgen Sie die Fl ssigkeiten umweltgerecht M Bringen Sie...

Page 51: ...hrend des Vakuumprozesses wenn der Druck in der Klimaanlage nach 8 Minuten noch mehr als 50 mbar betr gt Klimaanlage auf Leck ber pr fen bzw Anschl sse des AirConServiceCenters an die Klimaanlage ber...

Page 52: ...dung beim Einschalten des AirConServiceCenters M glichst bald internen Filter wechseln siehe Kapitel Trockner Filter wechseln auf Seite 38 Zum bergehen 3 Sekunden ENTER dr cken Im Display erscheint Va...

Page 53: ...ls 30 kg Std Vakuumpumpenleistung 5 Kfz Std K ltemittelr ckgewinnungsquote 95 Leistung des hermetischen Verdichters 0 32 kW Trockenfilterleistung 150 kg Vakuumpumpen l Laufzeit 60 h F llzylinder Speic...

Page 54: ...5 6 1 Front 65 6 2 Rear and side view 66 7 Initial start up 67 7 1 Setting up and switching on 67 7 2 Standby menu 68 7 3 Language selection 68 7 4 Entering company data 69 7 5 Entering the date and t...

Page 55: ...g the pressure transducer 94 9 5 Changing the vacuum pump oil 96 9 6 Meter readings 99 9 7 Updating the software via USB 101 10 Cleaning and maintenance 102 11 Disposal 103 11 1 Disposing of used flui...

Page 56: ...arefully Also observe the following The Dometic WAECO training manual Technical Specifications Vehicle Air Conditioning The Dometic WAECO information brochure Legal Specifications Vehicle Air Conditio...

Page 57: ...rmat Meaning Example Bold Designations used on the unit Press ENTER to confirm Bold Display messages Short selection Text Text List in any order Pressure monitor Pressure relief valves 1 Text 2 Text 3...

Page 58: ...are famil iar with the operation and basic principles of the AirConServiceCenter of air conditioning systems and of refrigerants Only use the device for its intended purpose CAUTION Do not make modif...

Page 59: ...burns from cold or hot components Wear protective gloves CAUTION Do not start up the AirConServiceCenter if it is damaged Each time you start up the unit or top up the AirConServiceCenter first check...

Page 60: ...om rolling away 2 3 Handling refrigerant safely WARNING Do not carry out maintenance work on the vehicle air conditioning system when the engine is at operating temperature When performing maintenance...

Page 61: ...operating instructions according to TRG 402 for each filling system AirConServiceCenter These operating instruc tions must be used to train personnel in handling the unit The operator must ensure that...

Page 62: ...en handling refrigerants Flammable substances warning 2 6 Safety devices Pressure monitor switches the compressor off if normal operating pressure is exceeded Pressure relief valve additional safety m...

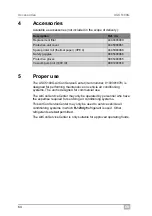
Page 63: ...ion Ref no Adapter for 500 ml fresh oil bottle 4440600026 Oil bottle 250 ml 4440600034 Adapter for coolant bottles large connection 4440600148 Sample bottle for professional oil can Daphne Hermetic oi...

Page 64: ...personnel who have the expertise required for servicing air conditioning systems This AirConServiceCenter may only be used to service vehicle air conditioning systems in which R 1234yf refrigerant is...

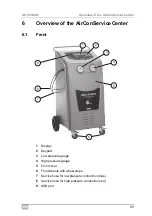
Page 65: ...he AirConServiceCenter 6 1 Front 1 Display 2 Keypad 3 Low pressure gauge 4 High pressure gauge 5 Front cover 6 Front wheels with wheel stops 7 Service hose for low pressure connection blue 8 Service h...

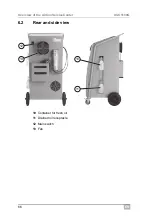
Page 66: ...EN Overview of the AirConServiceCenter ASC5100G 66 6 2 Rear and side view 10 Container for fresh oil 11 Drained oil receptacle 12 Main switch 13 Fan 11 10 13 12...

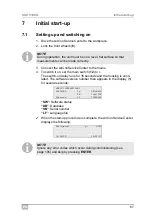
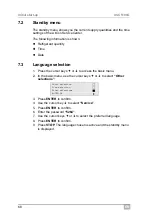
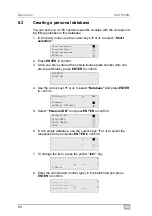
Page 67: ...version number then appears in the display 1 for several seconds SW Software status DB Database SN Serial number LF Language file When the start up procedure is complete the AirConServiceCenter displa...

Page 68: ...ss the cursor keys or to access the basic menu 2 In the basic menu use the cursor keys or to select Other selections 3 Press ENTER to confirm 4 Use the cursor key to select Service 5 Press ENTER to co...

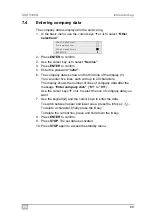
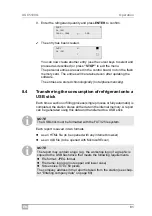
Page 69: ...ach with up to 20 characters The display shows the number of lines of company data after the message Enter company data 01 to 05 Use the cursor keys or to select the line of company data you want 7 Us...

Page 70: ...use the cursor keys or to select Other selections 2 Press ENTER to confirm 3 Use the cursor key to select Service 4 Press ENTER to confirm 5 Enter the password 8463 6 Use the keypad and the cursor key...

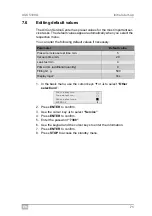
Page 71: ...ursor keys or to select Other selections 2 Press ENTER to confirm 3 Use the cursor key to select Service 4 Press ENTER to confirm 5 Enter the password 7388 6 Use the keypad and the cursor keys to ente...

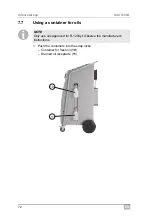
Page 72: ...5100G 72 7 7 Using a container for oils I 1 Push the containers into the snap locks Container for fresh oil 10 Drained oil receptacle 11 NOTE Only use oils approved for R 1234yf Observe the manufactur...

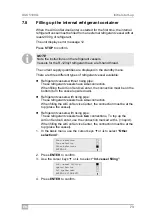
Page 73: ...n Refrigerant vessels with rising pipe These refrigerant vessels have one connection When filling the AirConServiceCenter the connection must be at the top place the vessel Refrigerant vessels with ri...

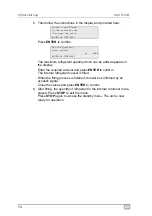
Page 74: ...vessel is filled When the filling process is finished this will be confirmed by an acoustic signal Close the valves and press ENTER to confirm 6 After filling the quantity of refrigerant in the inter...

Page 75: ...TER NOTICE When the air conditioning system is being serviced the engine and the air conditioning unit must be switched off NOTE A fully automatic air conditioning service is started using the Short s...

Page 76: ...rvice is started After the air conditioning service has finished you will be prompted to disconnect the hoses 7 and 8 of the AirConServiceCenter from the vehicle air conditioning system 9 Disconnect t...

Page 77: ...ions 2 Press ENTER to confirm 3 Use the cursor key to select Service and press ENTER to confirm 4 To access the ADM administrator menu enter the password 9786 and press ENTER to confirm 5 Enter the ad...

Page 78: ...ect user name and then press ENTER to confirm I ADM AREA Confirm new code ADM AREA User number 1 ADM AREA User number 1 Insert new code ADM AREA User number 1 Confirm new code NOTE Use the yellow info...

Page 79: ...e display If a user code has been created the same code must be used to enable the station 1 Enter the correct user code If you enter an incorrect user code the following error message appears Once th...

Page 80: ...cursor keys or to select Database and press ENTER to confirm 5 Select Personal DB and press ENTER to confirm 6 In this empty database use the cursor keys or to select the respective entry and press E...

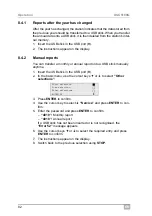
Page 81: ...r fully automatic is completed the station stores all the data in the internal memory A report can be generated using this data and transferred to a USB stick IEach report is saved in two formats as a...

Page 82: ...ort onto a USB stick manually anytime 1 Insert the USB stick in the USB port 9 2 In the basic menu use the cursor keys or to select Other selections 3 Press ENTER to confirm 4 Use the cursor key to se...

Page 83: ...the cursor keys or to select Other selections 2 Press ENTER to confirm 3 Use the cursor key to select Service and press ENTER to confirm 4 Enter the password 9051 and press ENTER to confirm 5 Use the...

Page 84: ...that year Press the cursor key to view the display for the monthly overview Here a total of 2400 g of refrigerant was extracted in January 2017 In the monthly overview the filled and extracted amount...

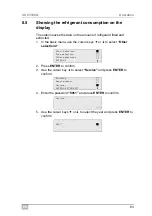
Page 85: ...asic menu use the cursor keys or to select Other selections 5 Press ENTER to confirm 6 Use the cursor keys or to select A C system test A prompt appears asking you to check the air conditioning system...

Page 86: ...I The following display messages appear 10 To end the air conditioning test press the STOP button Disconnect the HP service hose from the A C system ENTER OK NOTE If you have turned off the vehicle en...

Page 87: ...en performed a service report is printed 1 Start by fitting the connections of the AirConServiceCenter to the vehicle air conditioning system and opening them 2 In the basic menu use the cursor keys o...

Page 88: ...continue with chapter Filling process on page 89 3 Use the cursor key to enter the vacuum phase time 4 Press ENTER to confirm both settings I Rec Recycling Yes phase No ENTER OK STOP EXIT Pressure inc...

Page 89: ...confirm all settings I Filling phase Yes No ENTER OK STOP EXIT PAG oil ml 0 UV tracer ml 0 Refrigerant g 500 ENTER OK STOP EXIT NOTE If extraction is taking place in the same process sequence the quan...

Page 90: ...firm 3 Once all settings have been entered press ENTER to start the process 8 7 5 After ending the air conditioning service After the air conditioning service has finished you are prompted to disconne...

Page 91: ...ENTER to confirm 6 Deselect Vacuum phase using No Press ENTER to confirm 7 Deselect Filling phase using No Press ENTER to confirm 8 Select Process start Press ENTER to confirm The service hoses will n...

Page 92: ...from the holder and pull the dryer filter straight out 11 Replace the O rings E Moisten new O rings with refrigerant oil before installing 12 Insert the new dryer and tighten the screw to max 15 Nm 13...

Page 93: ...on since the last reset see date Vacuum time indicates how long the vacuum pump has operated since the last reset see date NOTE After finishing the service tasks you must delete the respective service...

Page 94: ...e dryer filter on page 91 3 Press ENTER to confirm 4 Use the cursor keys or to select Service 5 Press ENTER to confirm 6 Enter the password 2224 7 Confirm Pressure transducer by pressing ENTER Service...

Page 95: ...arkings on the couplings and hoses 11 Use the keypad 2 to enter the current local atmospheric pressure and press ENTER to confirm I 12 When calibration has been completed press ENTER to exit the menu...

Page 96: ...he menu 2 Take off the front panel Undo the screws D on the control panel and lift it up Then undo the screws E on the bottom of the front panel and take it off WARNING Switch off the AirConServiceCen...

Page 97: ...middle of the sight glass H and screw the oil filling plug G back in 8 Put the front panel and control panel back on and reconnect the power plug I NOTE After finishing the service tasks you must dele...

Page 98: ...em indicates how many grams of refrigerant have been filled into air conditioning systems using the menu item Short selec tion or Free selection Vacuum time indicates how long the vacuum pump was oper...

Page 99: ...tion since the last reset see date Vacuum time indicates how long the vacuum pump has operated since the last reset see date NOTE The unit saves various meter readings To access the total values conse...

Page 100: ...rvice tasks ASC5100G 100 Service completed displays the amount of service work performed using the air conditioning service unit since the last reset see date Service completed 07 03 17 Number 4 STOP...

Page 101: ...rent software on the USB stick 2 Insert the USB stick in the USB port 9 3 Switch on the unit The station will scan the USB stick for a later version If the software on the USB stick is more up to date...

Page 102: ...ergent Do not use solvents or scouring agents 2 Regularly inspect the service hoses 7 and 8 Do not start up the AirConServiceCenter if it is damaged 3 Every six months carry out a leak test with an el...

Page 103: ...e added to other recyclable waste 11 3 Scrapping the old unit If you wish to scrap the AirConServiceCenter first completely drain it of all liquids and dispose of them in an environmentally responsibl...

Page 104: ...vacuum process if the pressure in the air condition ing system after 8 minutes is still more than 50 mbar Check the air conditioning system or the connections between it and the AirConServiceCenter fo...

Page 105: ...u switch on the AirConServiceCenter Change the internal filter as soon as possible see chap ter Changing the dryer filter on page 91 To skip this press ENTER for 3 seconds The display shows Change the...

Page 106: ...tion rate 30 kg hr Vacuum pump output 5 cars hr Refrigerant recovery ratio 95 Hermetic compressor output 0 32 kW Drier filter output 150 kg Vacuum pump oil service life 60 h Filling cylinder accumulat...

Page 107: ...r 119 6 1 Parte delantera 119 6 2 Parte trasera y vista lateral 120 7 Primera puesta en funcionamiento 121 7 1 Instalaci n y encendido 121 7 2 Men Stand by 122 7 3 Selecci n de idioma 122 7 4 Introduc...

Page 108: ...ar el sensor de presi n 148 9 5 Cambiar el aceite de la bomba de vac o 150 9 6 Estados del contador 153 9 7 Actualizar el software v a USB 154 10 Limpieza y mantenimiento 156 11 Gesti n de residuos 15...

Page 109: ...detenidamente estas instrucciones de uso Tenga en cuenta adem s El manual de formaci n Climatizaci n del veh culo bases t cnicas de Dometic WAECO El folleto informativo Climatizaci n del veh culo base...

Page 110: ...tran en el aparato Pulse la tecla ENTER Negrita Mensajes en pantalla Selec autom tica Texto Texto Listado en orden arbitrario Presostato de seguridad V lvulas de sobrepresi n 1 Texto 2 Texto 3 Texto P...

Page 111: ...y principios b sicos del AirConServiceCenter de sistemas de refrigeraci n y equipos de aire acondicionado y de refri gerantes Utilice este aparato nicamente para el fin previsto ATENCI N No realice mo...

Page 112: ...condicionado del veh culo La mezcla de are comprimido y refrigerante puede ser inflama ble o explosiva El mantenimiento y reparaci n del aparato solo lo puede llevar a cabo personal cualificado y auto...

Page 113: ...cendido Peligro de sufrir lesiones por derrame de l quidos Los l quidos que se derramen sobre el suelo pueden suponer un peli gro de resbalamiento y lesiones Elimine inmediatamente los l quidos derram...

Page 114: ...ubterr neos por ejemplo fosas de montaje o pozos de drenaje El refrigerante es m s pesado que el ox geno y en consecuencia desplaza el ox geno necesario para la respiraci n En los trabajos en fosas de...

Page 115: ...giene para la salud al manipular gases a presi n Manejo del aparato y ejecuci n de los trabajos de mantenimiento en el mismo El explotador del aparato es el responsable de que el personal encar gado d...

Page 116: ...gafas de protecci n Advertencia sobre sustancias inflamables 2 6 Dispositivos de seguridad Presostato de seguridad desconecta el compresor cuando se sobre pasa la presi n de servicio normal V lvula de...

Page 117: ...ella de 500 ml de aceite nuevo 4440600026 Botella de aceite 250 ml 4440600034 Adaptador para botellas de refrigerante conexi n grande 4440600148 Frasco de prueba de lata de aceite profesional aceite D...

Page 118: ...ca del mantenimiento de equipos de aire acondicionado Con el AirConServiceCenter solo puede realizarse el mantenimiento de equipos de aire acondicionado de veh culos que utilicen el refrigerante R 134...

Page 119: ...delantera 1 Pantalla 2 Teclado de mando 3 Man metro de baja presi n 4 Man metro de alta presi n 5 Cubierta frontal 6 Ruedas delanteras inmovilizables 7 Manguera de servicio para la conexi n de baja pr...

Page 120: ...Vista general del AirConServiceCenter ASC5100G 120 6 2 Parte trasera y vista lateral 10 Recipiente para aceite limpio 11 Recipiente para aceite usado 12 Interruptor principal 13 Ventilador 11 10 13 1...

Page 121: ...la 1 mostrar durante algunos segundos el n mero de versi n del software SW versi n de software DB base de datos SN n mero de serie LF archivo de voz Para concluir el proceso de arranque el AirConServi...

Page 122: ...de direcci n o para llegar al men b sico 2 Con las teclas de direcci n o seleccione en el men b sico Otras selecciones 3 Para confirmar pulse la tecla ENTER 4 Con la tecla de direcci n seleccione Serv...

Page 123: ...cada una En pantalla aparece el n mero de l neas con datos de la empresa mostradas detr s del mensaje Introducir datos de la empresa de 01 a 05 Con las teclas de direcci n o se selecciona una l nea d...

Page 124: ...b sico Otras selecciones 2 Para confirmar pulse la tecla ENTER 3 Con la tecla de direcci n seleccione Servicio 4 Para confirmar pulse la tecla ENTER 5 Introduzca la contrase a 8463 6 Introduzca los d...

Page 125: ...eccione en el men b sico Otras selecciones 2 Para confirmar pulse la tecla ENTER 3 Con la tecla de direcci n seleccione Servicio 4 Para confirmar pulse la tecla ENTER 5 Introduzca la contrase a 7388 6...

Page 126: ...e recipientes de aceite I 1 Acople los recipientes a los cierres r pidos recipiente para aceite nuevo 10 recipiente para aceite usado 11 NOTA Utilice nicamente aceites autorizados para R 1234yf Siga t...

Page 127: ...tubo ascendente Estas botellas de refrigerante tienen una conexi n Al rellenar el AirConServiceCenter la conexi n debe estar arriba ponga la botella boca arriba Botellas de refrigerante con tubo asce...

Page 128: ...ena el recipiente interno de refrigerante El final del proceso de llenado se confirma con una se al ac stica Cierre las v lvulas y confirme con ENTER 6 Tras el rellenado se mostrar la cantidad de refr...

Page 129: ...irecci n y finalmente pulse ENTER AVISO Mientras se realiza el mantenimiento del equipo de aire acondicionado tanto el motor como el equipo de aire acondicionado deben estar para dos NOTA Con la opci...

Page 130: ...nto del aire acondicio nado aparece un mensaje exhort ndole a desconectar las mangue ras de servicio 7 y 8 del AirConServiceCenter del equipo de aire acondicionado del veh culo 9 Desconecte las mangue...

Page 131: ...n el men b sico Otras selecciones 2 Para confirmar pulse la tecla ENTER 3 Con la tecla de direcci n seleccione Servicio y confirme con ENTER 4 Introduzca la contrase a 9786 y confirme con ENTER para a...

Page 132: ...o s lo podr ponerse en marcha con dicho c digo 10 Para confirmar un nuevo c digo de usuario I 11 Introduzca los nombres de usuario correspondientes y confirme con ENTER ADM AREA Insert new code ADM AR...

Page 133: ...uno para desbloquear la estaci n 1 Introduzca el c digo de usuario correspondiente Si introduce un c digo de usuario err neo aparecer el siguiente mensaje de error Si lo introduce correctamente la est...

Page 134: ...irecci n o seleccione Base de datos y confirme con ENTER 5 Seleccione Personal DB y confirme con ENTER 6 En esta base de datos vac a seleccione con las teclas de direcci n o la entrada correspondiente...

Page 135: ...estaci n memoriza todos los datos correspondientes en una memoria interna A partir de estos datos puede generarse un informe y transferirse a un l piz USB ICada informe se guarda en dos formatos como...

Page 136: ...forme mensual o anual a un l piz USB 1 Inserte el l piz USB en la conexi n USB 9 2 Con las teclas de flecha o seleccione en el men b sico Otros men s 3 Para confirmar pulse la tecla ENTER 4 Con la tec...

Page 137: ...ione en el men b sico Otras selecciones 2 Para confirmar pulse la tecla ENTER 3 Con la tecla de direcci n seleccione Servicio y confirme con ENTER 4 Introduzca la contrase a 9051 y confirme con ENTER...

Page 138: ...e Pulsando la tecla de direcci n se representa en la pantalla la vista mensual En este ejemplo se purgaron en enero de 2017 un total de 2400 g de refrigerante En la vista mensual se muestra alternativ...

Page 139: ...4 Con las teclas de direcci n o seleccione en el men b sico Otras selecciones 5 Para confirmar pulse la tecla ENTER 6 Con las teclas de direcci n o seleccione Prueba pres A C Aparece un mensaje requi...

Page 140: ...HD alta presi n y ret relo del equipo de aire acondicionado I Aparecen los siguientes mensajes en pantalla 10 Para finalizar la prueba del equipo de aire acondicionado pulse la tecla STOP Desconectar...

Page 141: ...ir cada proceso se imprime un informe de servicio 1 Una las conexiones correspondientes del AirConServiceCenter con el equipo de aire acondicionado del veh culo y bralas 2 Con las teclas de direcci n...

Page 142: ...ro ceso de llenado en la p gina 143 3 Con la tecla de direcci n introduzca el tiempo de verificaci n de fuga que desee 4 Confirme los dos ajustes con ENTER I Recup Reciclado S fase No ENTER OK STOP EX...

Page 143: ...stes con ENTER I Fase rellenado S No ENTER OK STOP EXIT Aceite nuevo ml 0 Aditivo UV ml 0 Refrigerante g 500 ENTER OK STOP EXIT NOTA Si durante el mismo ciclo del proceso tiene lugar tambi n un proces...

Page 144: ...os los ajustes inicie los procesos con ENTER 8 7 5 Tras finalizar el mantenimiento del equipo de aire acondicionado Cuando se termina el servicio de mantenimiento del aire acondicio nado aparece un me...

Page 145: ...st tiempo a 1 Para confirmar pulse la tecla ENTER 6 Deseleccione Fase de vac o con No Para confirmar pulse la tecla ENTER 7 Deseleccione Fase de rellenado con No Para confirmar pulse la tecla ENTER 8...

Page 146: ...oporte y extraiga el filtro del secador sin inclinarlo 11 Cambie las juntas t ricas E Humecte las nuevas juntas t ricas con el aceite de refrigerante antes de montarlas 12 Coloque un nuevo secador y a...

Page 147: ...opci n de men Selec autom tica o tambi n Selecci n libre Tiempo de vac o indica cu nto tiempo ha estado la bomba de vac o en funcionamiento desde la ltima puesta a cero ver fecha NOTA Despu s de real...

Page 148: ...ap tulo Cambiar el filtro del secador en la p gina 145 3 Para confirmar pulse la tecla ENTER 4 Con las teclas de direcci n o seleccione Servicio 5 Para confirmar pulse la tecla ENTER 6 Introduzca la c...

Page 149: ...las mar cas azules y rojas de los acoplamientos y las mangueras de servicio 11 Con el teclado de mando 2 introduzca la presi n atmosf rica que haya en la localidad y pulse ENTER para confirmar I12 Cu...

Page 150: ...ente mediante la selecci n de men 2 Desmonte la cubierta frontal Desenrosque los tornillos D del panel de mando y abata ste hacia arriba Desenrosque entonces los tornillos E abajo en la cubierta front...

Page 151: ...o para bombas de vac o hasta la mitad de la mirilla H y vuelva a enroscar el tornillo de llenado de aceite G 8 Monte la cubierta frontal y el panel de mando y conecte el enchufe I NOTA Despu s de real...

Page 152: ...sistema indica la cantidad de gramos de refrigerante que se ha llenado en los equipos de aire acondicionado por medio de la opci n de men Selec autom tica o tambi n Selecci n libre Tiempo de vac o in...

Page 153: ...auto m tica o tambi n Selecci n libre Tiempo de vac o indica cu nto tiempo ha estado la bomba de vac o en funcionamiento desde la ltima puesta a cero ver fecha NOTA El aparato guarda distintos estados...

Page 154: ...atos en la memoria interna de la estaci n el software actual del AirConServiceCenter la base de datos actual con todos los tipos de veh culo convenciona les y las cantidades de llenado correspondiente...

Page 155: ...fondo negro 4 Pulse la tecla ENTER para actualizar el software o la base de datos La estaci n muestra el progreso de la actualizaci n Una vez efectuada la actualizaci n la estaci n configura los ajust...

Page 156: ...ervicio 7 y 8 No ponga el AirConServiceCenter en marcha si no est en perfectas condiciones 3 Compruebe la estanqueidad cada medio a o utilizando un detector de fugas electr nico ADVERTENCIA Peligro de...

Page 157: ...amarillo 11 3 Gesti n del aparato usado Cuando vaya a desechar definitivamente el AirConServiceCenter vac e primero todos los l quidos del aparato y gesti nelos respetando el medio ambiente M Lleve e...

Page 158: ...urante el proceso de vac o cuando la presi n en el equipo de aire acondi cionado sigue siendo supe rior a 50 mbares tras 8 minutos Compruebe si el equipo de aire acondicionado tiene fugas o bien compr...

Page 159: ...refrigerante est n abiertas En pantalla aparece Sustituya el filtro secador del equipo Desea continuar Mensaje al encender el AirConServiceCenter Cambie el filtro interno lo antes posible v ase la cap...

Page 160: ...vac o 5 veh c h Tasa de recuperaci n de refrigerante 95 Potencia del compresor herm tico 0 32 kW Potencia del filtro de secado 150 kg Tiempo de uso del aceite de la bomba de vac o 60 h Capacidad til...

Page 161: ...de AirConServiceCenter 173 6 1 Face avant 173 6 2 Face arri re et vue lat rale 174 7 Premi re mise en service 175 7 1 Installation et mise en marche 175 7 2 Menu de mode veille 176 7 3 S lection de l...

Page 162: ...teur de pression 204 9 5 Changement de l huile de la pompe vide 206 9 6 Statuts du compteur 209 9 7 Mise jour du logiciel l aide de la cl USB 210 10 Entretien et nettoyage 212 11 Elimination 213 11 1...

Page 163: ...ion de Dometic WAECO Climatisation des v hicules bases techniques de la brochure d information de Dometic WAECO Climatisation des v hicules bases juridiques des indications du fabricant de r frig rant...

Page 164: ...as D signations se trouvant sur l appareil Appuyer sur ENTER Gras Affichages l cran S lection courte Texte Texte Enum ration dans un ordre quelconque Dispositif de surveillance de la pression Soupapes...

Page 165: ...ssement ou de climatisation ainsi que des r frig rants est habilit utiliser l AirConServiceCenter Utilisez cet appareil uniquement pour l usage pr vu ATTENTION Ne proc dez aucun travail de modificatio...

Page 166: ...e climatisation de v hicule Un m lange d air comprim et de r frig rant peut tre inflammable ou explosif Seul un personnel qualifi et autoris de soci t s agr es et certi fi es est habilit effectuer la...

Page 167: ...isque de blessures en raison du d versement de liquides Du fait du d versement de liquides les personnes peuvent glisser et se blesser Essuyez imm diatement les liquides d vers s ou les gouttes de liq...

Page 168: ...eur par ex mines de montage puits perdus Le r frig rant est plus lourd que l oxyg ne et prend donc la place de l oxyg ne n ces saire la respiration En cas de travaux dans des mines de montage non vent...

Page 169: ...n Mesures de sant publique concernant la manipulation de gaz sous pression Utilisation de l appareil et ex cution de travaux de maintenance sur l appareil L exploitant de l appareil doit veiller ce qu...

Page 170: ...frig rant Avertissement concernant les substances inflammables 2 6 Dispositifs de s curit Dispositif de surveillance de la pression teint le compresseur d s que la pression de service normale est d p...

Page 171: ...raccordement 4440600148 Bouteille de test bouteille d huile professionnelle huile Daphne Hermetic 100 ml R cipient d huile usag e 250 ml 4440600249 Lunettes de protection gants de protection 444590010...

Page 172: ...n commerciale Seules des personnes poss dant les connaissances techniques n cessaires l entretien des climatisations sont habilit es utiliser l AirConServiceCenter L AirConServiceCenter permet l entre...

Page 173: ...nServiceCenter 6 1 Face avant 1 Affichage 2 Clavier 3 Manom tre basse pression 4 Manom tre haute pression 5 Plaque avant 6 Roues avant avec freins 7 Flexible d entretien raccord basse pression bleu 8...

Page 174: ...FR Vue d ensemble de AirConServiceCenter ASC5100G 174 6 2 Face arri re et vue lat rale 10 Bouteille d huile neuve 11 Bouteille d huile ancienne 12 Interrupteur principal 13 Ventilateur 11 10 13 12...

Page 175: ...e num ro de la version du logiciel pendant quelques secondes SW statut du logiciel DB base de donn es SN num ro de s rie LF ficher de langue Pour terminer le processus de d marrage l AirConServiceCent...

Page 176: ...es touches fl ch es ou pour acc der au menu de base 2 Dans le menu de base s lectionner Autres menus l aide de la touche fl ch e ou 3 Confirmer en appuyant sur ENTER 4 S lectionner Service avec la tou...

Page 177: ...de lignes des donn es affich es appara t l cran apr s le message Entrez donn es 01 05 Les touches fl ch es ou permettent de s lectionner la ligne souhait e dans les donn es 7 Saisir les donn es souhai...

Page 178: ...menus l aide de la touche fl ch e ou 2 Confirmer en appuyant sur ENTER 3 S lectionner Service avec la touche fl ch e 4 Confirmer en appuyant sur ENTER 5 Entrer le mot de passe 8463 6 Saisir les donn...

Page 179: ...tionner Autres menus l aide de la touche fl ch e ou 2 Confirmer en appuyant sur ENTER 3 S lectionner Service avec la touche fl ch e 4 Confirmer en appuyant sur ENTER 5 Entrer le mot de passe 7388 6 Sa...

Page 180: ...r cipients pour les huiles I 1 Placer les r cipients sur les raccords rapides bouteille pour huile neuve 10 bouteille d huile ancienne 11 REMARQUE Utilisez exclusivement des huiles R 1234yf autoris es...

Page 181: ...u de refoulement Ces bouteilles de r frig rant sont munies d un raccord Lors du remplissage de l AirConServiceCenter le raccord doit se trouver en haut placer la bouteille verticalement Bouteilles de...

Page 182: ...frig rant est remplie La fin du processus de remplissage est confirm e par un signal sonore Fermer les vannes et confirmer en appuyant sur ENTER 6 Apr s le remplissage la quantit de r frig rant pr se...

Page 183: ...ant les travaux d entretien effectu s sur la climatisation le moteur et la climatisation doivent tre teints REMARQUE Le menu S lection courte permet d ex cuter des travaux d entre tien de la climatisa...

Page 184: ...ue l entretien de la climatisation est termin l cran affiche un message demandant de d connecter les flexibles d entretien 7 et 8 de l AirConServiceCenter de la climatisation du v hicule 9 D connecter...

Page 185: ...us l aide de la touche fl ch e ou 2 Confirmer en appuyant sur ENTER 3 S lectionner Service avec la touche fl ch e et confirmer en appuyant sur ENTER 4 Saisir le mot de passe 9786 et confirmer en appuy...

Page 186: ...igatoire pour mettre l appareil en marche 10 Confirmer le nouveau code utilisateur I 11 Saisir le nom d utilisateur correspondant et confirmer la saisie en appuyant sur ENTER ADM AREA Insert new code...

Page 187: ...r le poste 1 Saisir le code utilisateur correspondant En cas de saisie d un code utilisateur incorrect le message d erreur suivant s affiche Lorsque la saisie est correcte le poste est activ et d marr...

Page 188: ...cas l espace peut galement rester vide confirmer en appuyant sur ENTER 4 S lectionner Base de donn es avec la touche fl ch e ou et confirmer en appuyant sur ENTER 5 S lectionner Personal DB et confirm...

Page 189: ...re entr e s lectionner avec les touches fl ch es puis poursuivre selon les indications ou bien quitter le menu en appuyant sur STOP Les entr es personnelles sont m moris es dans l appareil et non sur...

Page 190: ...ent d ann e Apr s un changement d ann e le poste signale que les donn es m mo ris es pour l ann e pr c dente doivent tre transf r es sur une cl USB Si vous transf rez les donn es annuelles sur une cl...

Page 191: ...l aide de la touche fl ch e s lectionner Service et confir mer en appuyant sur ENTER 5 Saisir le mot de passe et confirmer en appuyant sur ENTER 4910 rapport mensuel 4918 rapport annuel Si aucune cl U...

Page 192: ...de de la touche fl ch e ou 2 Confirmer en appuyant sur ENTER 3 S lectionner Service avec la touche fl ch e et confirmer en appuyant sur ENTER 4 Saisir le mot de passe 9051 et confirmer en appuyant sur...

Page 193: ...appuyez sur la touche fl ch e la vue mensuelle s affiche l cran Dans cet exemple 2400 g de fluide frigorig ne ont t aspir s en janvier 2017 Dans la vue mensuelle la quantit remplie et la quantit aspi...

Page 194: ...ectionner Autres menus l aide de la touche fl ch e ou 5 Confirmer en appuyant sur ENTER 6 S lectionner Test syst me A C l aide de la touche fl ch e ou Le message vous invitant contr ler le climatiseur...

Page 195: ...messages suivants s affichent 10 Pour terminer le test du climatiseur appuyer sur la touche STOP D connectez le flexible HP du syst me A C ENTER OK REMARQUE Si vous avez arr t le moteur du v hicule po...

Page 196: ...Connecter les raccords correspondants de l AirConServiceCenter au syst me de climatisation du v hicule et les ouvrir 2 Dans le menu de base s lectionner S lection courte l aide de la touche fl ch e o...

Page 197: ...l on s lectionne Phase de vide saisir le temps de vide sou hait standard 20 min ou sinon poursuivre avec chapitre Phase de charge page 198 3 Saisir l aide de la touche fl ch e la dur e de test de fuit...

Page 198: ...ou humidit ventuels et pr parer le syst me pour la phase de charge Les r sidus de r frig rant aspir s encore m lang s l huile r frig rante sont collect s et recycl s par l AirConService Center Phase...

Page 199: ...u s lancer les processus en appuyant sur ENTER 8 7 5 Apr s que l entretien de la climatisation est termin Une fois que l entretien de la climatisation est termin l cran affiche un message demandant de...

Page 200: ...Confirmer en appuyant sur ENTER 6 D sactiver Phase de vide avec Non Confirmer en appuyant sur ENTER 7 D sactiver Phase de charge avec Non Confirmer en appuyant sur ENTER 8 S lectionner D marrer proces...

Page 201: ...et retirer le filtre du s cheur 11 Remplacer les joints toriques E Humecter les nouveaux joints toriques avec de l huile r frig rante avant le montage 12 Placer un nouveau s cheur et serrer la vis 15...

Page 202: ...rte ou S lection libre Temps de vide indique combien de temps la pompe vide a fonctionn depuis la derni re remise z ro voir date REMARQUE Une fois les travaux d entretien termin s vous devez effacer l...

Page 203: ...ntretien ayant t effectu s par l appareil d entretien de la climatisation depuis la derni re remise z ro voir date 9 3 1 Contr le d tanch it Apr s le changement du filtre effectuez un contr le d tanch...

Page 204: ...t sur ENTER L appareil s aligne sur la pression ambiante 10 Revisser fermement les connecteurs sur les flexibles de service 7 et 8 en tenant compte des marquages bleus et rouges des connec teurs et fl...

Page 205: ...s sur STOP pour acc der au menu de mode veille 14 Pour la vidange des flexibles de service effectuez une br ve phase de vide voir chapitre S lection libre page 196 REMARQUE La pression atmosph rique a...

Page 206: ...ns le menu 2 D monter la plaque avant D visser les vis D du tableau de commande et rabattre le tableau de commande vers le haut Ensuite d visser les vis E en bas de la plaque avant et retirer la plaqu...

Page 207: ...H et revisser la vis de remplissage d huile G 8 Monter la plaque avant et le tableau de commande et brancher la prise secteur I REMARQUE Une fois les travaux d entretien termin s vous devez effacer l...

Page 208: ...inter R1234 vers A C indique combien de grammes de r frig rant ont t ajout s dans les climatiseurs au moyen de l entr e de menu S lection courte ou S lection libre Temps de vide indique combien de tem...

Page 209: ...mps de vide indique combien de temps la pompe vide a fonc tionn depuis la derni re remise z ro voir date REMARQUE L appareil m morise diff rents statuts du compteur Afin d appeler les valeurs totales...

Page 210: ...es sont enregistr es dans la m moire interne du poste le logiciel actuel de l AirConServiceCenter une base de donn es actuelle avec tous les types de v hicules cou rants et les niveaux de remplissage...

Page 211: ...t en bas 4 Pour actualiser le logiciel ou la base de donn es appuyer sur ENTER Le poste affiche la progression de l actualisation Apr s l actualisation le poste r gle les param tres par d faut Ensuite...

Page 212: ...aites pas fonctionner l AirConServiceCenter en cas d endommagement 3 Effectuez chaque ann e un contr le d tanch it l aide d un appa reil de recherche des fuites lectronique AVERTISSEMENT Risque de ble...

Page 213: ...viceCenter d finitivement hors service vidangez d abord l appareil pour liminer tous les liquides et recyclez les liquides en tenant compte des directives relatives la protection de l environnement M...

Page 214: ...sage pendant le proces sus de vide lorsque la pres sion dans le syst me de climatisation est encore sup rieure 50 mbars au bout de 8 minutes V rifier que le syst me de cli matisation ne fuit pas et v...

Page 215: ...que les vannes de cette derni re sont ouvertes Affichage l cran Changez le filtre interne Continuer Message lors de la mise en marche de l AirConServiceCenter Changer le filtre interne d s que possibl...

Page 216: ...ce de la pompe vide 5 v hicules heure Taux de r cup ration des r frig rants 95 Puissance du compresseur herm tique 0 32 kW Puissance du filtre sec 150 kg Dur e de fonctionnement huile de pompe vide 60...

Page 217: ...2 222 2 3 224 2 4 225 2 5 AirConServiceCenter 226 2 6 226 3 227 4 228 5 228 6 AirConServiceCenter 229 6 1 229 6 2 230 7 231 7 1 231 7 2 232 7 3 232 7 4 233 7 5 234 7 6 235 7 7 236 7 8 237 8 239 8 1 23...

Page 218: ...RU ASC5100G 218 9 256 9 1 256 9 2 256 9 3 258 9 4 259 9 5 261 9 6 264 9 7 USB 265 10 267 11 268 11 1 268 11 2 268 11 3 268 12 269 13 271...

Page 219: ...RU 219 ASC5100G 1 AirConServiceCenter ASC5100G Dometic WAECO Dometic WAECO AirConServiceCenter 1 1 AirConServiceCenter 49 0 2572 879 0...

Page 220: ...RU ASC5100G 220 1 2 A I ENTER 1 2 3 1 2 3 1 229 230 2 A E...

Page 221: ...RU 221 ASC5100G 2 2 1 AirConServiceCenter AirConServiceCenters AirConServiceCenter 405 C AirConServiceCenter AirConServiceCenter AirConServiceCenter...

Page 222: ...RU ASC5100G 222 2 2 AirConServiceCenter BGR 157 TRG 250 280 316 AirConServiceCenter AirConServiceCenter AirConServiceCenter...

Page 223: ...RU 223 ASC5100G AirConServiceCenter AirConServiceCenter AirConServiceCenter AirConServiceCenter AirConServiceCenter A R 1234yf AirConServiceCenter AirConServiceCenter AirConServiceCenter...

Page 224: ...RU ASC5100G 224 2 3 405 C A AirConServiceCenters I R 1234yf...

Page 225: ...RU 225 ASC5100G 2 4 TRG 402 AirConServiceCenter...

Page 226: ...RU ASC5100G 226 2 5 AirConServiceCenter 230 50 2 6...

Page 227: ...RU 227 ASC5100G 3 AirConServiceCenter A 500 4440600026 250 4440600034 4440600148 Daphne Hermetic 100 250 4440600249 4445900107 R 1234yf...

Page 228: ...ASC5100G 228 4 5 AirConServiceCenter ASC5100G 9103301878 AirConServiceCenter AirConServiceCenter R 1234yf AirConServiceCenter 4440400009 4445900081 VPE 4 4445900088 8885400066 8885400065 1000 88872000...

Page 229: ...RU 229 ASC5100G AirConServiceCenter 6 AirConServiceCenter 6 1 1 2 3 4 5 6 7 8 9 USB 1 2 6 5 4 8 7 9 3...

Page 230: ...RU AirConServiceCenter ASC5100G 230 6 2 10 11 12 13 11 10 13 12...

Page 231: ...1 1 AirConServiceCenter 2 6 I 3 AirConServiceCenter 4 12 I 35 1 SW DB SN LF AirConServiceCenter I WAECO INTERNATIONAL ASC5100G SW 5ELU0076 DB ldyf1701 SNxxxxxx LF 12340061 Refrigerant g XXXX 11 56 35...

Page 232: ...RU ASC5100G 232 7 2 AirConServiceCenter 7 3 1 2 Other selections 3 ENTER 4 Service 5 ENTER 6 5264 7 8 ENTER 9 STOP Short selection Free selection Other selections ENTER OK...

Page 233: ...RU 233 ASC5100G 7 4 1 Other selections 2 ENTER 3 Service 4 ENTER 5 3282 6 1 20 Enter company data 01 05 7 2 C C 8 ENTER 9 STOP 10 STOP Short selection Free selection Other selections ENTER OK...

Page 234: ...RU ASC5100G 234 7 5 1 Other selections 2 ENTER 3 Service 4 ENTER 5 8463 6 7 ENTER 8 STOP Short selection Free selection Other selections ENTER OK...

Page 235: ...RU 235 ASC5100G 7 6 AirConServiceCenter 1 Other selections 2 ENTER 3 Service 4 ENTER 5 7388 6 7 ENTER 8 STOP 5 20 4 0 500 Short selection Free selection Other selections ENTER OK...

Page 236: ...RU ASC5100G 236 7 7 I 1 10 11 R 1234yf 11 10...

Page 237: ...eCenter AirConServiceCenter AirConServiceCenter L liquid AirConServiceCenter 1 Other selections 2 ENTER 3 Int vessel filling 4 ENTER R 1234yf Short selection Free selection Other selections ENTER OK I...

Page 238: ...RU ASC5100G 238 5 ENTER ENTER ENTER 6 STOP STOP Connect the HP hose to the external tank then open the valve ENTER OK STOP EXIT Set the quantity then confirm g 3620 ENTER OK STOP EXIT...

Page 239: ...RU 239 ASC5100G 8 A 8 1 I 1 AirConServiceCenter 2 3 Short selection 4 ENTER 5 2 6 ENTER 7 2 ENTER Short selection Short selection SAEJ2099 Short selection Free selection Other selections ENTER OK...

Page 240: ...RU ASC5100G 240 8 ENTER 7 8 AirConServiceCenter 9 7 8 ENTER 10 HP LP PORT HP PORT LP PORT ENTER OK STOP EXIT...

Page 241: ...10 8 2 1 1 Other selections 2 ENTER 3 Service ENTER 4 9786 ENTER ADM 5 0000 ENTER I Short selection Free selection Other selections ENTER OK Flushing Reset scales Service ENTER OK STOP EXIT Service I...

Page 242: ...ADM AREA Insert new code ADM AREA Confirm new code ADM AREA User number 1 ADM AREA User number 1 Insert new code ADM AREA User number 1 Confirm new code ADM AREA User number 1 User name John Citizen...

Page 243: ...RU 243 ASC5100G I 8 2 2 1 STOP ENTER USER CODE WRONG CODE John Citizen...

Page 244: ...2 ENTER 3 ENTER 4 Database ENTER 5 Personal DB ENTER 6 ENTER 7 Short selection Free selection Other selections ENTER OK CAR DATA PLATE NR Filling Qt g 500 Database ENTER OK STOP EXIT Personal DB ALFA...

Page 245: ...RU 245 ASC5100G 8 ENTER 9 ENTER STOP ____________ 0 ___________________ ____________ g ___ 0 AUDI 0 A4 8E 2000 2004 g 500 AUDI 0 A4 8E 1...

Page 246: ...RU ASC5100G 246 8 4 USB USB I HTML XLS Microsoft Excel I 8 4 1 USB USB 1 USB USB 9 2 USB FAT32 USB JPEG logo jpg 370 x 50 233...

Page 247: ...RU 247 ASC5100G 8 4 2 USB 1 USB USB 9 2 3 ENTER 4 ENTER 5 ENTER 4910 4918 USB Error 52 6 ENTER 7 8 STOP Short selection Free selection Other selections ENTER OK...

Page 248: ...U ASC5100G 248 8 5 1 Other selections 2 ENTER 3 Service ENTER 4 9051 ENTER 5 ENTER Short selection Free selection Other selections ENTER OK Flushing Reset scales Service ENTER OK STOP EXIT Service 201...

Page 249: ...RU 249 ASC5100G R1234 from system 2017 18650 2017 2400 ENTER STOP R1234 from system Total 2017 g 18650 STOP EXIT R1234 to system Total 2017 g 9000 STOP EXIT R1234 from system 01 2017 g 2400 STOP EXIT...

Page 250: ...I 1 AirConServiceCenter 2 3 4 Other selections 5 ENTER 6 A C system test 7 Short selection Free selection Short selection Free selection Other selections ENTER OK A C system test Service ENTER OK STO...

Page 251: ...RU 251 ASC5100G 8 STOP 9 I 10 STOP Disconnect the HP service hose from the A C system ENTER OK Wait Recovery from the service hoses Process completed STOP EXIT...

Page 252: ...RU ASC5100G 252 8 7 I Free selection 1 AirConServiceCenter 2 Free selection 3 ENTER 4 ENTER Free selection Short selection Short selection Free selection Other selections ENTER OK...

Page 253: ...TER 253 I 8 7 2 1 ENTER 2 Vacuum phase 20 254 3 4 ENTER I Rec Recycling Yes phase No ENTER OK STOP EXIT Pressure increase Test time min 1 ENTER OK STOP EXIT Vacuum phase Yes No ENTER OK STOP EXIT Vacu...

Page 254: ...RU ASC5100G 254 8 7 3 1 ENTER 2 Filling phase 255 3 4 5 6 ENTER I Filling phase Yes No ENTER OK STOP EXIT PAG oil ml 0 UV tracer ml 0 Refrigerant g 500 ENTER OK STOP EXIT 0...

Page 255: ...RU 255 ASC5100G 8 7 4 1 ND HD HD ND 2 ENTER 3 ENTER 8 7 5 AirConServiceCenter 1 7 8 ENTER 2 HP LP PORT HP PORT LP PORT ENTER OK STOP EXIT Process start ENTER OK STOP EXIT...

Page 256: ...lection 2 ENTER 3 CAR DAT 4 Rec Recycling phase 5 Pressure increase test time 1 ENTER 6 Vacuum phase No ENTER 7 Filling phase No ENTER 8 Process start ENTER AirConServiceCenter 9 Short selection Free...

Page 257: ...RU 257 ASC5100G 10 D 11 E 12 15 13 14 D E...

Page 258: ...illing R1234 to system Short selection Free selection Vacuum time Other selections Service 7782 ENTER ENTER 3 STOP R1234 from system R1234 from system 07 03 17 g 4155 STOP EXIT R1234 from tank 07 03 1...

Page 259: ...9 4 I 1 Other selections 2 256 3 ENTER 4 Service 5 ENTER 6 2224 7 Pressure transducer ENTER Service completed 08 03 17 Total 4 STOP EXIT AirConServiceCenter Short selection Free selection Other select...

Page 260: ...RU ASC5100G 260 8 7 8 9 ENTER 10 7 8 11 2 ENTER I 12 ENTER 13 STOP 14 252 HP LP connectors removed http www meteo24 de wetter...

Page 261: ...RU 261 ASC5100G 9 5 1 10 2 D E AirConServiceCenter D E D E...

Page 262: ...RU ASC5100G 262 3 AirConServiceCenter I 4 G 5 J 6 J 7 H G 8 I Other selections Service 7782 ENTER ENTER 3 STOP Vacuum time G J I H...

Page 263: ...lling R1234 to system Short selection Free selection Vacuum time Service completed R1234 from system 07 03 17 g 4155 STOP EXIT R1234 from tank 07 03 17 g 3395 STOP EXIT R1234 to system 07 03 17 g 1200...

Page 264: ...vessel filling R1234 to system Short selection Free selection Vacuum time Other selections Service 7783 Service 7782 261 256 R1234 from system 07 03 17 g 1455 STOP EXIT R1234 from tank 07 03 17 g 3395...

Page 265: ...RU 265 ASC5100G Service completed 9 7 USB USB I AirConServiceCenter 1 USB 2 USB USB 9 3 Service completed 07 03 17 Number 4 STOP EXIT USB FAT32 9...

Page 266: ...SB USB 4 ENTER 5 USB New firmware release found ENTER upgrade STOP EXIT 5ELU0067 New database release found ENTER upgrade STOP EXIT ldyf1701 Wait Erase flash Erased Writing 1 63488 7 762751 Wait loadi...

Page 267: ...RU 267 ASC5100G 10 1 2 7 8 AirConServiceCenter 3 AirConServiceCenter AirConServiceCenter...

Page 268: ...RU ASC5100G 268 11 11 1 I 11 2 11 3 AirConServiceCenter M...

Page 269: ...ssure inside the A C system Recovery start Warning Pressure inside the A C system Not enough vacuum Carry on 8 50 AirConServiceCenter A C system leakage Carry on 120 AirConServiceCenter Warning Not en...

Page 270: ...on AirConServiceCenter External tank empty or closed valve Check Change the equipment drier filter Go on AirConServiceCenter 256 ENTER 3 Change the vacuum pump oil Go on AirConServiceCenter 261 ENTER...

Page 271: ...RU 271 ASC5100G 13 AirConServiceCenter ASC5100G 9103301878 x x 600 x 1050 x 650 90 220 240 50 60 30 5 95 0 32 150 60 h 9 55 5 A 10 1 10 C 40 C 25 C 50 C...

Page 272: ...ail info dometic nl NEW ZEALAND Dometic New Zealand Ltd Unite E The Gate 373 Neilson Street Penrose 1061 Auckland 64 9 622 1490 64 9 622 1573 Mail customerservices dometic co nz NORWAY Dometic Norway...

Reviews: