magic watch
Installing MAGIC WATCH
37
The sensor is preset to have a vertical installation angle of
approxi5°. This means that the cover ring is thicker at the bot-
tom.
Note that the sensors must be aligned in a particular direction. The top of
the sensor is marked with a
▼
(see fig. 12.1, page 6).
z
Fit the sensors at regular intervals along the total width of the vehicle in
order to guarantee the optimum monitoring.
z
The sensors may be painted but
not with a multiple-coat paint
as this
impairs their functionality.
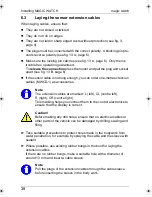
The installation procedure is as follows:
➤
Choose an installation location on the bumper which is as perpendicular
to the road surface as possible (see fig. 12, page 6).
z
If the sensor cable is not long enough, you can order one-metre extension
cables (MWCD-1) as accessories.
Caution!
Before making any drill holes, ensure that no electrical cables or
other parts of the vehicle can be damaged by drilling, sawing and
filing.
➤
For each sensor, drill a hole with a diameter of 22 mm in the bumper.
➤
For a more accurate fit, slant the drill downwards slightly when drilling the
hole on the inside of the bumper. The sensor cover can now be easily
inserted at a downward angle.
➤
Guide the cables of the sensors through the corresponding hole.
➤
Insert each sensor into the corresponding drill hole until it latches into
place.
MWE-850-4DSM.book Seite 37 Donnerstag, 7. Juli 2005 2:39 14
Summary of Contents for Magic Watch MWE-850-4DSM
Page 3: ...magic watch 3 1 2 3 4 9 6 8 5 7 1 ...
Page 4: ...magic watch 4 m a g i c w a t c h 4 1 2 3 4 2 3 ...
Page 5: ...magic watch 5 6 0 40 m 0 95 m 1 50 m 1 3 2 5 A B C 7 B A 8 ...
Page 6: ...magic watch 6 B B A 9 40 50 cm 0 10 A B 13 22 mm 1 12 1 STOP 0 4 m 2 11 ...
Page 7: ...magic watch 7 m a g i c w a t c h A B 14 m a g i c w a t c h A B 15 2 3 31 1 magic watch 16 ...


