3
QUICK START INSTRUCTIONS
*Disclaimer*
Operator must use caution when working around a hot stack. Protective gloves are required.
If you chose not to use the extension pole, please be advised that the installation and/or attachment of the sensor head manually is
not recommended.
Manual installation, which may require the operator to use a ladder, climb upon the equipment being tested, or any other unsafe
maneuver, constitutes a waiver of liability for any and all personal injury sustained by the operator in the use of this equipment.
Robert H. Wager Co., Inc. does not warrant, guarantee or insure the safety of any person or persons not in compliance with this
instruction manual.
It is important that the tester is familiar with the safe operation, features, and maintenance of this unit as well as the
SAE J1667 document.
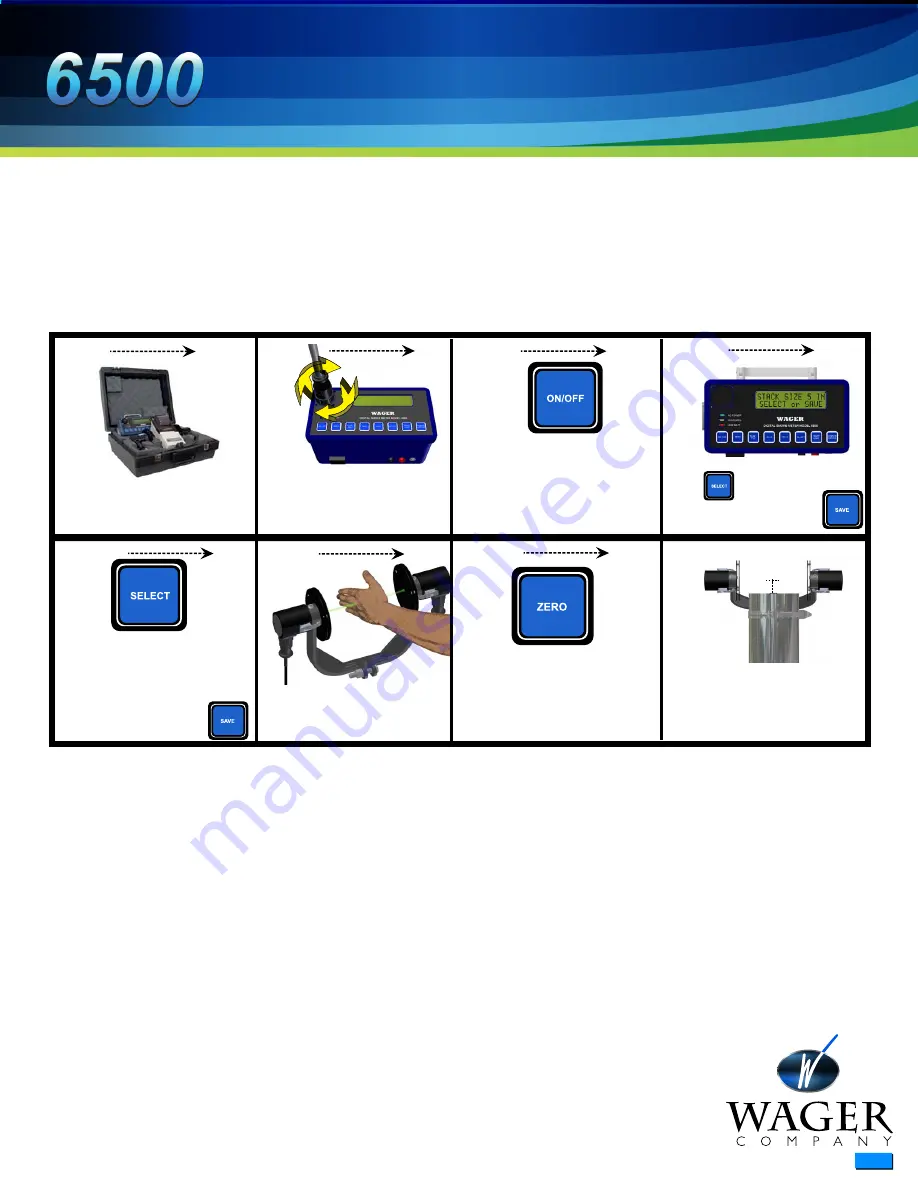
To give you the opportunity to test the unit when it is received, we have prepared the following:
Press
SAVE
.
Take the sensor head and the
control unit out of the carrying
case.
1
Connect the sensor head to the
control unit’s mating receptacle
(lock into place by turning the
locking ring • turn clockwise)
2
Press the ON/OFF switch to
activate the unit. It automatically
performs self-calibration.
3
Select the stack size by pressing
the button until your
measurement appears.
4
Pass your hand through the light
path until unit displays 100%.
Remove your hand to cycle to 0%.
6
The Horsepower shown is the
default setting. If it does not agree
with your engine’s specifications,
press SELECT until the correct
HP range is shown.
Press
SAVE
.
5
Attach the sensor head as
described in the SAE J1667
booklet (be sure to observe all
safety regulations shown later in
this manual).
8
If it does not show “0” (zero)
press the ZERO button.
7
7cm


