36
EN-USA_SECUSOL_TI-MA-111013-1121R800
4 Startup
System Check
After fitting all components please carry out the following
checks:
●
Are all components fitted correctly?
●
Are all fittings and connections safe and tight and fitted
with the original flat seals?
●
Were the bolts on the flange cover re-tightened?
●
Are all electrical connections installed correctly and ac-
cording to regulations?
●
Are the temperature sensors in the right position? Does
the controller show plausible values?
4.1 DHW System
Rinsing the DHW Storage Cylinder
●
Appropriate retainers are to be used when rising the
storage cylinder in order to remove remaining particles
from the piping.
●
We also recommend to install a dirt retainer at an ap-
propriate place of the heating circuit.
Filling and Venting the DHW System
●
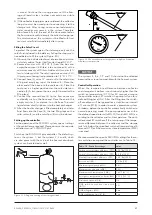
To fill the storage cylinder with domestic water, open
the shutoff of the safety sub-assembly at the cold-water
feed and the up-stream water tap. (Figure 37). Close all
water taps after the pipework was successfully vented.
●
Check for tightness of all connections and sockets, re-
tighten, if required, and monitor the system pressure
(Figure 38).
Pressure Testing of the DHW System
Cary out a pressure test of the system after successful in-
stallation. :
●
Connect the hot water taps and check all connections
and welding points.
●
Afterwards vent cylinder once again.
4.2 Backup Heating Circuit
If a heat generator is connected to the upper heat ex-
changer coil, the bachup heating circuit has to be rinsed
upon startup in order to remove production residues from
the coil.
4.3 Solar Circuit
Rinsing the Solar Circuit
To avoid damage to the system or malfunctions, possi-
ble residues from production or installation have to be
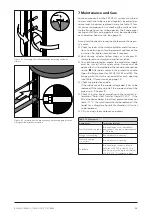
flushed out of the system before startup (Figure 39):
●
Connect a suitable hose (2) to the cold water filling tap
of the solar return sub-assembly (3) and a domestic wa-
ter tap (1).
●
With a second hose (4) connect the cold water filling
and emptying tap of the solar flow (feed) subassembly
(5) to a waste water discharge or a container (6).
●
Open filling and rinsing cocks (3 and 5).
●
Open domestic water tap (1). Due to the higher pres-
sure loss in the collector loop only the heat exchanger
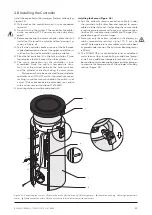
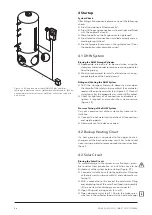
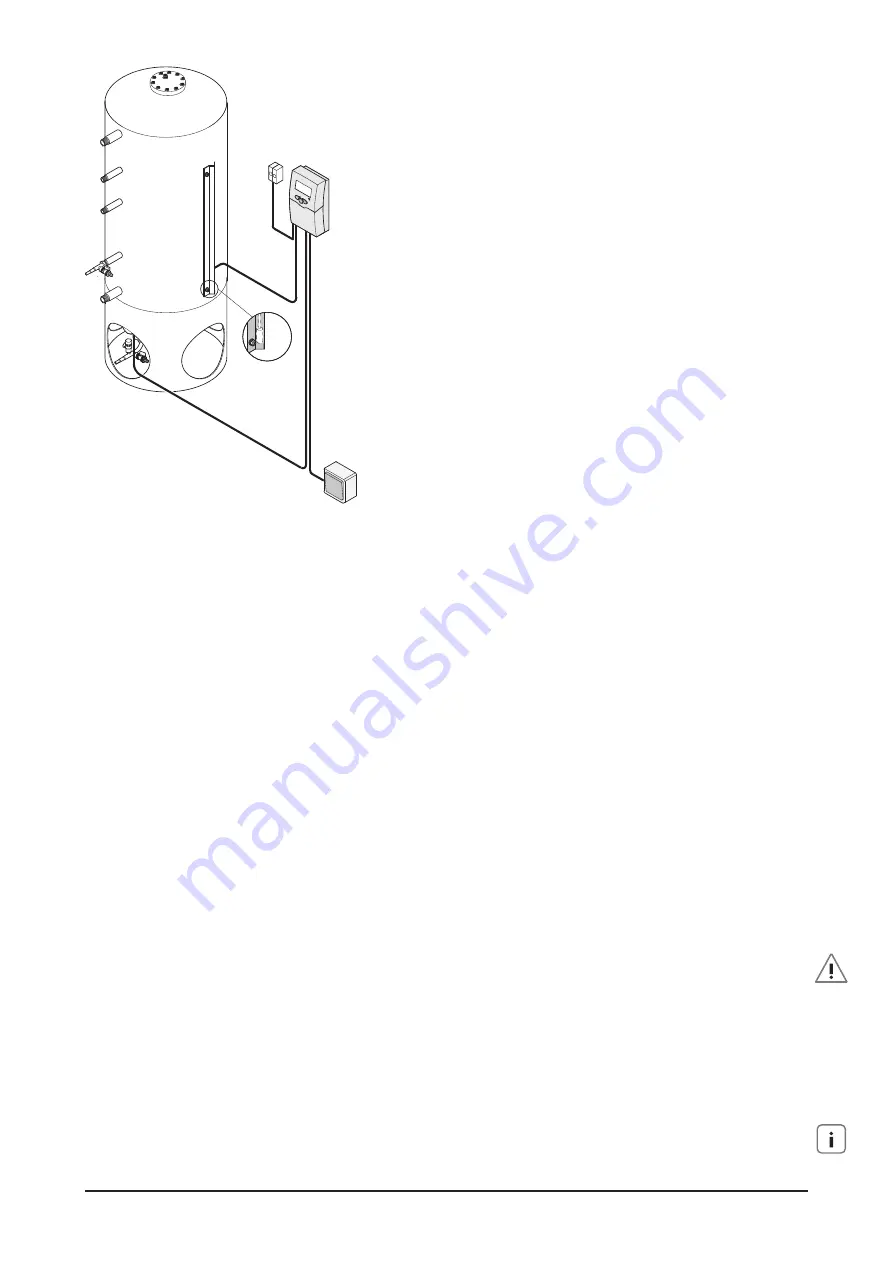
Figure 36 Wiring scheme of the SUNGO US plus controller:
(s)
storage temperature sensor;
(p)
Pump connection cable;
(k)
Con-
nection cable for collector sensor;
(n)
Mains connection cable with
on/off switch.
s
k
p
n


