Finish 230 AC Compact
11
GB
Spraying
Spraying Technique
5.3
Pressure Relief Procedure
Be sure to follow the pressure relief procedure when
shutting the unit down for any purpose, including
servicing or adjusting any part of the spray system,
changing or cleaning spray tips, or preparing for
cleanup.
1. Turn the pressure control knob counterclockwise to its lowest
setting.
2. Turn the PRIME/SPRAY valve to the PRIME position.
3. Trigger the gun to remove any pressure that still may be in the
hose.
4. Lock the gun by turning the gun lock nut clockwise (when
looking from the back of the gun) until it stops. This closes the
material valve in the gun.
Injection hazard. Do not spray without the tip guard
in place. NEVER trigger the gun unless the tip is
completely turned to either the spray or the unclog
position. ALWAyS engage the gun trigger lock
before removing, replacing or cleaning tip.
6.
Spraying Technique
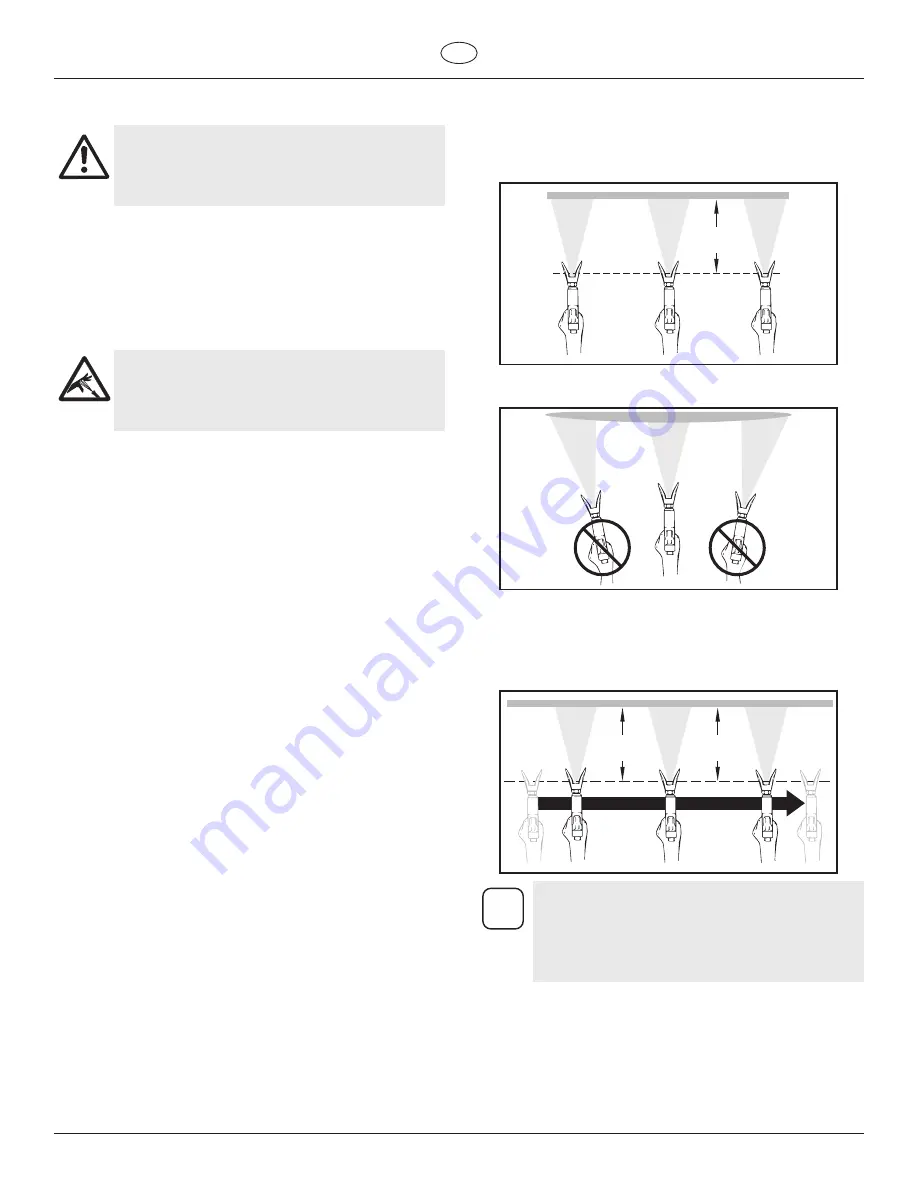
The key to a good paint job is an even coating over the entire surface.
Keep your arm moving at a constant speed and keep the spray gun at
a constant distance from the surface. The best spraying distance is 25
to 30 cm between the spray tip and the surface.
25 - 30 cm
Keep the spray gun at right angles to the surface. This means moving
your entire arm back and forth rather than just flexing your wrist.
Keep the spray gun perpendicular to the surface, otherwise one end
of the pattern will be thicker than the other.
Trigger gun after starting the stroke. Release the trigger before
ending the stroke. The spray gun should be moving when the trigger
is pulled and released. Overlap each stroke by about 30%. This will
ensure an even coating.
25 - 30 cm
25 - 30 cm
i
When finished spraying, perform Pressure Relief
Procedure.
If you expect to be away from your spray project
for more than 1 hour, follow the Overnight Storage
procedure described in the Cleanup section of this
manual.


