background image

EN

5

IMPORTANT SAFETY INFORMATION 

GENERAL INFORMATION

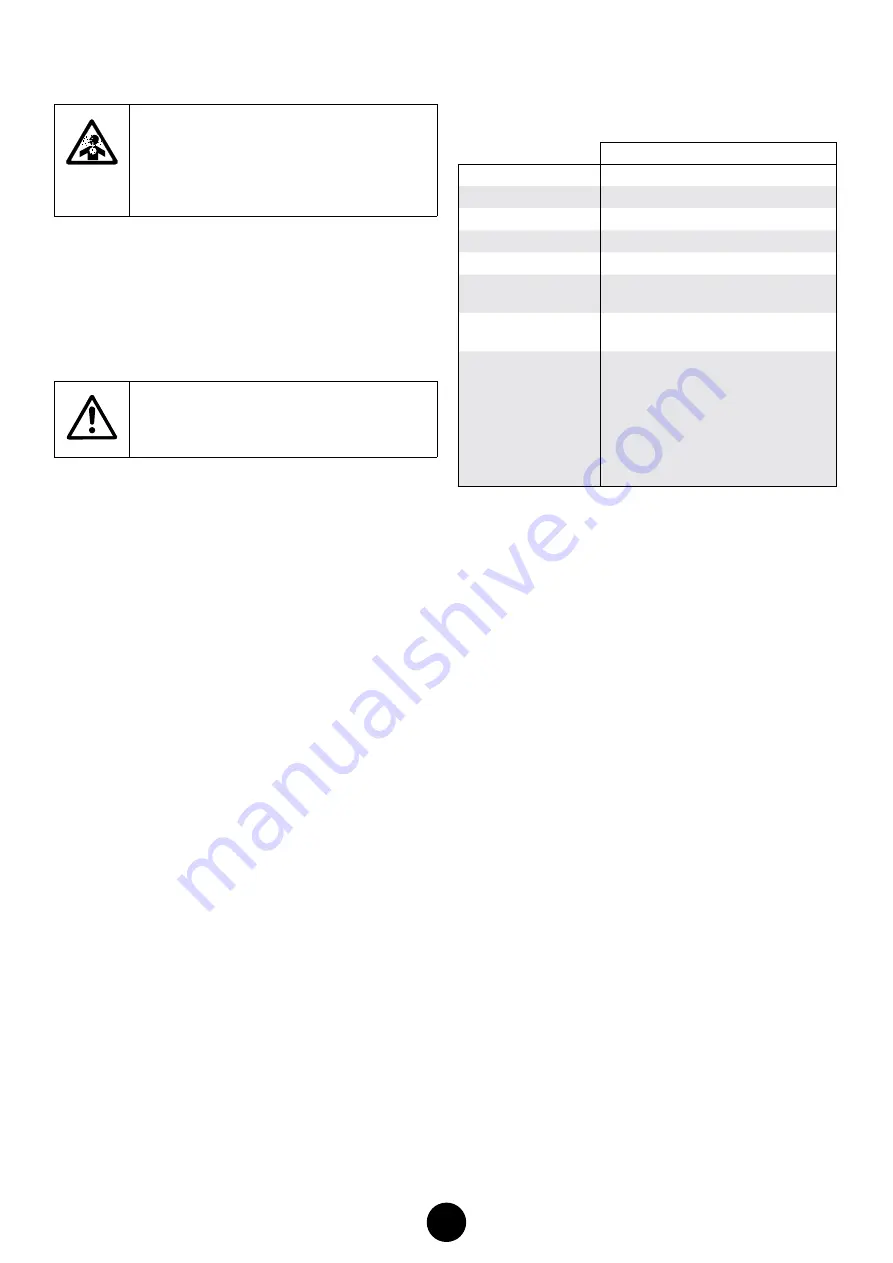
WARNING:  HAZARDOUS VAPORS

Paints, solvents, insecticides, and other materials 

can be harmful if inhaled or come in contact 

with the body.  Vapors can cause severe nausea, 

fainting, or poisoning.

PREVENTION:

• 

Use a respirator or mask if vapors can be inhaled.  Read all 

instructions supplied with the mask to be sure it will provide the 

necessary protection. 

• 

Wear protective eyewear.

• 

Wear protective clothing as required by coating manufacturer.

WARNING:  GENERAL 

Can cause severe injury or property damage.

PREVENTION:

• 

Always wear appropriate gloves, eye protection, clothing and a 

respirator or mask when painting.  

• 

Do not operate or spray near children.  Keep children away from 

equipment at all times.

• 

Do not overreach or stand on an unstable support.  Keep 

effective footing and balance at all times.

• 

Stay alert and watch what you are doing.

• 

Do not operate the unit when fatigued or under the influence of 

drugs or alcohol.

• 

Do not kink or over-bend the hose. Airless hose can develop 

leaks from wear, kinking and abuse.  A leak can inject material 

into the skin.  

• 

Do not expose the hose to temperatures or pressures in excess 

of those specified by manufacturer.

• 

Do not use the hose as a strength member to pull or lift the 

equipment.

• 

Use lowest possible pressure to flush equipment.

• 

Follow all appropriate local, state and national codes governing 

ventilation, fire prevention and operation.

• 

The United States Government Safety Standards have been 

adopted under the Occupational Safety and Health Act 

(OSHA).  These standards, particularly part 1910 of the General 

Standards and part 1926 of the Construction Standards should 

be consulted.

• 

Before each use, check all hoses for cuts, leaks, abrasion or 

bulging of cover.  Check for damage or movement of couplings.  

Immediately replace hose if any of those conditions exist. Never 

repair a paint hose.  Replace with a conductive high-pressure 

hose.

• 

Do not spray outdoors on windy days.

• 

Always unplug cord from outlet before working on equipment 

(electric models only).

SPECIFICATIONS

Control Pro 130 Power Tank

Maximum Pressure

1600 PSI (11.1 MPa)

Capacity

0.24 GPM (0.91 LPM)

Tank Capacity

1.5 gallon (5.7 l)

Horsepower

0.38

Max. tip

0.015”

Power Requirement

15 amp minimum circuit on 115 VAC, 

60 Hz current

Generator power 

requirement

2500 Watt  (disable idle-down feature)

Overheating 

protection

This sprayer has a built-in protective 

device to prevent damage from 

overheating.  The sprayer may 

automatically shut down after heavy 

use.  If this happens, turn switch OFF 

(0), unplug the sprayer and allow to 

cool for 20-30 minutes and resume 

spraying.

CAPABILITY

Sprays a variety of paints (oil-based and latex), primers, stains, 

preservatives and other nonabrasive materials.

DO NOT USE!

This pump should not be used with textured materials, block filler, 

lacquers, industrial enamels, or asphalt sealer or materials containing 

HHC. See coating supplier if flash point is not listed on the container.
Do not spray or clean with liquids having a flash point of less than 

38ºC (100ºF). Flash point is the temperature at which a fluid can 

produce enough vapor to ignite.

SAFETY FEATURES

Spray gun trigger lock and pressure diffuser; built-in tip safety guard; 

PRIME/SPRAY knob for safe pressure release. Conforms to UL STD 

1450. Certified to CSA C22.2 NO 68.

Summary of Contents for Control Pro 130

Page 1: ...User Manual of Product 1 Wagner 0580678 Control Pro 130 Power Tank Paint Sprayer High Efficiency Airless with Low Overspray...

Page 2: ...AL GUIDE D UTILISATION MANUAL DEL PROPIETARIO READTHIS MANUAL FOR COMPLETE INSTRUCTIONS LIRE CE MANUEL POUR OBTENIR DES DIRECTIVES COMPL TES LEA ESTE MANUAL PARA OBTENER LAS INSTRUCCIONES COMPLETAS wa...

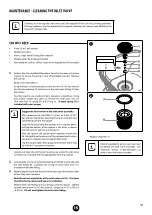
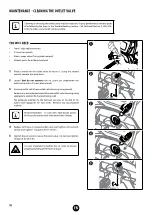
Page 3: ...________________________ 16 MAINTENANCE_____________________________________ 17 18 Cleaning the Inlet Valve________________________________ 17 Cleaning the Outlet Valve______________________________ 1...

Page 4: ...ly a 3 wire extension cord that has a 3 blade grounding plug and a 3 slot receptacle that will accept the plug on the product Make sure your extension cord is in good condition When using an extension...

Page 5: ...or clean with liquids having a flash point of less than 38 C 100 F Flash point is the temperature at which a fluid can produce enough vapor to ignite Paint or solvent flowing through the equipment is...

Page 6: ...ndards particularly part 1910 of the General Standards and part 1926 of the Construction Standards should be consulted Before each use check all hoses for cuts leaks abrasion or bulging of cover Check...

Page 7: ...e port and the plastic plug from the end of the spray hose prior to assembly TOOLS NEEDED Two 6 adjustable wrenches 1 Thread one end of the high pressure spray hose to the spray hose port Hold the por...

Page 8: ...lled with spraying material Make sure to lift with your legs and not your back in order to reduce the risk of injury Do not use the tank lid to carry the sprayer as it may slip off causing the sprayer...

Page 9: ...nything that is in the spraying area and could accidentally be sprayed 1 Push tab on filter twice to ensure inlet valve operation 2 Fill the tank with spray material Pull the return tube from the tank...

Page 10: ...PORTANT Make sure the washer a and saddle seat b are installed in the rear of the spray guard Note the orientation of the saddle seat b based on the orientation of the spray tip 6 Make sure the spray...

Page 11: ...ooting page 19 10 EN PRACTICE SPRAYING YOU WILL NEED A surface to practice spraying wood carboard or scrap drywall While spraying the spray guard tip assembly can be rotated to better suit your sprayi...

Page 12: ...ate relieve pressure by 1 slowly turn PRIME SPRAY knob to PRIME 2 unlock the spray gun and 3 squeeze trigger while pointing at scrap material cardboard Release trigger lock the spray gun and try rotat...

Page 13: ...e tank of spray material see Moving Emptying the Sprayer page 7 Do not run the sprayer without spray material or water in the tank 3 Remove inlet filter from tank Clean the inlet filter using the appr...

Page 14: ...sure Relief Procedure page 7 2 Turn spray tip 90 This will prevent air from drying out any spray material that may be inside the spray tip Wrap spray tip and guard in a damp rag and then place entire...

Page 15: ...th into the tank full of cleaning solution i Allowing the spray tip and tip guard to soak in the tank while flushing will make it easier to clean them afterwards Take care not to lose the saddle seat...

Page 16: ...Procedure page 7 10 Remove the spray tip assembly Repeat step 5 from above continuing to squeeze the trigger until fluid comes out clear Attention This pump is liquid cooled Do not allow the sprayer...

Page 17: ...n housing nut DO NOT remove the nut A penetrating oil like WD40 can be substituted Reassemble the spray gun 4 Place a wrench on the outlet valve to secure it Using the second wrench remove the spray h...

Page 18: ...x opening 2 and unscrew the inlet valve fitting 2 from the sprayer Snap the lid back onto the sprayer turn it upside down and tap the bottom of the sprayer a few times to loosen the inlet seat 3 ball...

Page 19: ...derneath the outlet valve with a 2 5 mm allen wrench 3 Unscrew outlet valve from outlet valve housing using wrench Remove any accumulated material inside outlet valve housing using appropriate solutio...

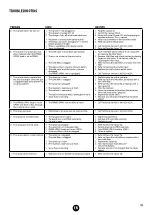
Page 20: ...The material is too heavy or thick 5 The material is too coarse 6 The outlet valve assembly is damaged or worn 7 Spray hose is too long 1 Replace spray tip with a new one 2 Refer to Clean the Inlet fi...

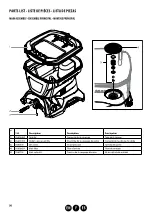
Page 21: ...2 0580072A Outlet valve assembly Ensemble de la soupape de sortie Conjunto de la v lvula de salida 3 0580070 Set screw Vis de pression Tornillo de ajuste 4 0580662A Inlet filter Filtre d entr e Filtr...

Page 22: ...T Ensemble du pistolet de pulv risation Control Pro T Conjunto de la pistola pulverizadora Control Pro T 2 0580606 Spray tip 515 Embout 515 Boquilla de pulverizaci n 515 3 0580767 Spray guard assembly...

Page 23: ...50 blanc peintures et teintures solides Filtro malla 50 blanco Pinturas y tinturas s lidas 0154842 Filter 100 mesh yellow semi transparent and transparent stains Filtre maille 100 jaune Teintures tra...

Page 24: ...ONSABLE DE DOMMAGES INT R TS INDIRECTS OU CONS CUTIFS QUE CE SOIT POUR UNE RUPTURE DE CETTE GARANTIE OU TOUTE AUTRE RAISON En cas de d faut de mat riau ou de fabrication du produit durant la p riode d...

Page 25: ...sur le site www wagnerspraytech com QUESTIONS Call Wagner Technical Service at 1 800 328 8251 Register your product online at www wagnerspraytech com NECESITA AYUDA Llame Wagner Technical Service al 1...

Reviews: